Crispy Hash Browns-Perfectly Golden and Delicious
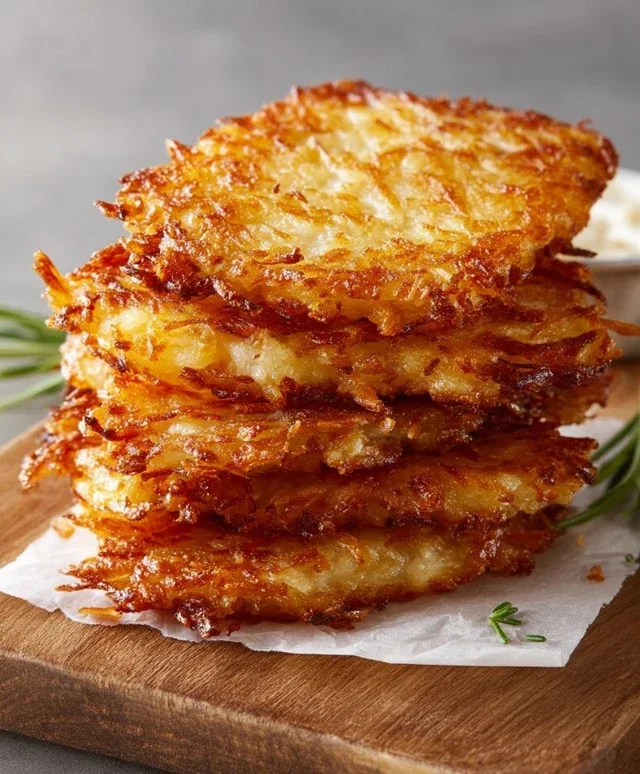
Crispy hash browns are a breakfast revelation, aren’t they? That perfect golden-brown exterior, yielding to a tender, savory interior – it’s pure comfort food magic. Who doesn’t dream of that satisfying crunch accompanying their morning eggs or a hearty brunch spread? There’s something undeniably special about a plate piled high with expertly prepared hash browns. It’s not just potatoes; it’s the promise of a great start to the day, a delicious foundation for all your favorite breakfast fixings. Forget those limp, oily diner versions; we’re talking about achieving that ultimate crispy hash brown perfection right in your own kitchen. Get ready to elevate your breakfast game with a recipe that guarantees a delightfully crunchy and flavorful experience every single time.
Crispy Hash Browns
There’s something undeniably comforting about a plate of perfectly crispy hash browns. They’re the golden, crunchy companion to a lazy weekend breakfast, the savory star of a brunch spread, or even a delightful afternoon snack. Forget those sad, soggy versions you might have encountered; achieving truly superior, shatteringly crisp hash browns at home is entirely within your reach. It all comes down to a few key techniques and a little bit of patience. Today, I’m going to share my foolproof method for making hash browns that will have you ditching the frozen stuff forever.
Ingredients:
Cooking Instructions
Preparing the Potatoes: The Foundation of Crispiness
The first and arguably most crucial step in achieving crispy hash browns is the proper preparation of your potatoes. We’re going to use Russet potatoes because their high starch content is ideal for creating that desirable crispy texture. Start by thoroughly washing your potatoes. You don’t necessarily need to peel them, as the skin can contribute to the crispiness and adds a rustic charm. However, if you prefer a smoother hash brown, feel free to peel them.
Once washed, the next step is to shred the potatoes. You can use the large holes of a box grater or a food processor with a shredding attachment. Grating them into long, thin shreds is key. Avoid cutting them into small cubes, as this will result in a mushier texture. After shredding, it’s absolutely vital to rinse the potatoes thoroughly under cold running water. This process removes excess starch, which is the enemy of crispiness. Continue rinsing until the water runs clear.
Next, and this is another non-negotiable step for ultimate crispiness, we need to get as much moisture out of those shredded potatoes as possible. Transfer the rinsed shreds to a clean kitchen towel or cheesecloth. Gather the edges of the towel and twist, squeezing out as much liquid as you can. The drier the potatoes, the crispier they will become. You’ll be surprised at how much water you can extract. I like to give them a final gentle squeeze with my hands too, just to be sure.
Adding Flavor and Getting Ready to Fry
Now that our potatoes are prepped and as dry as can be, it’s time to season them. In a medium bowl, combine the thoroughly squeezed potato shreds with the tablespoon of salt and half a teaspoon of black pepper. If you’re feeling adventurous and want to add an extra layer of flavor, this is the time to mix in your finely chopped yellow onion. The onion will caramelize beautifully as the hash browns cook, adding a wonderful sweetness and depth. Gently toss everything together to ensure the seasoning is evenly distributed throughout the potato shreds. Be careful not to overmix, which can make the potatoes gummy.
The Frying Process: Achieving Golden Perfection
This is where the magic happens! We’re going to cook our hash browns in batches to ensure they get gloriously crispy. Heat your neutral cooking oil in a large, heavy-bottomed skillet (cast iron is excellent for this) over medium-high heat. You want enough oil to generously coat the bottom of the pan, about 4-6 tablespoons. Allow the oil to get nice and hot. You’ll know it’s ready when it shimmers, or if you drop a tiny piece of potato in, it sizzles immediately.
Carefully add a portion of the seasoned potato mixture to the hot skillet. Don’t overcrowd the pan. If you put too many potatoes in at once, they will steam instead of fry, and we are aiming for crispiness! Spread the potato shreds into an even layer, pressing down gently with your spatula to form a cohesive patty or a more loosely spread layer, depending on your preference. If you added onion, ensure it’s mixed throughout this layer.
The Flip and the Second Searing: Double the Crisp!
Let the hash browns cook undisturbed for about 5-7 minutes. You want to see a beautiful golden-brown crust forming on the bottom. Resist the urge to stir or move them around too much during this initial cooking period. Once the bottom is perfectly crispy, it’s time for the flip. Carefully slide a spatula underneath the hash brown layer and flip it over. If you’re making smaller patties, this is easier. If you’ve made one large layer, you might need to flip it in sections or use two spatulas.
Once flipped, allow the other side to cook for another 5-7 minutes, again without disturbing it too much. This second searing is crucial for achieving that all-over crispiness. You can gently press down on the hash browns with your spatula again to encourage even contact with the hot pan and maximize browning. If you like your hash browns extra crispy, you can reduce the heat slightly to medium and let them cook for an additional few minutes on each side, allowing them to dry out and crisp up even more.
Finishing Touches and Serving Your Masterpiece
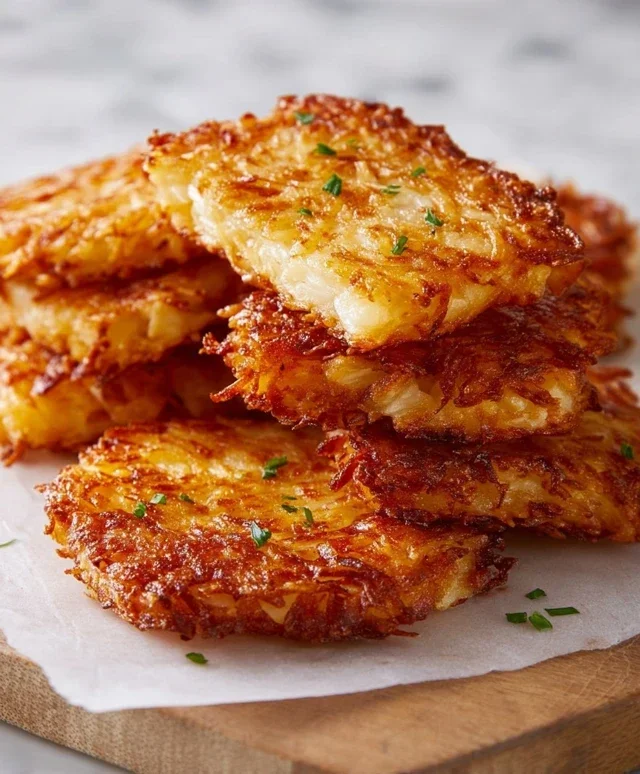
Once your hash browns are a deep golden brown and deliciously crispy on both sides, it’s time to remove them from the pan. Transfer them to a plate lined with paper towels to absorb any excess oil. This is an important step to prevent them from becoming greasy. Season immediately with a little more salt and pepper to taste. Serve your glorious crispy hash browns immediately. They are best enjoyed hot and fresh off the skillet. They’re perfect alongside eggs, beef bacon, sausage, or just on their own. Enjoy the satisfying crunch!
Conclusion:
There you have it – the ultimate guide to achieving perfectly crispy hash browns every single time! This recipe isn’t just about frying potatoes; it’s about unlocking that satisfying crunch and fluffy interior that makes breakfast truly special. The simplicity of the ingredients, combined with a few key techniques, results in a side dish that is both incredibly delicious and surprisingly easy to master. Whether you’re a seasoned home cook or just starting out, I encourage you to give these a try. They are a game-changer for any breakfast or brunch spread!
These golden delights are incredibly versatile. They are fantastic served alongside your favorite eggs, beef bacon, or sausages. For a more substantial meal, try topping them with avocado, salsa, or even a fried egg for a delicious hash brown bowl. Don’t be afraid to experiment with variations! You can add finely chopped onions, garlic powder, or your favorite herbs like chives or parsley to the potato mixture for an extra burst of flavor. Some people even love to add a sprinkle of smoked paprika for a hint of smokiness.
I truly hope you enjoy making and eating these as much as I do. They’re a simple pleasure that can elevate any meal. Happy cooking!
Frequently Asked Questions:
Can I make hash browns ahead of time?
While they are best enjoyed fresh for maximum crispiness, you can prepare the shredded potatoes (without frying) a few hours in advance and store them in the refrigerator. Be sure to pat them very dry before frying, as excess moisture will prevent them from getting crispy.
What’s the secret to extra crispy hash browns?
The keys to achieving that coveted crispiness are using cold, dry shredded potatoes and ensuring your cooking fat (oil or butter) is hot enough before adding them to the pan. Don’t overcrowd the pan, as this can steam the potatoes instead of frying them. Also, resist the urge to stir them too often; let them develop a golden-brown crust on each side.
Can I use pre-shredded potatoes?
While it’s possible, I highly recommend shredding your own potatoes. Pre-shredded potatoes often contain additives to prevent clumping, which can affect their texture and crispiness. Plus, shredding them yourself allows you to control the size and moisture content for optimal results.
Crispy Hash Browns
Simple and delicious crispy hash browns, perfect for breakfast or brunch.
Ingredients
-
2 large russet potatoes
-
1 tablespoon vegetable oil
-
1/2 teaspoon salt
-
1/4 teaspoon black pepper
-
1/4 cup finely chopped onion
-
2 tablespoons unsalted butter
Instructions
-
Step 1
Peel and shred the potatoes using a box grater or food processor. -
Step 2
Rinse the shredded potatoes under cold water to remove excess starch. Squeeze out as much water as possible with a clean kitchen towel or cheesecloth. -
Step 3
In a bowl, toss the shredded potatoes with vegetable oil, salt, and pepper. -
Step 4
Heat the butter in a large non-stick skillet over medium-high heat until shimmering. -
Step 5
Add the shredded potatoes to the hot skillet in an even layer. Sprinkle the chopped onion over the top. -
Step 6
Cook for 5-7 minutes per side, or until golden brown and crispy. Press down gently with a spatula to ensure even browning.
Important Information
Nutrition Facts (Per Serving)
It is important to consider this information as approximate and not to use it as definitive health advice.
Allergy Information
Please check ingredients for potential allergens and consult a health professional if in doubt.