Flourless Chickpea Brownies Vegan Gluten-Free Recipe
Flourless chickpea brownies are the guilt-free indulgence you’ve been dreaming of, and let me tell you, they are absolutely divine. Forget everything you thought you knew about healthier desserts because these fudgy, rich, and utterly satisfying treats are about to blow your mind. What’s not to love? They deliver that deep, dark chocolatey goodness without a trace of flour or gluten, making them a godsend for anyone navigating dietary restrictions. The secret ingredient? Surprisingly, it’s chickpeas! Don’t recoil – when blended into a smooth puree, they provide incredible moisture and a tender crum extractb, creating a brownie experience so decadent, you’d never guess their humble origin extracts. These flourless chickpea brownies are proof that you can have your cake (or brownie, in this case!) and eat it too, without compromising on flavor or texture. Get ready to discover your new favorite dessert obsession.
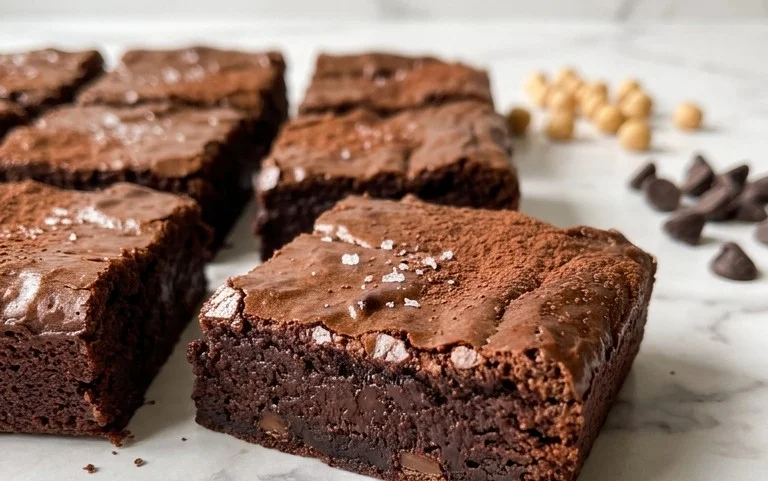
Flourless Chickpea Brownies (Vegan & Gluten-Free)
Get ready for a brownie revelation! These Flourless Chickpea Brownies are a game-changer for anyone craving a decadent chocolate treat without the gluten or dairy. What makes them so special? The humble chickpea! Don’t let that surprise you; when blended, chickpeas create an unbelievably fudgy and moist texture that perfectly mimics traditional brownies. Plus, they add a boost of protein and fiber, making these a slightly more wholesome indulgence. And the best part? They are surprisingly simple to make, requiring just one bowl and a blender or food processor. Whether you’re vegan, gluten-free, or just looking for a delicious and easy dessert, these brownies are sure to become a staple in your kitchen.
Ingredients:
Cooking Instructions
Phase 1: Preparing the Base
1.
Preheat your oven and prepare your baking pan: Before we get to mixing, let’s get your oven ready to bake these delightful brownies. Preheat your oven to 350°F (175°C). This is a standard baking temperature that will ensure your brownies cook evenly without burning. Next, find an 8×8 inch baking pan. You can use a metal pan or a glass one; both work well. To prevent any sticking and to make cleanup a breeze, line the pan with parchment paper. Leave some overhang on the sides of the paper, like little handles. This will make it super easy to lift the brownies out of the pan once they’re baked and cooled.
2.
Blend the wet ingredients and chickpeas: Now for the magic! In a food processor or a high-powered blender, combine the rinsed and thoroughly drained chickpeas, almond butter, and pure maple syrup. This is where the secret to our fudgy brownies lies. The chickpeas, when blended, create a smooth, paste-like consistency that acts as the binder and provides incredible moisture. Ensure you drain the chickpeas very well; excess water can affect the final texture. Add the vanilla extract to this mixture. Process or blend until the mixture is completely smooth and there are no visible chickpea chunks remaining. It might take a few minutes, and you might need to scrape down the sides of the bowl a couple of times to ensure everything is incorporated. The smoother, the better for a truly brownie-like texture.
Phase 2: Incorporating Dry Ingredients and Chocolate
3.
Add the dry ingredients to the blended mixture: Once you have a smooth, homogenous chickpea base, it’s time to add the dry components. To the food processor or blender bowl, add the baking powder, baking soda, sea salt, and unsweetened cocoa powder. These ingredients are crucial for the brownie’s structure and flavor. The baking powder and baking soda will help them rise slightly and develop a tender crum extractb, while the salt enhances the chocolate flavor. The cocoa powder is, of course, what gives them their rich chocolatey taste. If you’re using a food processor, you can pulse these dry ingredients in a few times to roughly combine them with the wet mixture. If using a blender, you might want to give it a blend on a low setting, but be careful not to overmix at this stage.
4.
Gently fold in the chocolate chips: For the ultimate chocolate experience, we’re adding chocolate chips! Reserve about ¼ cup of the mini chocolate chips for topping the brownies before baking, and add the remaining ½ cup of chocolate chips to the brownie batter. Now, this is an important step: gently fold in the chocolate chips using a spatula or a wooden spoon. We don’t want to overmix here, as we want the chips to remain relatively intact and create those lovely pockets of melted chocolate throughout the brownies. Overmixing can break them down too much. Stir just until the chips are evenly distributed throughout the thick batter. The batter will be quite thick, almost like a very dense cookie dough.
Phase 3: Baking and Cooling
5.
Bake the brownies and let them cool: Carefully spoon the thick batter into your prepared 8×8 inch baking pan. Use your spatula to spread the batter evenly into the corners of the pan. It will be quite thick, so don’t expect it to spread out on its own like a traditional batter. Once spread, sprinkle the reserved ¼ cup of mini chocolate chips evenly over the top of the batter. These will melt slightly during baking, creating a beautiful, glistening finish. Place the pan in your preheated oven and bake for 25-30 minutes. The brownies are done when a toothpick inserted into the center comes out with moist crum extractbs attached, but not wet batter. Be careful not to overbake, as this can lead to dry brownies. Once baked, remove the pan from the oven and let the brownies cool completely in the pan on a wire rack. This is a critical step for achieving the best fudgy texture. As they cool, they will firm up significantly. Resist the urge to cut into them while they are warm!
Once completely cooled, use the parchment paper overhangs to lift the brownies out of the pan. Slice them into squares and enjoy your delicious, healthy-ish chocolatey creation! These brownies are best stored in an airtight container at room temperature for a few days, or in the refrigerator for longer storage. They are so good, you might not even tell they are made from chickpeas!
Conclusion:
And there you have it – a truly decadent yet surprisingly wholesome treat! These flourless chickpea brownies are a testament to how delicious and satisfying vegan and gluten-free baking can be. We’ve managed to create a rich, fudgy brownie that’s packed with plant-based protein from the chickpeas, making it a guilt-free indulgence you can feel good about. The subtle earthy notes of the chickpeas meld beautifully with the deep chocolate flavor, creating a complex and deeply satisfying dessert experience. I truly encourage you to give this flourless chickpea brownie recipe a try; you might be surprised at just how incredible they turn out!
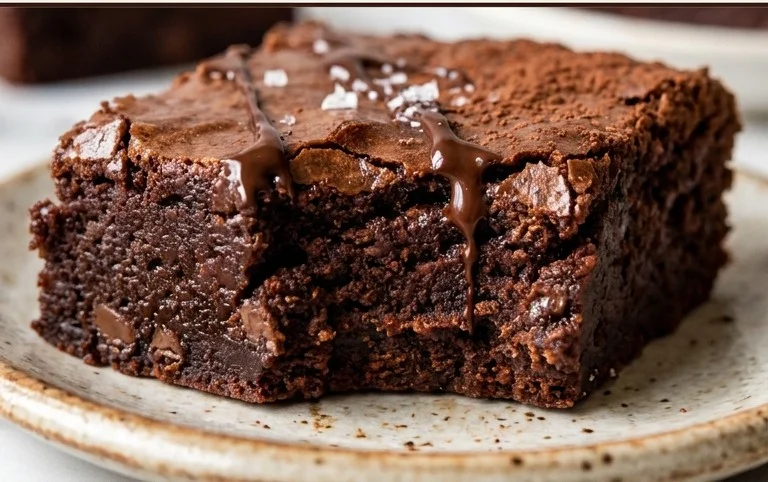
These brownies are wonderfully versatile. Enjoy them warm for an ooey-gooey delight, or chilled for a firmer, fudgier bite. They make a fantastic dessert after dinner, a perfect pick-me-up snack, or even a thoughtful homemade gift for friends and family. For a little extra flair, try topping them with a sprinkle of flaky sea salt, a dusting of cocoa powder, or a drizzle of vegan chocolate ganache. Don’t be afraid to experiment with add-ins like vegan chocolate chips, chopped nuts, or even a swirl of vegan peanut butter for a personalized touch.
Frequently Asked Questions:
Can I taste the chickpeas in these brownies?
The beauty of this recipe is that the chickpea flavor is remarkably well-hidden! The strong chocolate flavor, coupled with the sweetener and vanilla, completely masks any hint of chickpea. You’ll experience pure, rich chocolatey goodness without any savory undertones.
How long do these brownies keep?
These flourless chickpea brownies can be stored in an airtight container at room temperature for up to 2 days, or in the refrigerator for up to a week. They tend to become even more fudgy and delicious as they sit, so don’t be afraid to make a batch ahead of time!
Flourless Chickpea Brownies (Vegan & Gluten Free)
Decadent and fudgy vegan and gluten-free brownies made with chickpeas. A healthy and satisfying dessert option.
Ingredients
-
15.5 ounces chickpeas (1 can), rinsed and drained
-
½ cup almond butter
-
½ cup pure maple syrup
-
1 tablespoon vanilla extract
-
½ teaspoon baking powder
-
½ teaspoon baking soda
-
½ teaspoon sea salt
-
⅓ cup cocoa powder
-
¾ cup mini chocolate chips
Instructions
-
Step 1
Preheat your oven to 350°F (175°C). Line an 8×8 inch baking pan with parchment paper. -
Step 2
In a food processor, combine the rinsed and drained chickpeas, almond butter, maple syrup, and vanilla extract. Process until smooth and creamy. -
Step 3
Add the baking powder, baking soda, sea salt, and cocoa powder to the food processor. Pulse until just combined, being careful not to overmix. -
Step 4
Fold in ¾ cup of mini chocolate chips, reserving a few for topping if desired. -
Step 5
Spread the batter evenly into the prepared baking pan. -
Step 6
Bake for 25-30 minutes, or until a toothpick inserted into the center comes out with moist crumbs attached. -
Step 7
Let the brownies cool completely in the pan on a wire rack before cutting into squares.
Important Information
Nutrition Facts (Per Serving)
It is important to consider this information as approximate and not to use it as definitive health advice.
Allergy Information
Please check ingredients for potential allergens and consult a health professional if in doubt.