Healthy Crispy Chocolate Puffed Rice Cereal-Easy Snack
Healthy Crispy Chocolate Puffed Rice Cereal – the ultimate guilt-free indulgence you’ve been dreaming of! We all crave that satisfying crunch and sweet, chocolatey hit, but often, our favorite breakfast cereals are loaded with sugar and processed ingredients. That’s where this recipe comes in. Imagin extracte a breakfast that’s not only incredibly delicious and addictive but also nourishes your body. That’s the magic of this Healthy Crispy Chocolate Puffed Rice Cereal. It’s that perfect balance of sweet and satisfying, delivering a delightful crunch that will have you reaching for seconds. What makes it truly special is how we achieve that irresistible crispiness and rich chocolate flavor using wholesome, natural ingredients. Forget the artificial stuff; this is the real deal – a breakfast hero your taste buds and your body will thank you for!
Get ready to transform your mornings!
Discover the secret to a truly satisfying and nourishing start to your day.
Ingredients:
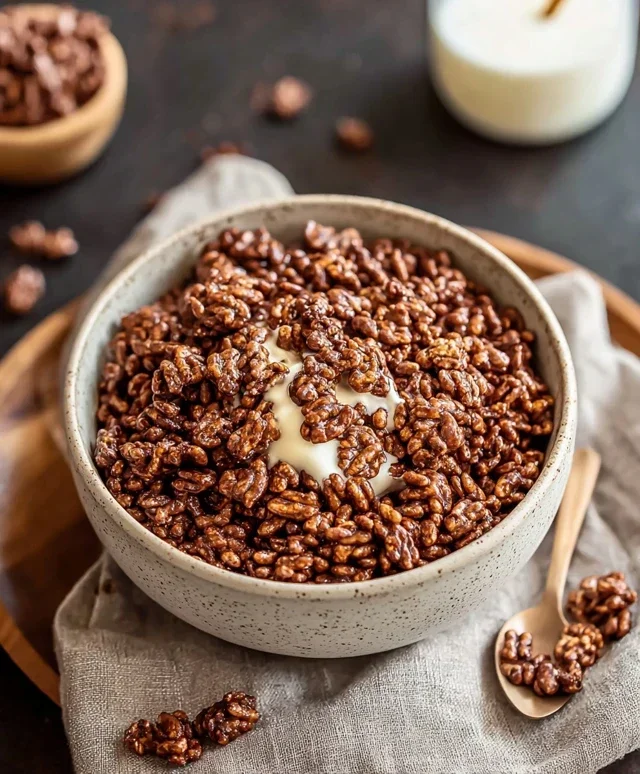
Let’s get started on making your own incredibly satisfying and healthy crispy chocolate puffed rice cereal! Forget those sugary store-bought boxes; this recipe is simple, uses wholesome ingredients, and delivers that delightful crunch and rich chocolate flavor you crave. It’s perfect for a quick breakfast, a healthy snack, or even a base for a yummy trail mix. I love how customizable it is, so feel free to play around with the sweetness level or even add a pinch of cinnamon for an extra layer of flavor.
Gathering Your Goodies
Before we dive into the fun part, let’s make sure you have everything ready. Having all your ingredients measured out and within reach will make the process smooth and enjoyable. This recipe is designed to be straightforward, so even if you’re new to making your own snacks, you’ll find it incredibly easy to follow.
The Simple Magic of Mixing
The beauty of this cereal lies in its simplicity. We’re essentially creating a flavorful coating for the puffed rice, which then gets baked to achieve that perfect crispiness. The coconut oil acts as a binder and also contributes to a wonderful mouthfeel. Raw cacao provides that deep, dark chocolate taste without any added sugar or dairy. Maple syrup lends a touch of natural sweetness, and the vanilla extract enhances all the other flavors.
Creating the Chocolatey Coating
This is where the magic truly happens! In a medium-sized bowl, we’re going to combine our wet ingredients and the cacao. It’s important to have your coconut oil in a liquid state, so if it’s solid, you can gently warm it. A few seconds in the microwave or placing the jar in warm water usually does the trick. Once liquid, pour it into the bowl. Next, add your raw cacao powder. Whisk these two together thoroughly until you achieve a smooth, glossy paste. There shouldn’t be any dry clumps of cacao left. This step is crucial for an even chocolate distribution throughout your cereal.
Now, it’s time to introduce the sweetness and the aromatic vanilla. Add the maple syrup to the cacao and coconut oil mixture. Stir well to combine. If you prefer a sweeter cereal, this is your moment to add a little more maple syrup, perhaps an extra teaspoon or two. Taste a tiny bit of the mixture (a very small amount, of course!) to gauge the sweetness. Finally, stir in the vanilla extract. The vanilla doesn’t just add its own pleasant aroma; it also helps to round out and enhance the chocolate flavor, making it taste even richer. Keep whisking until everything is beautifully incorporated into a homogenous, pourable chocolate sauce.
Coating the Puffed Rice
With our delicious chocolate mixture ready, it’s time to bring in the star of the show: the puffed rice. Gently pour the 4 cups of puffed rice into a large mixing bowl. Now, carefully pour the chocolate mixture over the puffed rice. The trick here is to be gentle. You want to coat every single piece of puffed rice without crushing them. I like to use a large spatula or even my hands (clean, of course!) to fold the chocolate mixture into the puffed rice. Work slowly and deliberately, ensuring that each puff gets a good coating of that rich chocolate goodness. It might seem like there’s a lot of chocolate for the amount of rice, but trust me, it will all get distributed. The goal is to lightly coat, not to drench. If you find some parts are a little less coated, you can gently fold again.
Preparing for Crisping
Once your puffed rice is evenly coated in chocolate, it’s time to prepare it for baking. Line a large baking sheet with parchment paper. This step is non-negotiable for easy cleanup and to prevent the cereal from sticking. Carefully spread the chocolate-coated puffed rice in a single layer onto the prepared baking sheet. Try your best to get it as evenly distributed as possible. This will help ensure that all the pieces bake and crisp up uniformly. If you have very large clumps, you can gently break them apart with your fingers. The looser the spread, the better the air circulation will be, leading to crispier results.
The Baking Process for Ultimate Crunch
Now, we’re going to bake this deliciousness to achieve that irresistible crispiness. Preheat your oven to 300 degrees Fahrenheit (150 degrees Celsius). Once the oven is preheated, place the baking sheet with the puffed rice cereal into the oven. We’re going to bake this for approximately 10-15 minutes. The key here is to watch it carefully. You don’t want to burn the chocolate. What we’re looking for is the cereal to become fragrant and for the edges to look slightly toasted.
During the baking process, it’s highly recommended to stir the cereal about halfway through. Take the baking sheet out of the oven and gently stir the cereal with your spatula. This ensures even baking and prevents any one side from getting too dark. Return the baking sheet to the oven and continue baking for the remaining time. Again, keep a close eye on it. You’ll know it’s done when it smells wonderfully chocolatey and you can see a slight crispness developing.
Cooling and Achieving Peak Crispiness
This is perhaps the most important step for achieving that perfect, satisfying crunch. Once the baking time is up, remove the baking sheet from the oven. Let the cereal cool completely on the baking sheet. This is where the magic of crisping truly happens. As it cools, the chocolate will harden, and the puffed rice will become wonderfully brittle. Do not be tempted to stir it or break it up while it’s still warm. It might seem soft and slightly sticky at this stage, but patience is key! Allow it to sit undisturbed for at least 30-45 minutes, or even longer, until it’s entirely at room temperature.
Once completely cool, you can then gently break apart any larger clumps into bite-sized pieces. You’ll notice how wonderfully crisp it has become. The texture should be light and airy with a satisfying snap. Store your homemade healthy crispy chocolate puffed rice cereal in an airtight container at room temperature. It should stay fresh and crispy for about a week, though I doubt it will last that long! Enjoy your guilt-free, homemade treat!
Conclusion:
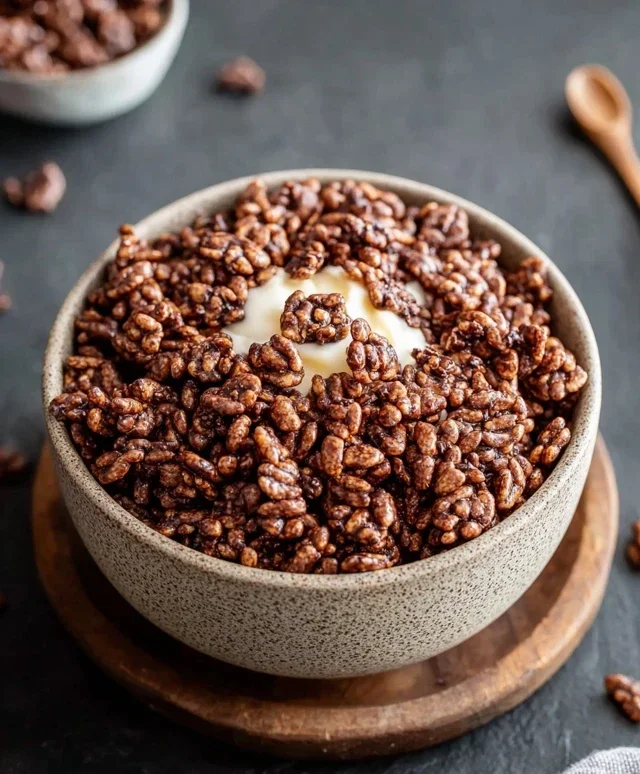
I hope you’re as excited as I am to give this Healthy Crispy Chocolate Puffed Rice Cereal recipe a try! It’s truly a winner because it delivers all the satisfying crunch and sweet chocolate flavor we crave from our favorite childhood cereals, but in a version packed with wholesome ingredients. This recipe is wonderfully adaptable and perfect for those mornings when you need a quick, delicious, and guilt-free breakfast. Plus, it’s so simple to make, even the busiest mornings won’t stand in your way of enjoying this delightful treat.
Enjoy it simply with your favorite milk, dairy or non-dairy. It also makes a fantastic topping for yogurt parfaits, smoothie bowls, or even sprinkled over fresh fruit for an extra textural element. Don’t be afraid to get creative! You can easily add a pinch of cinnamon for warmth, a dash of chili powder for a subtle kick, or even some finely chopped nuts or seeds for added healthy fats and protein. Let this be your starting point for a healthier cereal habit.
Give it a go – I’m confident you’ll love how easy it is to create this wholesome and delicious cereal right in your own kitchen!
Frequently Asked Questions:
Can I make this cereal ahead of time?
Absolutely! This Healthy Crispy Chocolate Puffed Rice Cereal stores beautifully in an airtight container at room temperature for up to a week. It maintains its crispiness remarkably well, making it perfect for meal prepping your breakfasts or snacks for the week.
What kind of puffed rice should I use?
For the best results and a healthier option, I recommend using plain, unsweetened puffed rice. Look for brands that list only rice as the ingredient. Avoid varieties that are already sweetened or flavored, as we’re building our own delicious flavor profile from scratch.
Is this recipe vegan-friendly?
Yes, it is! The base recipe uses plant-based ingredients. If you choose to use dairy-free milk for serving, then the entire dish is vegan. The cocoa powder and sweetener are naturally vegan, making it a great option for everyone.
Healthy Crispy Chocolate Puffed Rice Cereal
A simple, healthy, and crispy homemade chocolate puffed rice cereal that’s quick to make and customizable.
Ingredients
-
4 cups puffed rice
-
4 tbsp coconut oil, liquid
-
3 tbsp raw cacao
-
2 tbsp maple syrup
-
1/4 tsp vanilla extract
-
Pinch of salt
Instructions
-
Step 1
In a large bowl, combine the liquid coconut oil, raw cacao, maple syrup, vanilla extract, and a pinch of salt. Whisk until well combined and smooth. -
Step 2
Add the puffed rice to the chocolate mixture. Gently stir and fold until the puffed rice is evenly coated. -
Step 3
Line a baking sheet with parchment paper or a silicone baking mat. -
Step 4
Spread the coated puffed rice evenly onto the prepared baking sheet in a single layer. -
Step 5
Bake at 300°F (150°C) for 10-15 minutes, stirring halfway through, until slightly toasted and crispy. Be careful not to burn it. -
Step 6
Remove from oven and let cool completely on the baking sheet. It will crisp up as it cools. -
Step 7
Once cooled, break apart any clumps and store in an airtight container at room temperature.
Important Information
Nutrition Facts (Per Serving)
It is important to consider this information as approximate and not to use it as definitive health advice.
Allergy Information
Please check ingredients for potential allergens and consult a health professional if in doubt.