Fruity Pebbles Cheesecake Tacos – Delicious Dessert Treat
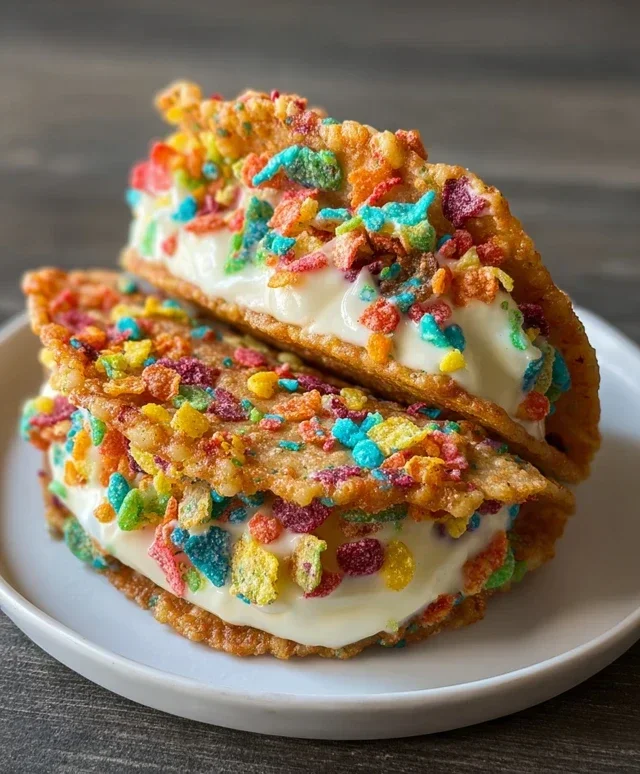
Fruity Pebbles Cheesecake Tacos are about to become your new obsession. Imagin extracte this: a crisp, golden waffle cone shell, cradling a cloud of creamy, tangy cheesecake filling, all dusted with the vibrant, crunchy goodness of Fruity Pebbles cereal. It’s the ultimate mashup of breakfast joy and dessert indulgence, and honestly, who can resist that? People adore these Fruity Pebbles Cheesecake Tacos because they tap into pure nostalgia while delivering a sophisticated yet playfully sweet flavor profile. What makes them truly special is the unexpected harmony of textures and tastes. The sweet crunch of the cereal perfectly complements the smooth, rich cheesecake, and the slightly chewy waffle cone adds another layer of delightful contrast. It’s a party in every bite, a guaranteed crowd-pleaser that’s as fun to make as it is to devour.
Get Ready for a Flavor Explosion!
The Most Fun Dessert You’ll Ever Make
Fruity Pebbles Cheesecake Tacos
Get ready for a flavor explosion that’s as fun to make as it is to eat! We’re taking the creamy delight of cheesecake and transforming it into playful, bite-sized tacos, all coated in the vibrant crunch of Fruity Pebbles. These aren’t your average desserts; they’re a whimsical adventure for your taste buds, perfect for parties, a special treat, or just when you need a serious dose of happy. Imagin extracte a crispy, sweet shell bursting with smooth, tangy cheesecake filling, topped with fluffy whipped cream and more of those iconic colorful cereal pieces. Trust me, these Fruity Pebbles Cheesecake Tacos are going to be an instant hit!
Ingredients:
Crafting Your Fruity Pebbles Cheesecake Tacos
Let’s dive into creating these delightful treats! The process is surprisingly straightforward, and the results are absolutely show-stopping. We’ll be making our own taco shells from the cereal and butter, then whipping up a simple yet decadent cheesecake filling.
Step 1: Creating the Cereal Taco Shells
The first magical step is to create our unique taco shells. In a medium bowl, combine the 3 cups of colorful fruity cereal with the 1/2 cup of melted unsalted butter. Gently mix until all the cereal pieces are evenly coated. You want a consistency where the cereal holds together when you press it. Don’t over-mix, as we want to retain some of that wonderful cereal texture. Now, for shaping. You’ll need some taco shell molds or, alternatively, a muffin tin lined with parchment paper or lightly greased. I find that pressing the cereal mixture into the bottom and up the sides of the molds (or muffin tin cups) works best. For taco shells, you can try to form them into a U-shape while they are still slightly warm and pliable, or you can let them set in taco shell molds if you have them. If using a muffin tin, press the mixture firmly into the bottom and up the sides to create a shell-like cup. The key here is to pack it tightly so the shells hold their shape once cooled.
Step 2: Baking the Cereal Shells to Perfection
Once your cereal mixture is pressed into your desired taco shell or cup shapes, it’s time to bake them. Preheat your oven to 325 degrees Fahrenheit (160 degrees Celsius). Carefully place your molds or muffin tin onto a baking sheet. We bake these at a lower temperature for a slightly longer time to allow them to firm up without burning. Bake for about 10-12 minutes, or until the edges are lightly golden and the shells feel set to the touch. They will firm up even more as they cool. Once baked, remove them from the oven and let them cool completely in their molds or muffin tin. This cooling process is crucial for them to maintain their taco shape. Patience is your friend here! Don’t rush this step, or your shells might crum extractble when you try to remove them.
Step 3: Whipping Up the Creamy Cheesecake Filling
While our cereal shells are cooling, let’s prepare the luscious cheesecake filling. In a separate medium bowl, combine the 8 oz of softened cream cheese with the 1/2 cup of sifted powdered sugar. Using an electric mixer (or a sturdy whisk and some elbow grease!), beat these together until they are smooth and creamy, with no lumps of cream cheese remaining. Sifting the powdered sugar is a small step that makes a big difference, preventing any grainy texture in your filling. Next, add the 1 tsp of pure vanilla extract to the cream cheese mixture and beat until it’s well combined. The vanilla extract adds a beautiful depth of flavor that complements the fruity cereal perfectly. This filling should be light, airy, and wonderfully smooth.
Step 4: Assembling Your Delicious Taco Creations
Now for the most exciting part – assembly! Once your cereal taco shells are completely cooled and firm, carefully remove them from their molds or muffin tin. If you notice any that have cracked slightly, don’t worry! You can usually press them back together gently. Spoon or pipe a generous amount of the creamy cheesecake filling into each cereal taco shell. Aim for a good balance – you want enough filling to be satisfying but not so much that it spills out when you pick up the taco. You can use a spoon, but a piping bag fitted with a star tip will give you a more professional and decorative finish, creating beautiful swirls of cheesecake.
Step 5: The Grand Finnon-alcoholic ale: Topping and Garnish
To complete these show-stopping Fruity Pebbles Cheesecake Tacos, it’s time for the final touches. Dollop or pipe a swirl of 1 cup of whipped cream on top of the cheesecake filling in each taco. The light and airy whipped cream adds another layer of texture and deliciousness. Finally, sprinkle a generous amount of additional fruity cereal over the whipped cream and cheesecake filling. This adds that signature crunch and visually ties the whole dessert together, reminding everyone of the delightful flavors within. You can also add a few whole cereal pieces for extra visual appeal. Serve these immediately for the best texture and flavor experience! They are best enjoyed within a few hours of assembly to maintain the crispness of the cereal shells. Prepare for happy sighs and requests for seconds!
Conclusion:
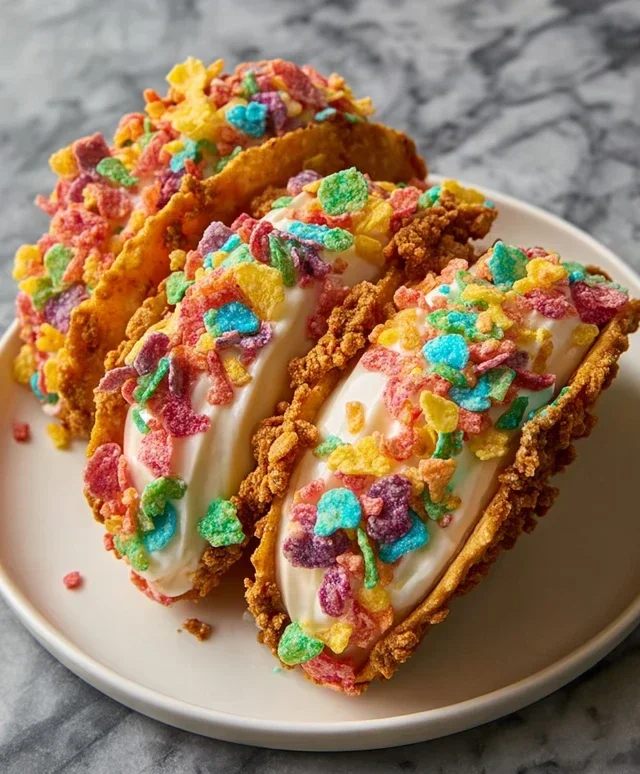
There you have it – the ultimate guide to creating your very own Fruity Pebbles Cheesecake Tacos! This recipe is an absolute showstopper, perfect for adding a vibrant splash of color and an explosion of flavor to any occasion. The creamy, tangy cheesecake filling nestled within a crispy taco shell, all adorned with the sweet, crunchy goodness of Fruity Pebbles, creates a delightful textural and taste sensation that’s truly unforgettable. I genuinely believe this is a fantastic recipe for anyone looking to impress guests or simply treat themselves to something incredibly fun and delicious. They’re surprisingly easy to make and the smiles they bring are absolutely priceless!
For serving, these cheesecake tacos are fantastic on their own as a delightful dessert, but you can elevate them even further. Consider a drizzle of white chocolate ganache or a dollop of whipped cream for extra indulgence. They also make a playful addition to a brunch spread or a kids’ birthday party. When it comes to variations, the possibilities are as endless as your imagin extractation! You could swap out the Fruity Pebbles for other colorful cereals like Cinnamon Toast Crunch or even a mix of your favorites. If you’re feeling adventurous, try infusing your cheesecake filling with a hint of lemon or lime zest for a brighter citrus note.
I truly encourage you to give these Fruity Pebbles Cheesecake Tacos a try. They are a guaranteed crowd-pleaser and a testament to how simple ingredients can come together to create something truly magical. Don’t be afraid to experiment and make them your own. Happy baking!
Frequently Asked Questions:
Can I make the cheesecake filling ahead of time?
Absolutely! You can prepare the cheesecake filling up to 24 hours in advance. Store it covered in the refrigerator. Just be sure to give it a good stir before assembling your tacos to ensure it’s smooth and creamy.
What kind of taco shells work best?
For the best crunch and to hold up to the filling, I recommend using baked or fried flour tortilla shells that have been crisped. You can easily bake them yourself by lightly brushing them with oil and baking until golden and firm. Avoid soft taco shells, as they won’t provide the desired texture.
Are there any nut-free variations?
Yes! This recipe is naturally nut-free, provided you use a brand of Fruity Pebbles and any other optional ingredients that do not contain nuts or are not processed in facilities with nuts. Always check your ingredient labels to be sure.
Fruity Pebbles Cheesecake Tacos
A vibrant and fun dessert taco featuring a creamy Fruity Pebbles-infused cheesecake filling nestled in a crunchy cereal shell.
Ingredients
-
3 cups colorful fruity cereal
-
1/2 cup unsalted butter, melted
-
8 oz cream cheese, softened
-
1/2 cup powdered sugar, sifted
-
1 tsp pure vanilla extract
-
1 cup whipped cream
-
Additional fruity cereal for garnish
Instructions
-
Step 1
Prepare the taco shells: In a bowl, combine 2 cups of the colorful fruity cereal with the melted unsalted butter. Mix well until the cereal is coated. -
Step 2
Press the cereal mixture into a greased taco mold or shape into taco shells on a parchment-lined baking sheet. Chill in the refrigerator for at least 30 minutes until firm. -
Step 3
Make the cheesecake filling: In a separate bowl, beat the softened cream cheese until smooth. Gradually add the sifted powdered sugar and vanilla extract, beating until well combined. -
Step 4
Gently fold in the whipped cream until just incorporated. Do not overmix. -
Step 5
Fill the chilled cereal taco shells with the cheesecake mixture. -
Step 6
Garnish with the remaining 1 cup of colorful fruity cereal and additional fruity cereal for decoration. Serve immediately.
Important Information
Nutrition Facts (Per Serving)
It is important to consider this information as approximate and not to use it as definitive health advice.
Allergy Information
Please check ingredients for potential allergens and consult a health professional if in doubt.