Easy No Bake Patriotic Cheesecake Recipe
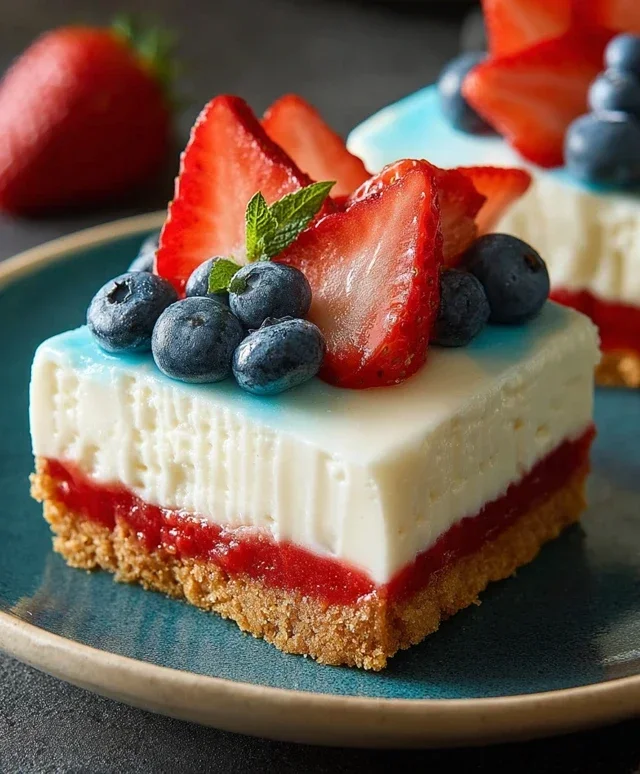
No Bake Patriotic Cheesecake is the ultimate dessert for any summer celebration! This creamy, dreamy treat is an absolute crowd-pleaser, and I’m so excited to share my go-to recipe with you. It’s wonderfully simple to whip up, making it perfect for those hot days when you want something impressive without spending hours in the kitchen. What I love most about this No Bake Patriotic Cheesecake is its versatility; it’s visually stunning with its vibrant red, white, and blue layers, making it the star of any barbecue, picnic, or Fourth of July party. Plus, the no-bake aspect means less fuss and more time enjoying the festivities with your loved ones. Get ready to wow your guests with a dessert that’s as delicious as it is festive!
No Bake Patriotic Cheesecake
Get ready to celebrate in delicious style with this incredibly easy No Bake Patriotic Cheesecake! Perfect for Fourth of July, Memorial Day, or any occasion that calls for a burst of red, white, and blue, this cheesecake is as stunning to look at as it is delightful to eat. The best part? No oven required! We’ll be creating layers of creamy, dreamy cheesecake filling with a vibrant Jell-O topping, all nestled on a sweet golden Oreo crust. This recipe is designed to be straightforward, even for begin extractner bakers, and the results are always impressive. Let’s gather our ingredients and get started on this patriotic masterpiece.
Ingredients:
Crust Preparation
The foundation of our no-bake cheesecake is a simple yet flavorful crust made from golden Oreos. The golden Oreos lend a slightly sweeter and less intense chocolate flavor than traditional Oreos, which is perfect for a dessert that relies on bright, fruity, and creamy notes.
First, let’s get our crust ready. In a medium bowl, combine the 2 cups of golden Oreo crum extractbs with the melted butter and 1/4 teaspoon of salt. Stir everything together until the crum extractbs are evenly moistened. The mixture should resemble wet sand. If it seems a little dry, you can add another teaspoon of melted butter. Press this mixture firmly and evenly into the bottom of a 9-inch springform pan. Using the bottom of a glass or a flat measuring cup can help you get a nice, compact layer. Make sure to press it up the sides slightly if you desire a bit of a crust border. Once pressed, place the crust in the freezer for at least 15-20 minutes while you prepare the filling. This helps it set up nicely and prevents it from crum extractbling when you slice the cheesecake.
Creamy Cheesecake Filling
Now for the star of the show: the luscious, creamy cheesecake filling. We’ll be making a no-bake version that is incredibly smooth and rich.
In a large bowl, beat the two packages (8 oz each) of softened cream cheese with an electric mixer until it’s completely smooth and free of lumps. Make sure your cream cheese is truly softened, at room temperature, for the smoothest results. Gradually add the 2 cups of powdered sugar, beating until well combined and the mixture is light and fluffy. Scrape down the sides of the bowl as needed. Then, mix in the 2 teaspoons of vanilla extract. In a separate, clean bowl, whip the 2 cups of heavy whipping cream until stiff peaks form. Be careful not to over-whip, or you’ll end up with butter. Gently fold about one-third of the whipped cream into the cream cheese mixture to lighten it. Then, carefully fold in the remaining whipped cream until just combined. This step is crucial for achieving a light and airy texture.
Creating the Red Layer
We’re going to create a beautiful red layer using a portion of our cheesecake filling. This adds a gorgeous visual element and a subtle fruity hint.
Take about one-third of your prepared cheesecake filling and place it in a separate bowl. Add the 1 teaspoon of red gel food color to this portion. Gel food coloring is highly concentrated, so start with a small amount and add more until you achieve a vibrant red hue. Gently mix the food coloring into the filling until it’s evenly distributed and there are no streaks of white. Once you have your red filling, carefully spoon it over the chilled crust. Use the back of a spoon or a small offset spatula to gently spread it into an even layer. Don’t worry if it’s not perfectly smooth, as the next layer will cover it.
Adding the Blue Jell-O Layer
This is where the “blue” in our patriotic design comes in! The blue raspberry Jell-O adds a fun, wobbly texture and a burst of berry flavor.
Prepare the blue raspberry Jell-O according to package directions, but with a slight modification. In a heatproof bowl, dissolve the 1 package (3.94 oz) of blue raspberry Jell-O in 1 cup of boiling water. Stir until the Jell-O powder is completely dissolved. Now, here’s the trick to getting a beautiful, slightly firmer layer: stir in 1/4 cup of cold water. Let this mixture sit at room temperature until it’s slightly thickened and syrupy, but not yet set – this usually takes about 30-45 minutes. You can speed this up by placing it in the refrigerator for a bit, but keep a close eye on it. Once it reaches this thickened stage, carefully pour it over the red cheesecake layer. Return the cheesecake to the refrigerator and chill for at least 1-2 hours, or until the Jell-O layer is set. This waiting period is important to ensure the layers don’t mix.
The White Layer and Final Touches
The final layer of creamy white cheesecake filling and the fresh berry topping will complete our patriotic masterpiece.
Once the Jell-O layer is firm, it’s time for the final white cheesecake layer. In a clean bowl, beat the 6 oz of softened cream cheese with the 6 tablespoons of softened butter until very smooth and creamy. Gradually add the 3 cups of powdered sugar, mixing until well combined and no lumps remain. Stir in the 1 teaspoon of vanilla extract. This mixture might be a little thicker than the first filling, which is perfect for creating distinct layers. Gently spoon this white cheesecake mixture over the set blue Jell-O layer, spreading it evenly to cover. For a truly polished look, you can smooth the top with an offset spatula. Finally, arrange the fresh blueberries on top of the white cheesecake layer in a decorative pattern. You can create stripes, a star shape, or simply scatter them for a beautiful effect. Chill the cheesecake in the refrigerator for at least 4-6 hours, or preferably overnight, to allow it to set completely before serving. This ensures clean slices and the best texture.
Enjoy your stunning and delicious No Bake Patriotic Cheesecake! It’s the perfect dessert to impress your guests and add a festive flair to any celebration.
Conclusion:
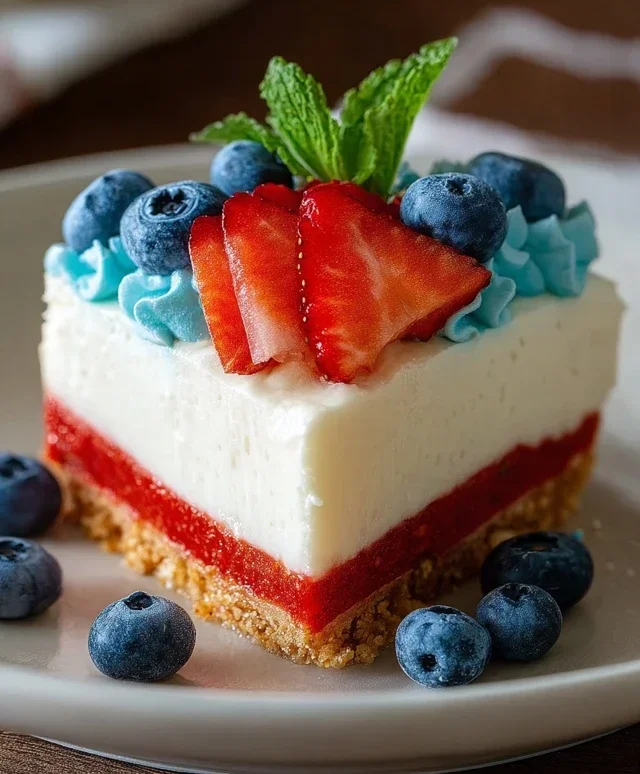
There you have it! This no-bake patriotic cheesecake is an absolute dream for any summer gathering, holiday barbecue, or just because you deserve a delicious treat. Its creamy texture, vibrant colors, and effortless preparation make it a guaranteed crowd-pleaser. You don’t need to be a master baker to whip up this stunning dessert, and the satisfaction of seeing those delighted faces is priceless. It’s the perfect way to add a burst of festive flavor and visual appeal to any occasion. So, gather your ingredients, get creative with your toppings, and dive into this delightful no-bake patriotic cheesecake. I truly encourage you to give it a try – you won’t regret it!
Frequently Asked Questions:
Q: Can I make this no-bake patriotic cheesecake ahead of time?
Absolutely! This cheesecake is fantastic for making ahead. I usually prepare it the day before serving to allow it to set up completely, ensuring that perfect sliceable texture. Just cover it tightly with plastic wrap once it’s chilled and store it in the refrigerator.
Q: What are some other topping ideas besides the traditional berries?
The possibilities are endless! For a patriotic theme, consider whipped cream swirled with red and blue food coloring, mini marshmallows, red and blue sprinkles, or even a drizzle of white chocolate. For other occasions, fresh kiwi, mango chunks, or even a caramel sauce would be delicious!
Q: My cheesecake isn’t setting up. What went wrong?
The most common reason for a cheesecake not setting is not allowing enough chilling time. Ensure it’s been in the refrigerator for at least 6-8 hours, or ideally overnight. Also, make sure you used full-fat cream cheese and heavy cream; lighter versions may not provide enough stability for a no-bake recipe.
No Bake Patriotic Cheesecake
A festive and easy no-bake cheesecake featuring layers of red, white, and blue, perfect for any patriotic celebration.
Ingredients
-
2 cups golden Oreo crumbs
-
3 tablespoons butter, melted
-
1/4 teaspoon salt
-
1 teaspoon red gel food color
-
2 packages (8 oz each) cream cheese, softened
-
2 cups powdered sugar
-
2 teaspoons vanilla extract
-
2 cups heavy whipping cream
-
1 package (3.94 oz) blue raspberry Jell-O
-
1 cup boiling water
-
6 oz cream cheese, softened
-
6 tablespoons butter, softened
-
3 cups powdered sugar
-
1 teaspoon vanilla extract
-
Fresh blueberries
Instructions
-
Step 1
In a bowl, combine golden Oreo crumbs, 3 tablespoons melted butter, and 1/4 teaspoon salt. Press into the bottom of a 9-inch springform pan. -
Step 2
In a large bowl, beat 2 packages (8 oz each) softened cream cheese until smooth. Gradually beat in 2 cups powdered sugar and 2 teaspoons vanilla extract. -
Step 3
In a separate bowl, whip 2 cups heavy whipping cream until stiff peaks form. Gently fold the whipped cream into the cream cheese mixture. -
Step 4
Divide the cream cheese mixture into three equal portions. Stir 1 teaspoon red gel food color into one portion. In a small bowl, dissolve 1 package (3.94 oz) blue raspberry Jell-O in 1 cup boiling water, then let it cool slightly and stir into another portion of the cream cheese mixture. -
Step 5
Spread the red layer over the crust. Then carefully spread the blue layer over the red layer. Chill for 15 minutes. -
Step 6
In a medium bowl, beat 6 oz softened cream cheese with 6 tablespoons softened butter until smooth. Gradually beat in 3 cups powdered sugar and 1 teaspoon vanilla extract until smooth and fluffy. This will be the white layer. -
Step 7
Carefully spread the white layer over the blue layer. Chill the cheesecake for at least 4 hours, or until firm. -
Step 8
Before serving, garnish with fresh blueberries.
Important Information
Nutrition Facts (Per Serving)
It is important to consider this information as approximate and not to use it as definitive health advice.
Allergy Information
Please check ingredients for potential allergens and consult a health professional if in doubt.