Easy Homemade Bread Recipe- Bake Your Own Delicious Loaf
Homemade bread is more than just a baked good; it’s an experience. There’s an undeniable magic in transforming simple ingredients – flour, water, yeast, and salt – into a warm, fragrant loaf that fills your kitchen with an aroma that’s utterly irresistible. Why do we crave this comfort? Perhaps it’s the connection to tradition, to simpler times when bread was a staple, baked with love and patience. Or maybe it’s the pure sensory pleasure: the satisfying weight of the dough in your hands, the subtle transformation as it rises, and the glorious moment the crust cracks just so as it cools. What truly makes homemade bread special is the journey. It’s a mindful process, a chance to slow down and create something tangible and delicious from scratch. The taste of truly fresh, perfectly baked homemade bread, slathered with butter, is simply unparalleled, a reward for every ounce of effort.”
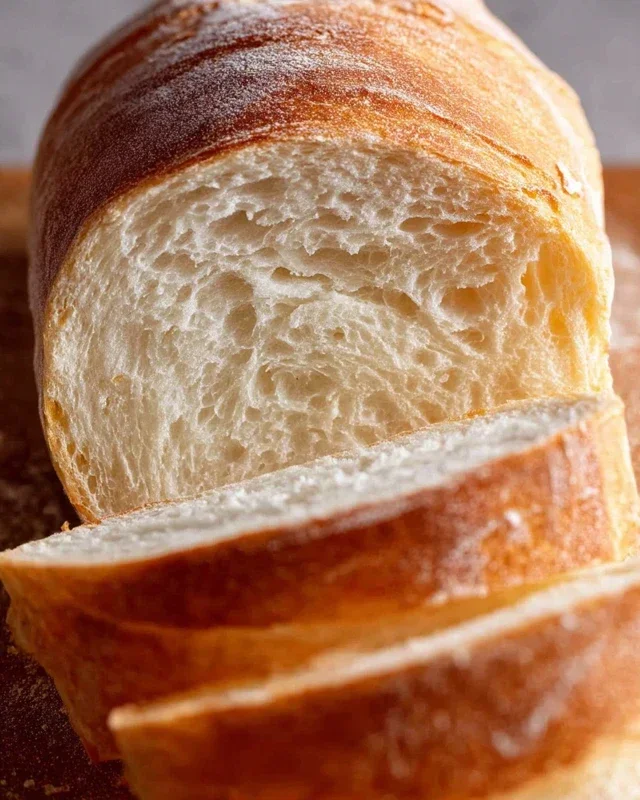
Homemade Bread
There’s something incredibly satisfying about pulling a loaf of freshly baked bread from your own oven. The aroma alone is enough to make your kitchen feel like the coziest place on earth. Forget the store-bought stuff, because making your own bread is surprisingly straightforward and the taste is infinitely superior. This recipe is my go-to for a classic, soft, and slightly chewy white bread that’s perfect for sandwiches, toasting, or just enjoying with a smear of butter.
Ingredients:
*Note on Yeast and Flour: Active dry yeast requires activation. Bread flour, with its higher protein content, will yield a chewier loaf, while all-purpose flour will result in a slightly softer crum extractb.
Getting Started: Activating the Yeast
The first step to any successful yeast bread is to ensure your yeast is alive and ready to work its magic. In a large mixing bowl, combine the warm water and your chosen sweetener – either honey or sugar. Gently stir until dissolved. Now, sprinkle the active dry yeast over the surface of the liquid. Resist the urge to stir it in vigorously. Let it sit undisturbed for about 5-10 minutes. You’ll know your yeast is active when it becomes foamy and bubbly on the surface. This indicates that the yeast is consuming the sugar and producing carbon dioxide, which is essential for the bread to rise. If you don’t see this foamy action, your yeast may be old or the water was too hot or too cold, and you’ll need to start over with fresh yeast.
Mixing the Dough
Once your yeast is happily frothing, it’s time to add the rest of the wet ingredients. Pour in the oil and stir it into the yeasty mixture. Next, add the salt. Salt plays a crucial role in bread making: it not only enhances the flavor but also controls the yeast’s activity and strengthens the gluten structure. Now, it’s time for the flour. Start by adding about 4 cups of the flour to the bowl. Using a wooden spoon or a sturdy spatula, begin extract to mix everything together. The dough will be shaggy and sticky at this stage. Gradually add more flour, about a quarter cup at a time, until the dough starts to pull away from the sides of the bowl. You’re aiming for a dough that is still slightly tacky but manageable. Don’t be tempted to dump in all the flour at once, as this can lead to a dry, dense loaf. The exact amount of flour needed can vary depending on humidity and the type of flour you use.
Kneading the Dough
This is where the real work begin extracts, and it’s a wonderfully tactile experience. Lightly flour a clean countertop or a large board. Turn the dough out onto the floured surface. Now, we knead! There are several ways to knead, but a common and effective method is the push-and-fold technique. With the heels of your hands, push the dough away from you, stretching it. Then, fold the dough in half towards you. Give it a quarter turn and repeat. Continue this process for about 8-10 minutes. You’re looking for the dough to become smooth, elastic, and less sticky. It should spring back when gently poked. If the dough is sticking too much to your hands or the counter, add just a whisper more flour, a teaspoon at a time. Over-kneading can make the bread tough, so aim for that smooth, elastic texture.
First Rise (Proofing)
Once your dough is beautifully kneaded, it’s time to let it rest and grow. Lightly grease a clean large bowl with a little oil. Place the kneaded dough into the oiled bowl, turning it to coat all sides with the oil. This prevents a dry skin from forming. Cover the bowl tightly with plastic wrap or a clean kitchen towel. Find a warm, draft-free spot for the dough to rise. This could be a slightly warmed (but turned off) oven, a sunny windowsill, or simply on your counter in a warmer room. Let the dough rise for about 1 to 1.5 hours, or until it has doubled in size. The exact time will depend on the warmth of your environment. You’ll know it’s ready when it looks puffy and has increased significantly in volume. Gently poke the dough with your finger; if the indentation remains, it’s proofed and ready.
Shaping and Second Rise
Once your dough has had its first glorious rise, gently punch it down to release the accumulated gases. Turn the dough out onto your lightly floured surface again. Now, you can shape it into your desired loaf. For a standard loaf pan bread, gently flatten the dough into a rectangle. Then, starting from one of the shorter sides, tightly roll up the dough like a jelly roll. Pinch the seam to seal it, and tuck in the ends. Lightly grease a 9×5 inch loaf pan with oil or butter, or line it with parchment paper. Place the shaped loaf into the prepared pan, seam-side down. Cover the pan loosely with plastic wrap or a clean kitchen towel and let it rise again in a warm place for another 30-45 minutes, or until it has almost doubled in size and crests over the edge of the pan. This second rise is crucial for achieving a light and airy crum extractb.
Baking Your Masterpiece
Preheat your oven to 375 degrees Fahrenheit (190 degrees Celsius) during the last 15 minutes of the second rise. Once the dough has reached its final rise, carefully place the loaf pan into the preheated oven. Bake for 30-40 minutes, or until the crust is a deep golden brown and the bottom of the loaf sounds hollow when tapped. If the top is browning too quickly, you can loosely tent it with aluminum foil during the last 10-15 minutes of baking.
Cooling and Enjoying
As soon as your beautiful loaf is out of the oven, carefully remove it from the pan and place it on a wire rack to cool completely. Resist the urge to slice into it immediately! Allowing the bread to cool properly is essential for the texture to set. Slicing too soon can result in a gummy interior. Once cooled, slice and enjoy the fruits of your labor. You’ve made delicious, homemade bread!
Conclusion:
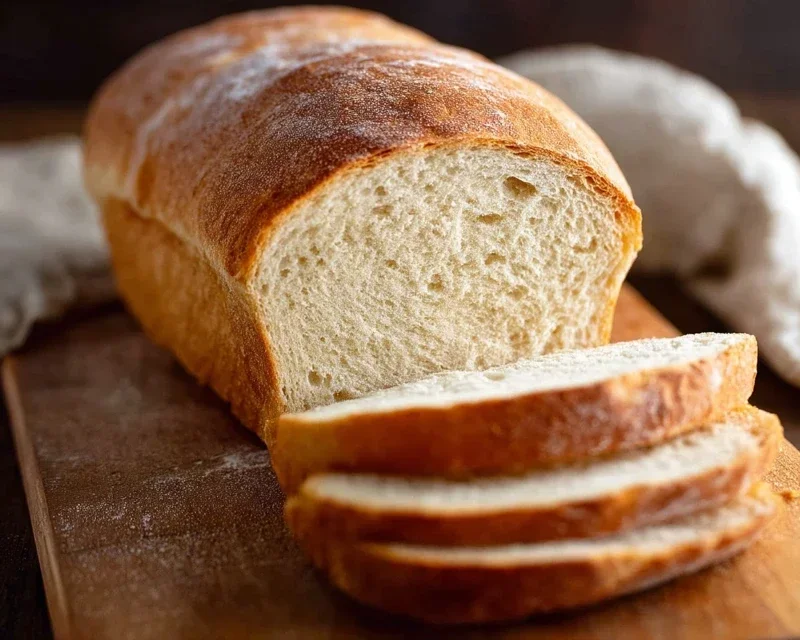
Embarking on the journey of making homemade bread is incredibly rewarding, and this recipe makes it accessible and delightful. You’ll be amazed by the simple ingredients that transform into a crusty, flavorful loaf with a wonderfully soft interior. The aroma alone is enough to fill your home with warmth and anticnon-alcoholic ipation. This recipe is fantastic because it demystifies bread-making, proving that you don’t need fancy equipment or years of experience to achieve excellent results. It’s a truly satisfying experience that offers a tangible reward for your efforts.
Once your beautiful loaf is out of the oven, the possibilities for enjoyment are endless! It’s perfect simply sliced and slathered with butter, or serve it alongside your favorite soups and stews. Think of it as the ideal companion for a hearty salad or as the base for gourmet sandwiches. For variations, don’t hesitate to experiment! Adding seeds like sunflower or pumpkin during the kneading stage can introduce delightful textures and flavors. A sprinkle of herbs like rosemary or thyme on top before baking adds an aromatic touch. You can also try incorporating a bit of whole wheat flour for a nuttier taste.
I truly encourage you to give this homemade bread recipe a try. The satisfaction of pulling a warm, fragrant loaf from your own oven is unparalleled. It’s a project that fosters patience and mindfulness, and the delicious outcome is a wonderful bonus. You’ll likely find yourself hooked on the joy of baking your own bread!
Frequently Asked Questions:
Why is my bread dense and not fluffy?
Dense bread can sometimes be due to insufficient kneading, which means the gluten hasn’t developed enough to create a light structure. Over-proofing or under-proofing can also be culprits. Ensure your yeast is active and that you’re allowing the dough to rise in a warm place. Measuring your flour accurately is also key – too much flour can make your dough heavy.
Can I freeze my homemade bread?
Absolutely! Homemade bread freezes wonderfully. Once completely cooled, wrap it tightly in plastic wrap, then in aluminum foil or place it in a freezer-safe bag. It should stay fresh for up to 3 months. Thaw at room temperature or warm slices in the oven or toaster.
Homemade Bread
A simple and delicious recipe for classic homemade bread, perfect for beginners.
Ingredients
-
2 cups warm water (105-115 degrees Fahrenheit)
-
1 Tablespoon active dry yeast
-
1/4 cup honey
-
2 teaspoons salt
-
2 Tablespoons canola oil
-
4 – 5 1/2 cups all-purpose flour
Instructions
-
Step 1
In a large bowl, combine the warm water and honey. Sprinkle the yeast over the top and let it sit for 5-10 minutes until foamy. -
Step 2
Stir in the salt and oil. Gradually add the flour, 1 cup at a time, mixing until a shaggy dough forms. You may not need all of the flour. -
Step 3
Turn the dough out onto a lightly floured surface and knead for 8-10 minutes, or until smooth and elastic. Add a little more flour if the dough is too sticky. -
Step 4
Place the dough in a lightly oiled bowl, turning to coat. Cover with plastic wrap or a clean kitchen towel and let it rise in a warm place for 1 to 1.5 hours, or until doubled in size. -
Step 5
Punch down the dough and shape it into a loaf. Place it in a greased 9×5 inch loaf pan. -
Step 6
Cover the pan and let the dough rise again for 30-45 minutes, or until it has risen above the rim of the pan. -
Step 7
Preheat your oven to 375 degrees Fahrenheit (190 degrees Celsius). Bake for 30-35 minutes, or until the crust is golden brown and the internal temperature reaches 190-200 degrees Fahrenheit (88-93 degrees Celsius). -
Step 8
Remove the bread from the pan and let it cool completely on a wire rack before slicing.
Important Information
Nutrition Facts (Per Serving)
It is important to consider this information as approximate and not to use it as definitive health advice.
Allergy Information
Please check ingredients for potential allergens and consult a health professional if in doubt.