Easy Apple Pie Bars- Delicious Dessert Recipe
Apple pie bars are a quintessential dessert, and for good reason! There’s something undeniably comforting about the warm, spiced embrace of baked apples nestled within a buttery, crum extractbly crust. Forget the fuss of a traditional pie; these apple pie bars deliver all the beloved flavors and textures in a much more convenient, portable package. They’re perfect for picnics, potlucks, or simply satisfying a craving for a taste of home. What makes these apple pie bars so special is their versatility and ease. Whether you prefer a sweet-tart apple filling or a richer, caramel-kissed version, you can tailor them to your liking. The best part? You get that perfect ratio of crisp crust to gooey apple filling in every single bite, making these apple pie bars an instant crowd-pleaser and a guaranteed hit in your kitchen.
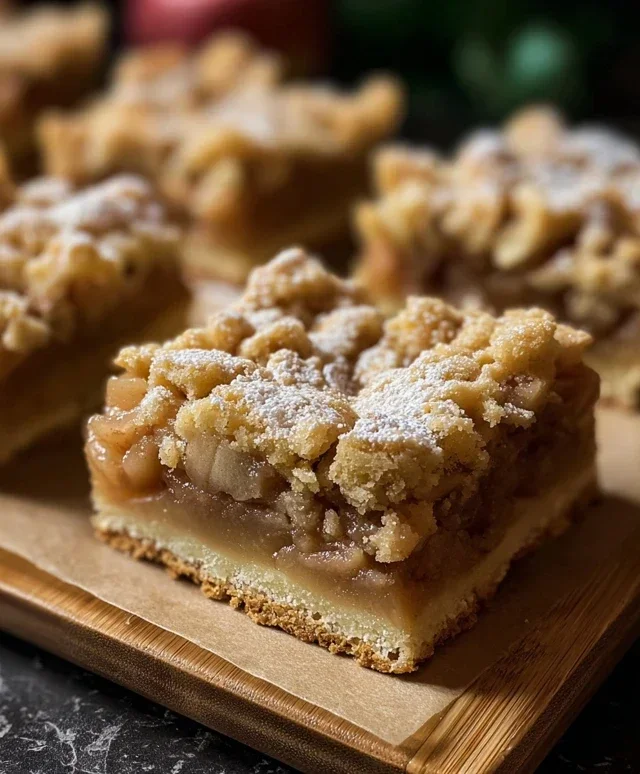
Apple Pie Bars
There’s something undeniably comforting about apple pie. The sweet, tender apples, the warm spices, the buttery crust – it’s a classic for a reason. But sometimes, the thought of rolling out pie dough and carefully crimping edges can feel a bit daunting. That’s where these Apple Pie Bars come in! They capture all the beloved flavors of a traditional apple pie but in a wonderfully easy-to-make bar format. The crust is buttery and crum extractbly, forming a perfect base, while the apple filling is sweet, spiced, and utterly delicious. They’re perfect for potlucks, holiday gatherings, or just a cozy afternoon treat. You can slice them into neat squares or more rustic rectangles, and they hold up beautifully, making them incredibly portable. Let’s get baking!
Ingredients:
Crust Preparation
The foundation of our delicious apple pie bars is a simple, press-in crust. This is what makes them so easy to assemble – no rolling pin required! First, in a large mixing bowl, whisk together the all-purpose flour, granulated sugar, baking powder, and salt. This dry mixture forms the base of our crust. Make sure everything is well combined so the leavening and seasoning are evenly distributed.
Next, add the cold, cubed unsalted butter to the dry ingredients. You want the butter to be very cold; this is crucial for achieving a tender and crum extractbly crust. You can either use a pastry blender, two knives, or your fingertips to cut the butter into the flour mixture. The goal is to break the butter down into small, pea-sized pieces. You’ll know it’s ready when the mixture resembles coarse crum extractbs with some larger, butter-laden pieces still visible. Don’t overwork it; we want those pockets of butter to create flakiness.
Now, it’s time to bring the dough together. In a small bowl, lightly beat the egg with the vanilla extract. Add this wet mixture to the flour and butter mixture. Mix gently with a fork or spatula until the dough just starts to come together. It will still look a little shaggy. Press the dough together with your hands to form a cohesive ball. It won’t be a smooth dough like bread, but it should hold together.
Take your prepared baking pan (an 8×8 or 9×13 inch pan works well, depending on how thick you want your bars) and evenly press about two-thirds of the dough into the bottom. Use the bottom of a measuring cup or your fingers to create a nice, even layer. This will be your bottom crust. Reserve the remaining one-third of the dough. Place the pan with the bottom crust into the refrigerator to chill while you prepare the apple filling. This chilling step helps the crust maintain its structure during baking.
Apple Filling Magic
Now for the star of the show: the apples! In a medium bowl, combine the peeled and diced apples. As you dice your apples, toss them with the lemon juice. The lemon juice not only adds a bright, tangy note but also helps prevent the apples from browning while you prepare the rest of the filling.
To the apples, add the brown sugar, cinnamon, and cornstarch. The brown sugar will provide a lovely caramel-like sweetness, while the cinnamon infuses that classic warm spice flavor we all adore in apple pie. The cornstarch is essential for thickening the apple juices as they cook, preventing a runny filling and ensuring your bars have a nice, cohesive texture. Gently toss everything together until the apples are evenly coated with the sugar, spice, and cornstarch mixture. Ensure all those diced apple pieces are beautifully coated.
Assembly and Baking
Take the chilled crust out of the refrigerator. Evenly spoon the prepared apple filling over the bottom crust, spreading it out to cover the surface. Don’t worry if it looks like a lot of apples; they will cook down. Now, take the reserved one-third of the dough from the refrigerator. You have a couple of options here: you can either crum extractble this dough loosely over the top of the apples for a streusel-like topping, or you can grate it over the apples using a box grater for a more distributed crum extractble. Either way, aim for even coverage.
Preheat your oven to 375°F (190°C). Place the assembled bars on a baking sheet (to catch any potential drips) and bake for 30-40 minutes, or until the crust is golden brown and the apple filling is bubbly and tender. You should be able to easily pierce the apples with a fork. The aroma that will fill your kitchen is absolutely divine!
Cooling and Serving
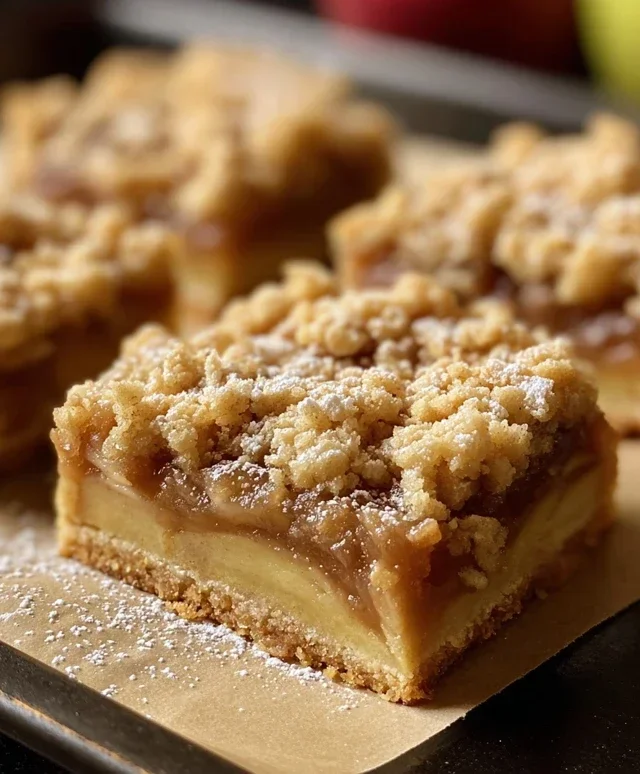
This is perhaps the hardest part: waiting for them to cool! Once they are out of the oven, let the apple pie bars cool completely in the pan on a wire rack. This cooling period is crucial for the bars to set properly, making them much easier to cut. If you try to cut them while they are still warm, they will likely fall apart. Patience will be rewarded! Once completely cool, slice them into your desired bar shapes. These bars are delicious served plain, but a dusting of powdered sugar or a scoop of vanilla ice cream takes them to the next level. Enjoy your homemade apple pie bars!
Conclusion:
I hope you’re as excited to bake these Apple Pie Bars as I am to eat them! This recipe truly simplifies the joy of classic apple pie, transforming it into a perfectly portable and irresistibly delicious bar. The combination of a tender, buttery shortbread crust, a sweet and spiced apple filling, and a delightful crum extractble topping makes these bars a guaranteed crowd-pleaser. They are fantastic for potlucks, bake snon-alcoholic ales, or simply as an easy dessert for a weeknight treat. Imagin extracte serving them warm with a scoop of vanilla ice cream, or at room temperature with a dollop of whipped cream. Feel free to get creative with your own twists – perhaps add a pinch of nutmeg to the crust, or a splash of bourbon extract to the apple filling for an adult-friendly version. Don’t be afraid to experiment with different apple varieties for subtle flavor nuances. I genuinely encourage you to give these Apple Pie Bars a try; I know you won’t be disappointed!
Frequently Asked Questions:
Can I make these Apple Pie Bars ahead of time?
Absolutely! These bars are excellent for making in advance. You can bake them up to two days beforehand and store them in an airtight container at room temperature. They might even taste better the next day as the flavors meld together!
What kind of apples are best for this recipe?
A mix of tart and sweet apples often yields the best flavor and texture. I recommend using varieties like Honeycrisp, Gala, Granny Smith, or Fuji. Using a combination ensures a balanced taste and that the apples hold their shape well during baking.
How should I store any leftover Apple Pie Bars?
To keep your Apple Pie Bars fresh, store them in an airtight container at room temperature for up to 3 days. If you anticnon-alcoholic ipate having leftovers for longer, you can refrigerate them for up to a week. For longer storage, you can freeze the baked bars for up to 3 months.
Apple Pie Bars
A delicious and easy-to-make dessert featuring a buttery shortbread crust and a sweet, spiced apple filling, all in convenient bar form.
Ingredients
-
2½ cups all-purpose flour
-
1 cup granulated sugar
-
1 tsp baking powder
-
½ tsp salt
-
1 cup (2 sticks) cold unsalted butter, cubed
-
1 egg
-
1 tsp vanilla extract
-
4 cups peeled & diced apples
-
2 tbsp lemon juice
-
½ cup brown sugar
-
2 tsp cinnamon
-
1 tsp cornstarch
Instructions
-
Step 1
Preheat oven to 375°F (190°C). Grease and flour a 9×13 inch baking pan. -
Step 2
In a large bowl, whisk together flour, granulated sugar, baking powder, and salt. -
Step 3
Cut in the cold butter until the mixture resembles coarse crumbs. Stir in the egg and vanilla extract until just combined. -
Step 4
Press two-thirds of the dough evenly into the bottom of the prepared pan to form the crust. -
Step 5
In a separate bowl, toss the diced apples with lemon juice. In a small bowl, mix brown sugar, cinnamon, and cornstarch. Add this mixture to the apples and toss to coat. -
Step 6
Spread the apple mixture evenly over the crust. Crumble the remaining dough over the apple layer. -
Step 7
Bake for 35-45 minutes, or until the topping is golden brown and the apple filling is bubbly. -
Step 8
Let cool completely in the pan before cutting into bars.
Important Information
Nutrition Facts (Per Serving)
It is important to consider this information as approximate and not to use it as definitive health advice.
Allergy Information
Please check ingredients for potential allergens and consult a health professional if in doubt.