Banana Pudding Cheesecake Cones – A Dreamy Dessert
Banana Pudding Cheesecake Cones are the ultimate fusion dessert, and trust me, once you try them, you’ll understand why they’re causing such a stir. Imagin extracte the creamy, dreamy bliss of classic banana pudding swirled into the rich decadence of cheesecake, all nestled within a crisp, golden waffle cone. It’s a symphony of textures and flavors that hits all the right notes. We love banana pudding for its comforting sweetness and nostalgic appeal, and who can resist the tangy, luxurious embrace of cheesecake? But the genius of these Banana Pudding Cheesecake Cones lies in their playful presentation. They take these beloved desserts to a whole new level of fun and portability, making them perfect for parties, a special treat, or even just a spontaneous indulgence. Get ready to be amazed by this incredible creation!
Ingredients:
Get ready to embark on a dessert adventure that combines two iconic treats into one spectacular, handheld delight! We’re talking about Banana Pudding Cheesecake Cones, a symphony of creamy, dreamy, and crunchy textures that are guaranteed to impress. Forget your standard slice of cheesecake; these cones are fun, portable, and bursting with classic banana pudding flavors. This recipe is surprisingly easy to make and perfect for any occasion, from a casual get-together to a special celebration. The magic lies in creating a luscious, no-bake cheesecake filling infused with the unmistakable taste of banana pudding, all nestled inside crisp waffle cones and topped with delightful crunch. Let’s dive in and create these little cups of joy!
Crafting the Creamy Cheesecake Filling
The foundation of our amazing cones is a rich and tangy cheesecake filling that’s incredibly simple to whip up. You’ll start by taking your softened cream cheese. Make sure it’s truly soft to avoid any lumps. In a medium bowl, beat the softened cream cheese with your powdered sugar until it’s smooth and creamy. This is where the sweetness comes in, creating that classic cheesecake base. Next, add the vanilla extract. This little addition enhances all the other flavors and brings a lovely aroma to the mix.
Now for the star of the show: the banana pudding! In a separate, larger bowl, whisk together the instant banana pudding mix and the cold milk. It’s crucial to use cold milk here; it helps the pudding thicken up quickly and prevents a grainy texture. Whisk continuously for about two minutes, or until the pudding starts to set and becomes thick. Don’t overmix, but ensure there are no dry pockets of pudding powder.
Gently fold the whipped cream into the banana pudding mixture. This step adds an incredible lightness and airiness to our filling, making it more like a mousse than a dense cheesecake. Be delicate when folding to maintain the fluffiness of the whipped cream. You want to incorporate it until just combined, with no streaks of white remaining. Then, carefully fold this banana pudding mixture into your cream cheese mixture. Again, fold gently until everything is just combined and you have a beautifully smooth, luscious, and creamy filling that smells absolutely divine. This no-bake approach means no oven time, keeping things cool and simple!
Assembling Your Banana Pudding Cheesecake Cones
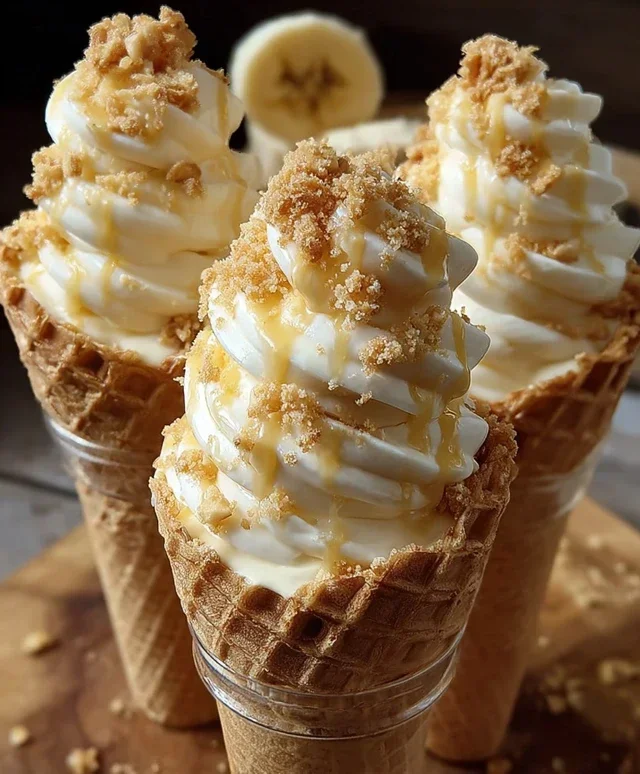
Now comes the fun part: assembling these delightful cones! Grab your waffle cones. You want them to be sturdy enough to hold the delicious filling. Carefully spoon or pipe the banana cheesecake filling into each waffle cone. Don’t overfill them; leave a little space at the top for the toppings. A piping bag with a large round tip makes this process neat and easy, but a spoon works perfectly well too. Just be sure to fill them evenly.
Once your cones are filled, it’s time for the textural contrast. Sprinkle the crushed vanilla wafers or grabeef ham crackers generously over the top of the filling in each cone. This layer of crum extractbs adds that essential crunch, mimicking the classic banana pudding experience. It’s like a delightful little crum extractble topping for your cheesecake masterpiece.
For that extra touch of decadence and visual appeal, drizzle your cones with caramel sauce or sweetened condensed milk. Get creative with your drizzling pattern! This not only adds another layer of flavor but also makes your cones look incredibly inviting. Finally, for the ultimate banana pudding cheesecake cone experience, sprinkle a few extra crushed vanilla wafers on top of the drizzle. This final flourish ensures every bite is a perfect harmony of creamy, crunchy, and sweet.
Serving and Enjoying Your Masterpiece
These Banana Pudding Cheesecake Cones are best enjoyed immediately after assembly to ensure the waffle cones stay crisp and the filling is perfectly chilled. However, if you need to make them a little ahead of time, you can store the filling separately in the refrigerator and assemble the cones just before serving. This prevents the cones from getting soggy.
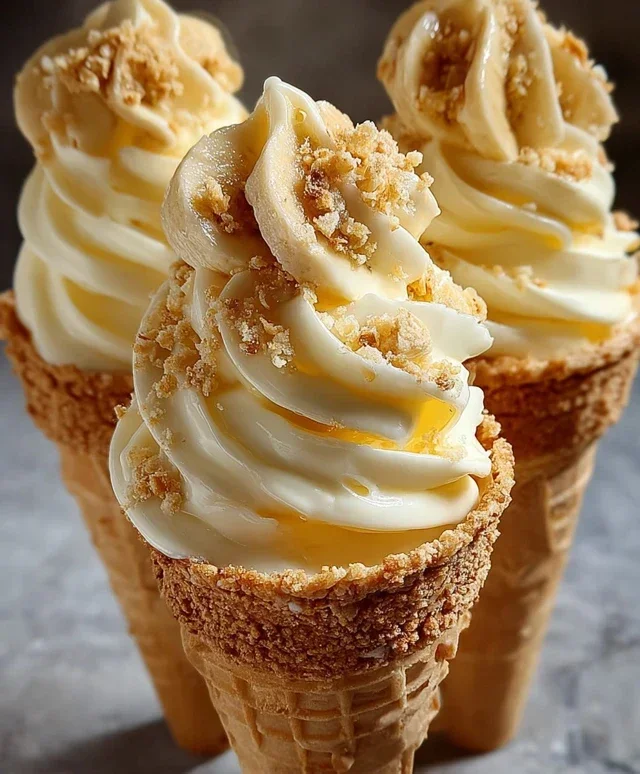
When you’re ready to serve, present these beauties on a platter or in a decorative container. Watch the smiles as everyone gets to dig into their own personal, handheld dessert. The combination of the creamy, banana-infused cheesecake, the crisp waffle cone, the crunchy cookie bits, and the sweet drizzle is simply irresistible. Each bite is a delightful explosion of flavors and textures that will transport you straight to dessert heaven. These cones are a testament to how simple ingredients can be transformed into something truly extraordinary. Enjoy every single delicious lick and crunch!
Conclusion:
There you have it – a delightful journey into creating the most amazing Banana Pudding Cheesecake Cones! This recipe truly is a showstopper, combining the rich, creamy indulgence of cheesecake with the comforting, familiar flavors of banana pudding, all nestled within a crispy, delightful ice cream cone. It’s the perfect dessert for impressing guests, celebrating a special occasion, or simply treating yourself to something truly extraordinary. The textural contrast, from the smooth cheesecake filling to the crunchy cone and soft banana slices, is simply divine. Don’t be intimidated; the process is rewarding, and the result is absolutely worth every step.
I highly recommend serving these as individual desserts. They look incredibly elegant and make for a fun, handheld treat. For variations, consider adding a swirl of caramel sauce to the cheesecake filling for an extra layer of sweetness, or sprinkle some crushed Nilla wafers on top for added crunch and flavor. You could even incorporate a hint of rum extract extract into the filling for a more sophisticated twist. So, gather your ingredients, embrace the fun, and dive into making these spectacular Banana Pudding Cheesecake Cones. I promise you won’t regret it – happy baking!
Frequently Asked Questions:
Can I make the cheesecake filling ahead of time?
Absolutely! The cheesecake filling can be made up to two days in advance and stored in an airtight container in the refrigerator. This can save you time on the day you plan to assemble your cones.
What kind of cones work best?
Waffle cones are generally the best choice for their sturdiness and delicious flavor. Cake cones can also work, but they might be a bit more fragile. Ensure your cones are fresh and not stnon-alcoholic ale for the best crunchy texture.
Can I freeze these Banana Pudding Cheesecake Cones?
While the cheesecake filling freezes well, the cone itself can become soggy upon thawing. It’s best to assemble these cones just before serving for optimal texture and flavor. If you must freeze them, wrap them tightly in plastic wrap and then in foil, and consume within a week or two, accepting that the cone texture may be compromised.
Banana Pudding Cheesecake Cones
A delightful no-bake cheesecake filling infused with banana pudding flavor, swirled with caramel, and served in crispy waffle cones, topped with crushed vanilla wafers.
Ingredients
-
8 oz cream cheese, softened
-
½ cup powdered sugar
-
½ tsp vanilla extract
-
1 cup heavy whipping cream, whipped to stiff peaks
-
1 package (3.4 oz) instant banana pudding mix
-
2 cups cold milk
-
8 waffle cones
-
½ cup crushed vanilla wafers
-
Caramel sauce drizzle
-
Extra crushed vanilla wafers
Instructions
-
Step 1
In a large bowl, beat the softened cream cheese until smooth. Gradually beat in the powdered sugar until well combined. -
Step 2
Stir in the vanilla extract. Gently fold in the whipped heavy cream until no streaks remain, being careful not to deflate the cream. -
Step 3
In a separate medium bowl, whisk together the instant banana pudding mix and cold milk until smooth and thickened. Let it sit for 5 minutes. -
Step 4
Gently fold the prepared banana pudding into the cream cheese mixture until just combined. Don’t overmix. -
Step 5
Spoon the banana pudding cheesecake filling evenly into the 8 waffle cones. Sprinkle the crushed vanilla wafers over the filling in each cone. -
Step 6
Drizzle caramel sauce over the crushed wafers. Top with additional crushed vanilla wafers for garnish. -
Step 7
Serve immediately or chill for at least 30 minutes before serving for a firmer texture.
Important Information
Nutrition Facts (Per Serving)
It is important to consider this information as approximate and not to use it as definitive health advice.
Allergy Information
Please check ingredients for potential allergens and consult a health professional if in doubt.