Easy Strawberry Cobbler-Sweet & Delicious Dessert
Strawberry cobbler is more than just a dessert; it’s a warm hug in a bowl, a taste of pure summer bliss. There’s something undeniably magical about plump, juicy strawberries bubbling under a tender, golden topping. It’s the kind of dish that instantly transports you to a simpler time, conjuring memories of sunny afternoons and shared laughter. What makes this particular strawberry cobbler so special? It’s the perfect balance – the slight tartness of the berries mingling with the sweet, slightly crum extractbly biscuit-like crust. It’s not overly fussy, making it approachable for any home baker, yet it delivers an impressive flavor and texture that will have everyone asking for seconds. Prepare to fall in love with this classic, comforting strawberry cobbler all over again.
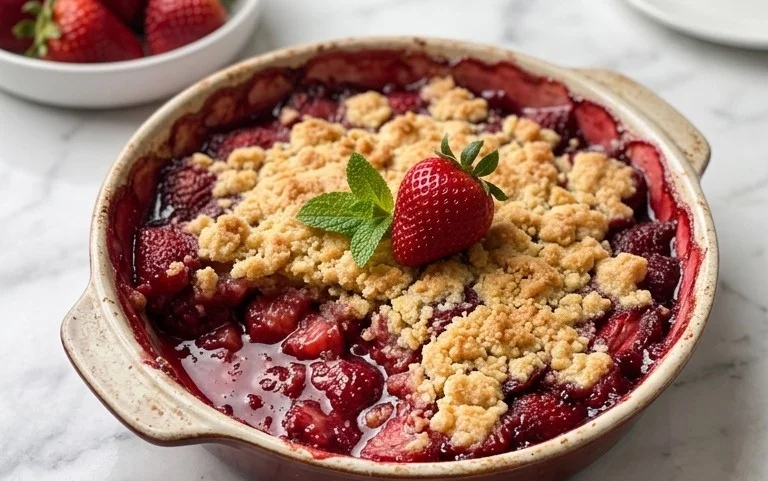
Strawberry Cobbler
There’s nothing quite like the comforting embrace of a homemade strawberry cobbler. The sweet, slightly tart burst of fresh strawberries, nestled under a tender, biscuit-like topping, is pure bliss. This recipe is my go-to for a reason – it’s simple, forgiving, and always a crowd-pleaser. Whether you’re looking for a delightful dessert to cap off a summer barbecue or a cozy treat for a chilly evening, this strawberry cobbler delivers. The aroma that fills your kitchen as it bakes is non-intoxicating, a promise of the deliciousness to come. Let’s get started on this delightful journey of creating a truly memorable dessert.
Ingredients:
Cooking Instructions
The magic of this cobbler lies in its two distinct layers: the luscious strawberry filling and the pillowy biscuit topping. We’ll tackle each part with care to ensure a perfect balance of flavors and textures.
Step 1: Prepare the Luscious Strawberry Filling
Begin extract by preheating your oven to 375 degrees Fahrenheit (190 degrees Celsius). This will ensure your cobbler bakes evenly from the moment it goes in. In a medium-sized bowl, combine the 1/2 cup of white sugar and 2 tablespoons of cornstarch. Whisk these together thoroughly. The cornstarch is crucial here; it acts as a thickener, preventing your strawberry filling from becoming too watery. Next, pour in the 1/4 cup of lemon juice. The lemon juice not only adds a bright, zesty flavor that beautifully complements the sweetness of the strawberries but also helps to activate the pectin in the fruit, aiding in the thickening process. Now, gently add your prepared 3 cups of fresh strawberries, hulled and sliced. Toss everything together until the strawberries are evenly coated with the sugar, cornstarch, and lemon juice mixture. Be gentle to avoid mushing the berries. Pour this vibrant strawberry mixture into an 8×8 inch baking dish or a similar-sized oven-safe skillet. Don’t worry if it looks a little juicy; that’s exactly what we want. Finally, dot the surface of the strawberries with the 2 tablespoons of diced cold butter. These little pats of butter will melt as the cobbler bakes, adding a touch of richness and helping the berries achieve a wonderful glossy finish.
Step 2: Craft the Tender Biscuit Topping
In a separate, larger bowl, combine the 1 cup of all-purpose flour, 1 tablespoon of white sugar, 1 1/2 teaspoons of baking powder, and 1/2 teaspoon of salt. Whisk these dry ingredients together until they are well combined. The baking powder is our leavening agent, promising a light and airy texture for our topping. Now, add the 3 tablespoons of cold butter, cut into small cubes. Using a pastry blender, your fingertips, or even two forks, cut the butter into the dry ingredients until the mixture resembles coarse crum extractbs. You want to see some pea-sized pieces of butter remaining; these will create little pockets of steam as they melt in the oven, contributing to the flaky texture of the biscuit topping. Don’t overwork the dough at this stage; it’s better to have slightly larger butter pieces than to develop too much gluten.
Step 3: Bring the Topping Together with Cream
Gradually add the 1/2 cup of heavy cream to the flour and butter mixture. Stir with a fork until just combined and a shaggy dough forms. You might not need all the cream, or you might need a tiny bit more, depending on the humidity and the flour. The goal is a soft, slightly sticky dough that just comes together. Avoid overmixing, as this can lead to a tough topping. The heaviness of the cream will contribute to a rich, tender biscuit.
Step 4: Assemble and Bake Your Cobbler
Now for the exciting part! Spoon dollops of the biscuit dough randomly over the top of the strawberry filling in the baking dish. Don’t worry about covering the entire surface perfectly; the dough will spread slightly as it bakes. Aim for about 6 to 8 dollops, spaced out. You want to see plenty of the beautiful red strawberry filling peeking through. Place the baking dish on a baking sheet to catch any potential drips. Bake in the preheated oven for 35-45 minutes, or until the topping is golden brown and the strawberry filling is bubbly and thickened. The baking time can vary slightly depending on your oven, so keep an eye on it. You’re looking for a beautiful, rustic look.
Step 5: Rest and Serve Your Masterpiece
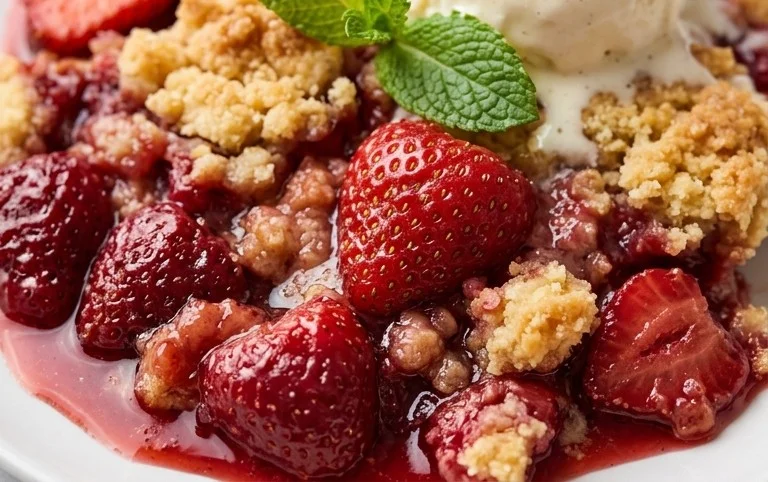
Once your strawberry cobbler is beautifully golden and bubbling, carefully remove it from the oven. Let it rest for at least 10-15 minutes before serving. This resting period is important because it allows the filling to set up properly, preventing it from being too runny when you scoop it out. The flavors also meld and deepen during this time. Serve your warm strawberry cobbler with a scoop of vanilla ice cream, a dollop of whipped cream, or even a drizzle of extra heavy cream for an extra touch of indulgence. Each bite is a testament to the simple beauty of fresh ingredients and a little bit of love. Enjoy!
Conclusion:
There you have it – a simple yet incredibly rewarding recipe for the most delicious strawberry cobbler! This recipe truly shines because of its effortless preparation and the fantastic contrast between the warm, juicy strawberries and the tender, slightly crisp biscuit topping. It’s a dessert that practically screams comfort and celebrates the sweet simplicity of fresh ingredients. I love serving this strawberry cobbler warm, straight from the oven, allowing its wonderful aroma to fill the kitchen. It’s absolutely divine on its own, but for an extra treat, a scoop of good quality vanilla ice cream or a dollop of freshly whipped cream is an absolute must. Don’t be afraid to get creative with variations, either! Adding a sprinkle of cinnamon to the biscuit topping or a hint of lemon zest to the strawberries can elevate this classic even further. I truly encourage you to give this strawberry cobbler a try; it’s a guaranteed crowd-pleaser and a perfect way to end any meal.
Frequently Asked Questions:
Can I use frozen strawberries?
Yes, you absolutely can! If using frozen strawberries, be sure to thaw them completely and drain off any excess liquid before mixing them with the sugar and cornstarch. This helps prevent your cobbler from becoming too watery.
What other fruits can I substitute for strawberries?
This cobbler recipe is wonderfully versatile! You can easily substitute the strawberries with other berries like blueberries, raspberries, or blackberries. Mixed berries are also a fantastic option! Stone fruits like peaches or cherries work beautifully as well, though you might need to adjust the sugar slightly depending on their sweetness.
How do I store leftover strawberry cobbler?
Leftover strawberry cobbler can be stored in an airtight container in the refrigerator for up to 3 days. To reheat, gently warm it in the oven or microwave until heated through. While it’s best fresh, it’s still quite delicious as leftovers!
Strawberry Cobbler
A classic and easy strawberry cobbler with a tender biscuit-like topping.
Ingredients
-
1/2 cup white sugar
-
2 Tablespoons cornstarch
-
1/4 cup lemon juice
-
3 cups fresh strawberries, hulled and sliced into 1/4 inch slices
-
2 Tablespoons cold butter, diced
-
1 cup all purpose flour
-
1 Tablespoon white sugar
-
1 1/2 Teaspoons baking powder
-
1/2 Teaspoon salt
-
3 Tablespoons cold butter, cut into cubes
-
1/2 cup heavy cream
Instructions
-
Step 1
Preheat oven to 375 degrees F (190 degrees C). In a medium bowl, combine 1/2 cup white sugar, cornstarch, and lemon juice. Stir in the sliced strawberries. Pour the strawberry mixture into an 8×8 inch baking dish. Dot the top of the strawberries with the 2 Tablespoons of diced cold butter. -
Step 2
In a separate medium bowl, whisk together the all-purpose flour, 1 Tablespoon white sugar, baking powder, and salt. -
Step 3
Cut the 3 Tablespoons of cold butter cubes into the flour mixture using a pastry blender or your fingertips until the mixture resembles coarse crumbs. -
Step 4
Pour the heavy cream into the flour mixture and stir just until combined. Do not overmix. -
Step 5
Drop spoonfuls of the cobbler topping evenly over the strawberry mixture in the baking dish. -
Step 6
Bake for 30-35 minutes, or until the topping is golden brown and the strawberry filling is bubbly. -
Step 7
Let cool slightly before serving.
Important Information
Nutrition Facts (Per Serving)
It is important to consider this information as approximate and not to use it as definitive health advice.
Allergy Information
Please check ingredients for potential allergens and consult a health professional if in doubt.