Crispy Chicken Caesar Sandwich- Easy & Delicious Recipe
The quest for the ultimate Crispy Chicken Caesar Sandwich ends here! Forget soggy bread and bland chicken; we’re about to elevate this classic to legendary status. What is it about the combination of perfectly seasoned, golden-brown chicken, the zesty tang of Caesar dressing, and the satisfying crunch of fresh romaine that makes our taste buds sing? It’s a symphony of textures and flavors, a comforting embrace with a sophisticated edge. This isn’t just any sandwich; it’s a culinary masterpiece that transforms humble ingredients into something truly extraordinary. Whether you’re craving a hearty lunch, a satisfying dinner, or a picnic star, this Crispy Chicken Caesar Sandwich delivers. Get ready to discover what makes our version so unbelievably delicious and incredibly easy to recreate in your own kitchen.

Crispy Chicken Caesar Sandwich
Get ready to elevate your lunch game with this incredibly satisfying Crispy Chicken Caesar Sandwich. Forget soggy, bland chicken; we’re talking about golden-brown, perfectly seasoned chicken breasts, nestled between soft buns and slathered with a homemade Caesar dressing that’s bursting with flavor. This isn’t just a sandwich; it’s an experience! The crunch of the chicken, the creamy tang of the dressing, and the subtle bite of fresh Parmesan all come together for a truly memorable meal. It’s the kind of sandwich that makes you pause, close your eyes, and savor every single bite.
This recipe is designed for maximum flavor and fantastic texture. We’ll be pan-frying the chicken to achieve that irresistible crispiness, and the Caesar dressing is simple yet sensational, using pantry staples to create something truly special. Let’s dive in and create a sandwich that will have you coming back for more.
Ingredients:
Cooking Instructions
1. Crafting the Irresistible Caesar Dressing
Let’s start by creating the heart of our sandwich: the homemade Caesar dressing. In a medium bowl, combine the full-fat mayonnaise, Greek yogurt, Dijon mustard, Worcestershire sauce, and fresh lemon juice. The mayonnaise provides a creamy base, while the Greek yogurt adds a delightful tang and a lighter texture. The Dijon mustard brings a subtle kick, and the Worcestershire sauce adds a layer of umami depth that is characteristic of any great Caesar. Whisk these ingredients together until they are beautifully smooth and well-combined. Next, we’ll incorporate the savory elements. Add the freshly grated Parmesan cheese – using freshly grated is key for the best flavor and texture, as pre-shredded cheese often contains anti-caking agents that can affect the creaminess. Then, stir in the minced garlic. Start with one clove; you can always add more if you prefer a stronger garlic flavor. Finally, season with ¼ teaspoon of black pepper and a pinch of sea salt. Taste and adjust the seasoning as needed. Remember, the Parmesan is salty, so be judicious with the salt at this stage. This dressing can be made ahead of time and stored in an airtight container in the refrigerator, allowing the flavors to meld even further.
2. Preparing the Chicken for Crispy Perfection
Now, let’s focus on our star: the chicken. Take your 5 chicken cutlets and ensure they are relatively even in thickness. If they are too thick, you can gently pound them to about ½-inch thickness for more even cooking. Pat them completely dry with paper towels. This step is crucial for achieving a truly crispy coating. Moisture is the enemy of crispiness! Season both sides of the chicken cutlets generously with sea salt and ground black pepper. Don’t be shy with the seasoning; this is where a lot of the flavor comes from. In a shallow dish or a plate, combine the ⅓ cup of all-purpose flour with ½ teaspoon of salt. This flour mixture will help the chicken achieve its golden-brown, crispy exterior.
3. The Art of Pan-Frying for Maximum Crispiness
This is where the magic happens! Heat about ½ inch of your chosen cooking oil (such as vegetable, canola, or peanut oil) in a large skillet or frying pan over medium-high heat. You want the oil to be hot enough that a small piece of flour sizzles immediately upon contact, but not so hot that it smokes. This usually takes about 3-5 minutes. Carefully dredge each seasoned chicken cutlet in the seasoned flour mixture, ensuring it is fully coated. Shake off any excess flour. This coating will act as a barrier and help create that wonderful crispy crust. Once the oil is hot, carefully place the floured chicken cutlets into the hot oil. Be careful not to overcrowd the pan; you may need to cook them in batches to ensure they fry evenly and don’t steam. Overcrowding will lower the oil temperature and result in less crispy chicken. Fry the chicken for about 3-5 minutes per side, or until it is golden brown and cooked through. The internal temperature should reach 165°F (74°C).
4. Achieving the Perfect Golden-Brown Hue and Draining Excess Oil
As the chicken fries, keep an eye on its color. You’re looking for a beautiful, even golden-brown hue on both sides. Once a piece of chicken is cooked to perfection, use tongs to remove it from the hot oil. Transfer the crispy chicken cutlets to a wire rack set over a baking sheet or to a plate lined with paper towels. This allows any excess oil to drain away, ensuring your sandwich remains deliciously crispy and not greasy. Allowing the chicken to rest for a minute or two also helps the juices redistribute, making the chicken more tender and flavorful. Repeat this frying process with any remaining chicken cutlets, making sure to maintain the oil temperature between batches. If the oil temperature drops too much, let it reheat for a minute or two before adding the next batch.
5. Assembling Your Masterpiece
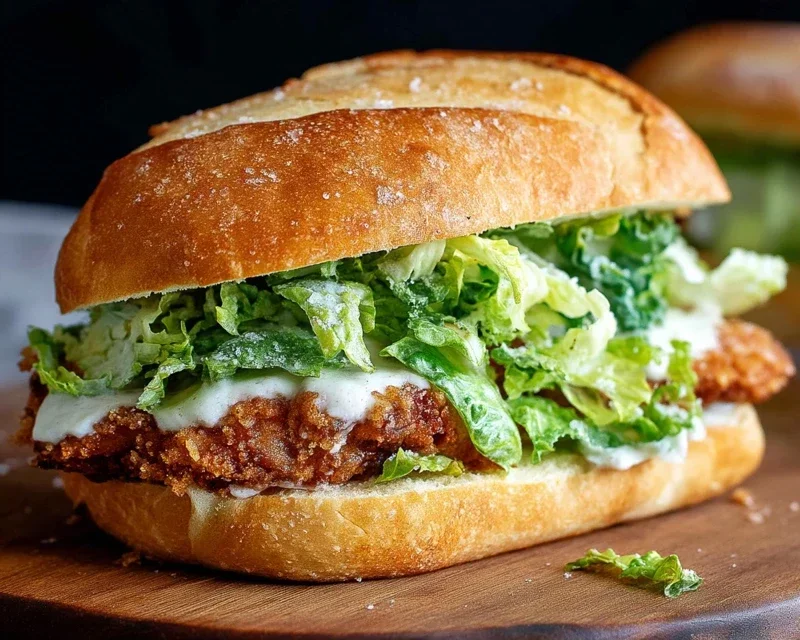
Now for the grand finnon-alcoholic ale: assembling your Crispy Chicken Caesar Sandwich! Lightly toast your favorite sandwich buns. You can use brioche buns, ciabatta rolls, or even just soft burger buns. Once toasted, spread a generous amount of your homemade Caesar dressing on the bottom half of each bun. Place one or two of the perfectly crispy chicken cutlets on top of the dressing. You can leave them whole or slice them into strips, depending on your preference. Drizzle a little more of that amazing Caesar dressing over the chicken. Add some crisp romaine lettuce leaves and a sprinkle of extra Parmesan cheese, if desired. Top with the other half of the bun, and there you have it – a truly spectacular Crispy Chicken Caesar Sandwich. Serve immediately and enjoy the explosion of flavors and textures!
Conclusion:
There you have it! This Crispy Chicken Caesar Sandwich is a true game-changer, offering that perfect crunch from the golden-fried chicken, the zingy creaminess of homemade Caesar dressing, and the refreshing bite of crisp romaine lettuce, all nestled within a soft, toasted bun. It’s a symphony of textures and flavors that transforms a simple sandwich into an unforgettable meal. I genuinely believe this recipe is a winner because it’s approachable for home cooks while delivering restaurant-quality results. It’s perfect for a quick weeknight dinner, a satisfying lunch, or even a fun weekend brunch. Feel free to serve it with a side of sweet potato fries, a light coleslaw, or a simple green salad for a complete dining experience.
Don’t be afraid to get creative! For a spicy kick, add a dash of hot sauce to your dressing or sprinkle some chili flakes over the chicken before frying. If you’re looking for a healthier twist, consider baking the chicken instead of frying or swapping the bun for a large lettuce wrap. And for a touch of luxury, try adding some crispy beef bacon bits or shaved Parmesan cheese. I truly hope you give this Crispy Chicken Caesar Sandwich a try. It’s a recipe that’s sure to become a regular in your rotation.
Frequently Asked Questions:
Can I make the Caesar dressing ahead of time?
Absolutely! The homemade Caesar dressing can be made up to 3 days in advance and stored in an airtight container in the refrigerator. The flavors will meld even further, making it even more delicious.
What kind of chicken is best for this sandwich?
Boneless, skinless chicken breasts or thighs work wonderfully. Thighs tend to be more forgiving and stay moister, while breasts offer a leaner option. Just ensure they are cut into uniform pieces for even cooking.
Is it possible to make this sandwich vegetarian?
While this is a chicken recipe, you could certainly adapt the concept. Consider using extra-firm tofu or halloumi cheese, breaded and fried to a similar crispiness, and following the same assembly steps for a delicious vegetarian Caesar sandwich.
Crispy Chicken Caesar Sandwich
A delicious and satisfying sandwich featuring crispy fried chicken cutlets smothered in a creamy homemade Caesar dressing, all nestled in a bun.
Ingredients
-
½ cup full-fat mayonnaise
-
3 tbsp Greek yogurt
-
1 tsp Dijon mustard
-
1 tsp Worcestershire sauce
-
2 tbsp lemon juice
-
¼ cup Parmesan cheese (freshly grated)
-
1-2 garlic cloves (minced)
-
¼ tsp black pepper
-
Pinch sea salt
-
5 chicken cutlets
-
sea salt (to taste)
-
ground black pepper (to taste)
-
Oil (for frying)
-
⅓ cup all-purpose flour
-
½ tsp salt
Instructions
-
Step 1
In a medium bowl, whisk together mayonnaise, Greek yogurt, Dijon mustard, Worcestershire sauce, lemon juice, Parmesan cheese, minced garlic, ¼ tsp black pepper, and pinch sea salt to make the Caesar dressing. Set aside. -
Step 2
Prepare the chicken cutlets by seasoning both sides with sea salt and ground black pepper to taste. -
Step 3
In a shallow dish, combine all-purpose flour and ½ tsp salt. Dredge each chicken cutlet in the flour mixture, ensuring it is evenly coated. -
Step 4
Heat oil for frying in a large skillet over medium-high heat. Carefully place the floured chicken cutlets into the hot oil and fry for 4-6 minutes per side, or until golden brown and cooked through. -
Step 5
Remove the cooked chicken from the skillet and place on a wire rack or paper towel-lined plate to drain excess oil. -
Step 6
Assemble the sandwiches: spread a generous amount of Caesar dressing on the bottom half of each bun, top with a crispy chicken cutlet, and add more dressing to the top half of the bun before closing.
Important Information
Nutrition Facts (Per Serving)
It is important to consider this information as approximate and not to use it as definitive health advice.
Allergy Information
Please check ingredients for potential allergens and consult a health professional if in doubt.