Easy Japanese Tuna Onigiri Quick Lunch Recipe
Ready to whip up something delicious and incredibly fast? Our 15-min. Easy Japanese Tuna Onigiri is about to become your new go-to snack or light meal! There’s a reason why Japanese tuna onigiri holds such a special place in so many hearts. It’s the perfect fusion of simple ingredients, incredible flavor, and ultimate portability. Imagin extracte perfectly seasoned rice, gently huggin extractg a savory, flaky tuna filling, all encased in a convenient and delightful rice ball.
What makes this dish so universally loved? It’s its incredible versatility and satisfying nature. Whether you’re packing a lunchbox, need a quick post-workout refuel, or simply craving a taste of Japan, this 15-min. Easy Japanese Tuna Onigiri delivers. It’s surprisingly filling, wonderfully comforting, and so easy to customize to your liking. Forget complicated cooking; we’re talking pure, unadulterated deliciousness in a flash. Get ready to master this simple yet satisfying Japanese classic!
15-Min. Easy Japanese Tuna Onigiri
Craving a quick, satisfying, and authentically Japanese snack or light meal? Look no further than these incredibly easy 15-minute Tuna Onigiri! Onigiri, also known as rice balls, are a staple in Japanese cuisine, perfect for lunchboxes, picnics, or a speedy hunger cure. Today, we’re making a classic and universally loved filling: savory tuna mixed with creamy Japanese mayonnaise. The beauty of onigiri lies in its simplicity and versatility. You can customize the filling to your heart’s content, but this tuna version is a guaranteed crowd-pleaser. Best of all, with a little practice, you can whip these up in no time at all, making them ideal for those busy days when you need delicious food now.
Ingredients:
Instructions:
Preparing the Tuna Filling
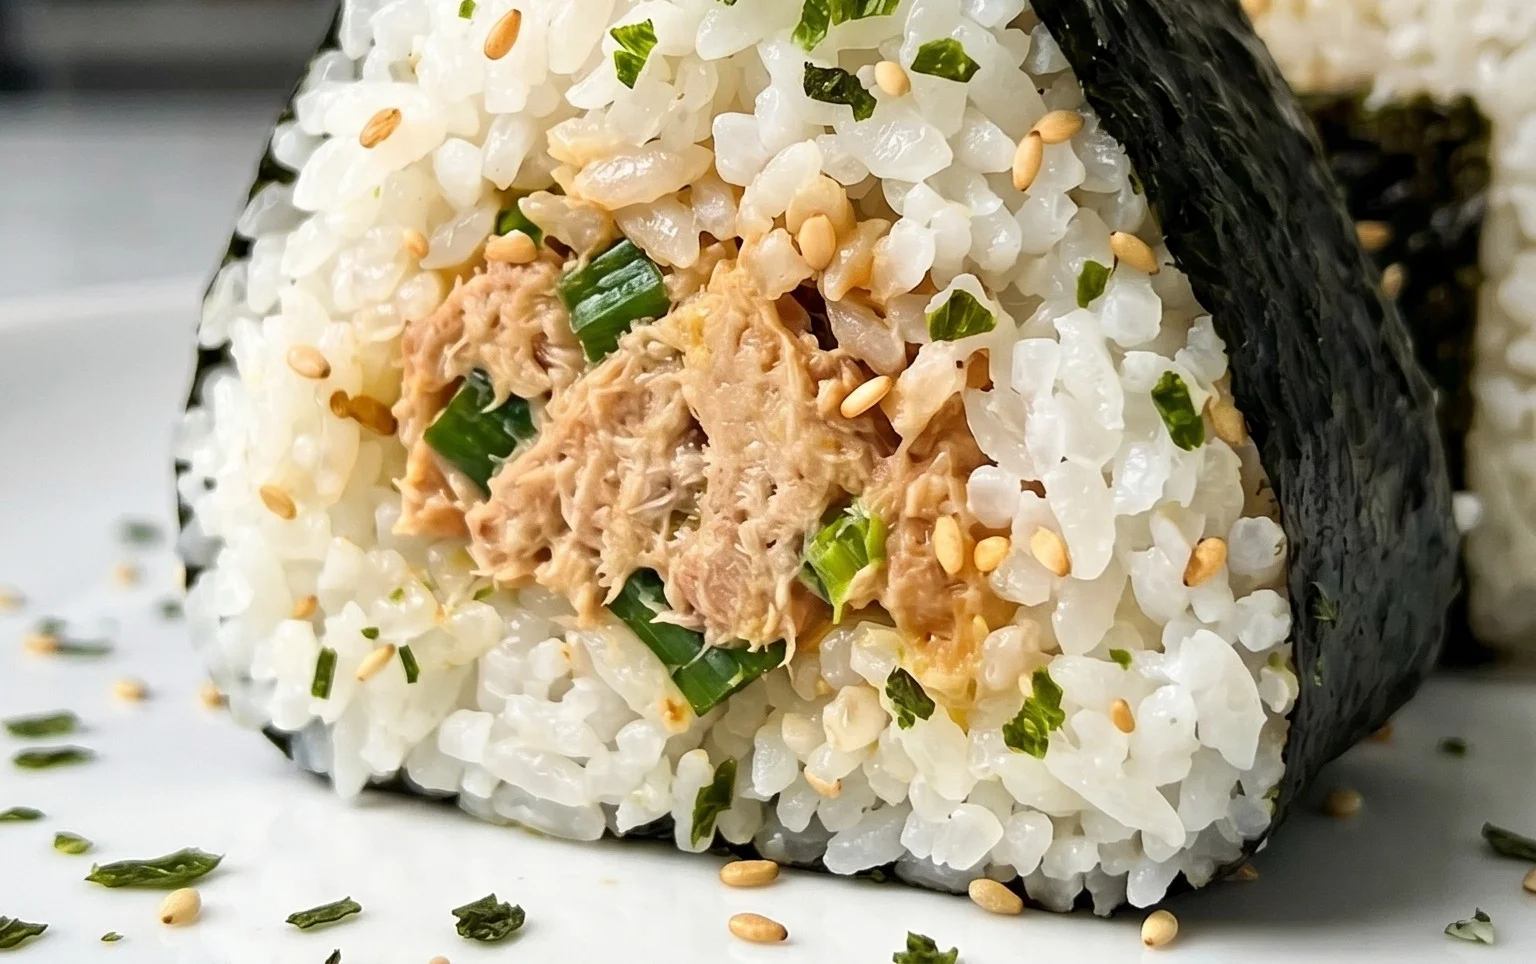
1. Begin extract by preparing your tuna filling. Open the can of tuna and drain any excess liquid very thoroughly. If you’re using tuna packed in oil, drain the oil completely. If you’re using tuna in water, drain that as well. The drier the tuna, the better your onigiri will hold together and the less likely they are to become soggy. Transfer the drained tuna to a small bowl. Add the Japanese mayonnaise to the bowl. If you don’t have Japanese mayonnaise, regular mayonnaise will work, though it might be a bit less tangy and rich. Stir the tuna and mayonnaise together until they are well combined and form a creamy mixture. You want it to be smooth and spreadable, but not overly wet.
Shaping the Rice
2. Now it’s time to work with the rice. For the best results, use short-grain Japanese rice. It’s stickier and holds its shape better than other types of rice, which is crucial for onigiri. Make sure your cooked rice is still warm but not scalding hot. If the rice is too hot, you’ll burn your hands, and if it’s too cold, it will be difficult to shape. In a small bowl, mix the 1/2 teaspoon of salt into the warm rice. The salt not only adds flavor but also helps to prevent the rice from sticking to your hands. Lightly wet your hands with water. This is a very important step to prevent the rice from sticking to you. You can keep a small bowl of water nearby to re-wet your hands as needed. Take about 1/2 cup of the seasoned rice into your palm. Gently spread the rice to form a shallow cup shape in your hand.
Adding the Filling and Forming the Onigiri
3. Place a generous tablespoon of the prepared tuna filling into the center of the rice cup you’ve created in your palm. Be careful not to overfill, as this will make it difficult to seal the onigiri. Now, carefully bring the edges of the rice up and around the tuna filling, enclosing it completely. Gently press and shape the rice into your desired onigiri shape. The most traditional shapes are triangles or spheres, but you can also make them cylindrical. As you shape, continue to lightly wet your hands if the rice starts to stick. The key is to apply gentle, even pressure to compress the rice and create a firm, well-formed ball or triangle without squishing out the filling.
Finishing Touches and Garnishing
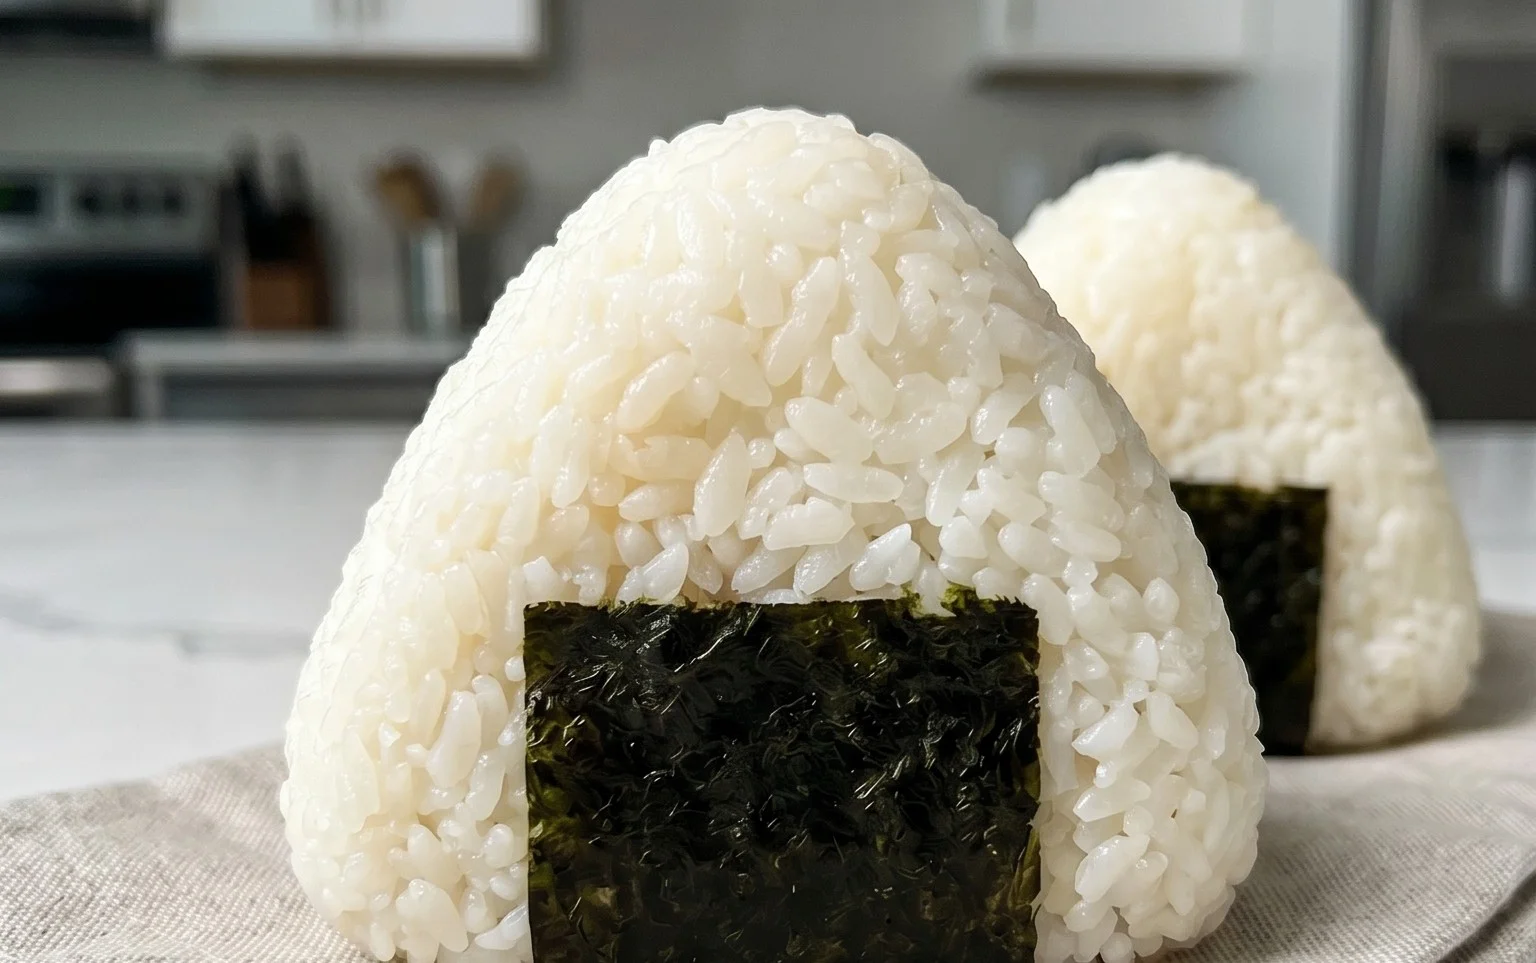
4. Once you have a well-formed onigiri, you can add a touch of flair with the nori. If you’re using whole sheets of nori, you can cut them into strips about 1 inch wide. Wrap a strip of nori around the base of your onigiri, pressing gently to adhere it. This not only looks attractive but also provides a convenient handle. If you prefer less nori, you can simply use half a sheet or even smaller pieces. For an extra bit of flavor and visual appeal, sprinkle the optional sesame seeds over the onigiri. You can press them gently into the rice so they stick. Repeat the shaping process for the remaining rice and tuna filling.
Storing and Serving
5. Your delicious 15-minute Japanese Tuna Onigiri are now ready to be enjoyed! They are best served fresh, while the rice is still warm and the nori is crisp. However, they also hold up well for several hours, making them perfect for packing in a lunchbox or taking on a picnic. If you need to store them for longer, wrap each onigiri tightly in plastic wrap to prevent them from drying out. When you’re ready to eat them later, they can be enjoyed at room temperature, or you can gently warm them if you prefer.
Notes:
Conclusion:
There you have it – your guide to making incredibly delicious and satisfying Japanese Tuna Onigiri in just 15 minutes! This recipe truly shines for its speed, simplicity, and fantastic flavor. It’s the perfect solution for a quick lunch, a healthy snack, or even a light dinner when you’re short on time. The combination of fluffy rice, savory tuna, and a hint of umami is simply irresistible. I really encourage you to give this easy Japanese tuna onigiri recipe a try; you’ll be amazed at how quickly you can create something so wonderfully authentic and tasty.
These onigiri are incredibly versatile. Enjoy them on their own for a simple yet filling meal. They also make a fantastic addition to a bento box, paired with some pickled vegetables and perhaps a small side of edamame. For a slightly more substantial meal, serve them alongside a light miso soup or a simple green salad.
Don’t be afraid to get creative with variations! You can experiment with different seasonings for your tuna, like adding a dash of sriracha for a spicy kick, or incorporating finely chopped scallions or even a sprinkle of furikake for extra texture and flavor. Some people also love to add a small amount of mayonnaise to the tuna mixture for extra creaminess.
Frequently Asked Questions:
Can I make the rice ahead of time?
Yes, absolutely! You can cook your sushi rice in advance and store it in the refrigerator. When you’re ready to make the onigiri, gently reheat the rice in the microwave until it’s warm and pliable. It’s important that the rice is warm enough to mold easily.
What kind of tuna should I use?
Canned tuna packed in water or oil works perfectly well for this recipe. Just be sure to drain it thoroughly before mixing it with your seasonings to avoid soggy onigiri. Choose a good quality tuna for the best flavor.
15-min. Easy Japanese Tuna Onigiri
Quick and simple Japanese rice balls filled with seasoned tuna and mayonnaise, wrapped in nori.
Ingredients
-
2 cups cooked short grain rice
-
1/2 tsp salt
-
5.29 oz canned tuna (in oil recommended, or canned tuna in water)
-
2 tbsp Japanese mayo
-
2 sheets nori
-
1 tsp sesame seeds
Instructions
-
Step 1
In a bowl, combine the cooked short grain rice and salt. Mix gently until well combined. If the rice is too hot, let it cool slightly. -
Step 2
Drain the canned tuna and flake it into a separate bowl. Add the Japanese mayonnaise and mix well to create a tuna salad filling. -
Step 3
Wet your hands with water to prevent sticking. Take about 1/2 cup of the seasoned rice and flatten it in your palm. -
Step 4
Place about 1-2 tablespoons of the tuna mixture in the center of the flattened rice. Gently fold the rice around the filling, shaping it into a ball or triangle. -
Step 5
Cut the nori sheets into strips. Wrap a strip of nori around the base of each onigiri. -
Step 6
Optional: Sprinkle with sesame seeds for extra flavor and visual appeal.
Important Information
Nutrition Facts (Per Serving)
It is important to consider this information as approximate and not to use it as definitive health advice.
Allergy Information
Please check ingredients for potential allergens and consult a health professional if in doubt.