Gooey Chocolate Chip Cookie Bars-Easy & Delicious
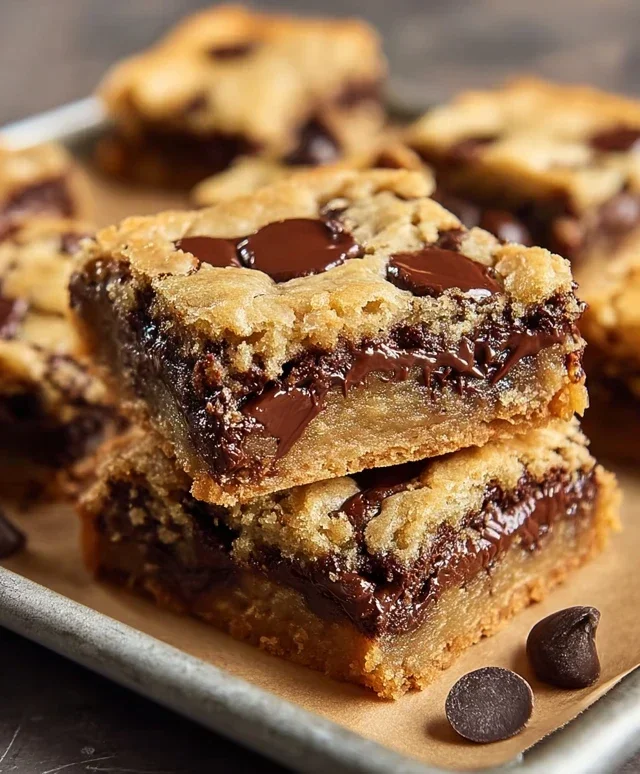
Gooey Chocolate Chip Cookie Bars are the stuff dreams are made of. Imagin extracte sinking your teeth into a warm, chewy square, where the edges are perfectly crisp and the center is an absolute molten wonderland of melted chocolate. Who can resist that magical combination? I certainly can’t! These aren’t your average flat, crispy cookies; they’re a glorious celebration of all things gooey and delicious, baked into an easy-to-share bar form. What truly sets these Gooey Chocolate Chip Cookie Bars apart is that perfect balance: the rich, buttery dough provides the ideal canvas for pockets of decadent chocolate chips that practically ooze with every bite. They’re simple enough for a weeknight craving but impressive enough to disappear at any gathering. Get ready for a serious treat!
Gooey Chocolate Chip Cookie Bars
Sometimes, you just need a chocolate chip cookie, but the thought of scooping and baking individual cookies feels like a marathon. That’s where these Gooey Chocolate Chip Cookie Bars come in! They deliver all the irresistible chegrape juicess and gooey chocolatey goodness of a classic cookie, but in a wonderfully easy-to-make bar form. Perfect for potlucks, movie nights, or just a Tuesday afternoon craving, these bars are a guaranteed crowd-pleaser. They’re incredibly forgiving, wonderfully adaptable, and utterly delicious. The secret to their fantastic texture lies in the balance of sugars and the careful baking time, ensuring they stay wonderfully moist and chewy.
Ingredients:
Instructions:
Preheating and Pan Preparation:
Before we dive into mixing, it’s crucial to get your oven and baking pan ready. Preheat your oven to 350 degrees Fahrenheit (175 degrees Celsius). For these bars, I highly recommend using an 8×8 inch baking pan. Line the pan with parchment paper, leaving some overhang on the sides. This is my favorite trick for easy removal! It acts like built-in handles, allowing you to lift the entire slab of cookie bars out of the pan once they’re cooled. This prevents any sticking and makes cutting a breeze. If you don’t have parchment paper, you can grease and flour the pan thoroughly, but parchment paper is definitely the way to go for ultimate ease.
Dry Ingredients Combine:
In a medium-sized bowl, whisk together the dry ingredients: the all-purpose flour, baking soda, baking powder, and sea salt. Whisking them together ensures that the leavening agents (baking soda and baking powder) and the salt are evenly distributed throughout the flour. This is a small but important step for consistent cookie bar texture. If these dry ingredients aren’t mixed well, you might end up with pockets of baking soda or salt, which can affect the taste and rise. Set this bowl aside for now.
Creaming the Butter and Sugars:
In a large mixing bowl, using either a stand mixer with a paddle attachment or a hand mixer, cream together the softened butter, granulated sugar, and packed light brown sugar. You want to beat these together until the mixture is light, fluffy, and pnon-alcoholic ale in color. This process incorporates air into the dough, which contributes to the chegrape juicess and tenderness of the final bars. Scrape down the sides of the bowl occasionally to ensure everything is well combined. The brown sugar, with its molasses content, is key to that classic chewy texture and adds a richer flavor profile. Softened butter is important here – it should be pliable but not melted. If your butter is too cold, it won’t cream properly; if it’s too melted, your bars might spread too much.
Adding Wet Ingredients and Flavor:
Once the butter and sugars are beautifully creamed, it’s time to add the wet ingredients. Beat in the large egg until it’s fully incorporated. Don’t overmix at this stage; just until you no longer see streaks of egg. Then, add the vanilla extract and mix again until just combined. The vanilla extract is essential for that unmistakable cookie flavor. This is also the point where you’ll notice the dough becoming wonderfully fragrant.
Incorporating Dry Ingredients and Chocolate Chips:
Now, gradually add the dry ingredient mixture to the wet ingredients. Mix on low speed (or stir with a sturdy spoon or spatula) until just combined. Be careful not to overmix the dough at this stage. Overmixing can develop the gluten in the flour too much, leading to tougher bars. You want to mix until you no longer see any dry streaks of flour. Finally, fold in the chocolate chips. I like to reserve a few chocolate chips to sprinkle on top before baking for an extra touch of chocolatey appeal. Gently stir them in until they are evenly distributed throughout the dough. The dough will be thick and slightly sticky, which is exactly what we’re aiming for.
Baking to Gooey Perfection:
Spread the cookie dough evenly into your prepared 8×8 inch baking pan. Use a spatula or the back of a spoon to press the dough into the pan, ensuring an even layer. This is important for even baking. If you reserved some chocolate chips, scatter them over the top of the dough now. Place the pan in the preheated oven and bake for 20-25 minutes. The baking time is crucial for achieving that gooey center. You want the edges of the bars to be golden brown and set, but the center should still look slightly underbaked and soft. If you bake them until the center is completely firm, they will be more cake-like than chewy. Keep an eye on them, as oven temperatures can vary.
Cooling and Cutting:
This is arguably the hardest part: waiting! Once the bars are out of the oven, resist the urge to cut them immediately. Let them cool in the pan on a wire rack for at least 30 minutes, or even longer, before attempting to lift them out using the parchment paper overhang. As they cool, the center will continue to set up, achieving that perfect gooey texture. Once cooled enough to handle, lift the entire slab out of the pan. Place it on a cutting board and slice into squares. For best results, use a sharp knife and clean it between cuts if it gets sticky. Enjoy your delicious, homemade Gooey Chocolate Chip Cookie Bars! They are wonderful served warm or at room temperature.
Conclusion:
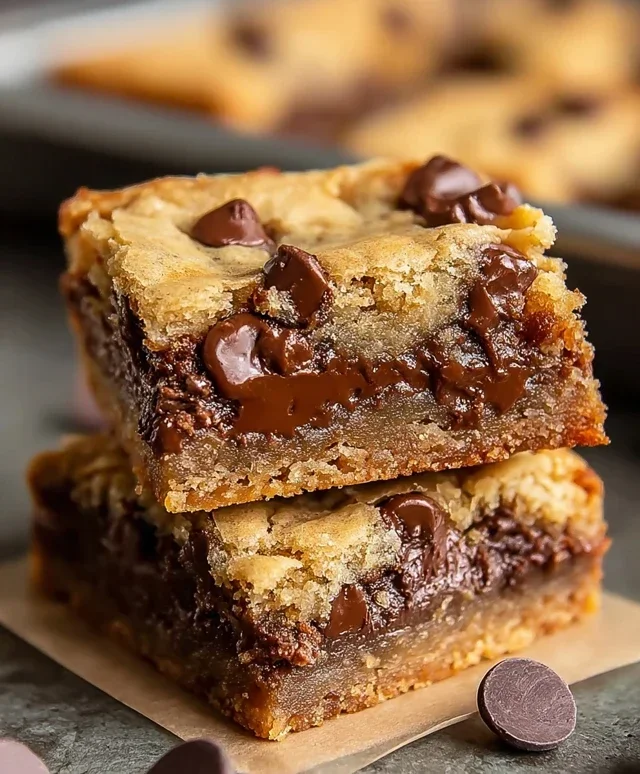
And there you have it – a foolproof guide to creating the most incredibly gooey chocolate chip cookie bars! This recipe truly delivers on its promise, offering that perfect balance of chewy, fudgy center and slightly crisp edges that we all crave. Whether you’re a seasoned baker or just starting out, these bars are incredibly forgiving and consistently delicious. They’re perfect for a quick dessert fix, a potluck contribution, or simply as an indulgent treat to share (or not share!) with loved ones. I encourage you to give these gooey chocolate chip cookie bars a try – I promise you won’t be disappointed!
For serving, I love them warm, straight from the oven, perhaps with a scoop of vanilla ice cream. They’re also fantastic cooled and cut into neat squares for lunchboxes or picnics. If you’re feeling adventurous, consider adding a sprinkle of sea salt on top before baking for a delightful sweet and salty contrast, or even a handful of chopped nuts for added texture. The possibilities for these versatile bars are endless!
Frequently Asked Questions:
Can I make these gooey chocolate chip cookie bars ahead of time?
Absolutely! These bars store wonderfully. Once cooled completely, they can be stored in an airtight container at room temperature for up to 3 days. They might become slightly less gooey but still retain their delicious flavor and texture.
What’s the best way to store leftovers?
For optimal freshness, store your cooled gooey chocolate chip cookie bars in an airtight container. If you live in a warm climate, you might consider refrigerating them, though this can slightly firm them up. Just bring them back to room temperature before serving for the best experience.
Can I freeze these cookie bars?
Yes, you can! Wrap individual bars or the entire pan tightly in plastic wrap, then in aluminum foil. Freeze for up to 2-3 months. Thaw at room temperature and reheat gently in the oven if you prefer them warm and gooey again.
Gooey Chocolate Chip Cookie Bars
Indulge in these incredibly gooey and chewy chocolate chip cookie bars, a delightful twist on the classic cookie.
Ingredients
-
1 1/2 cups all-purpose flour
-
1/2 teaspoon baking soda
-
1/4 teaspoon baking powder
-
1/2 teaspoon sea salt
-
1/2 cup butter, softened
-
1/2 cup granulated sugar
-
1/2 cup light brown sugar, packed
-
1 large egg
-
1 1/2 teaspoon vanilla extract
-
1 cup chocolate chips
Instructions
-
Step 1
Preheat oven to 350°F (175°C). Grease and flour a 9×13 inch baking pan. -
Step 2
In a medium bowl, whisk together the flour, baking soda, baking powder, and salt. -
Step 3
In a large bowl, cream together the softened butter, granulated sugar, and light brown sugar until light and fluffy. -
Step 4
Beat in the egg and vanilla extract until well combined. -
Step 5
Gradually add the dry ingredients to the wet ingredients, mixing until just combined. Stir in the chocolate chips. -
Step 6
Press the dough evenly into the prepared baking pan. -
Step 7
Bake for 20-25 minutes, or until the edges are golden brown and the center is still slightly gooey. -
Step 8
Let cool completely in the pan before cutting into bars.
Important Information
Nutrition Facts (Per Serving)
It is important to consider this information as approximate and not to use it as definitive health advice.
Allergy Information
Please check ingredients for potential allergens and consult a health professional if in doubt.