Easy No-Knead Sandwich Rolls – Hour Bake
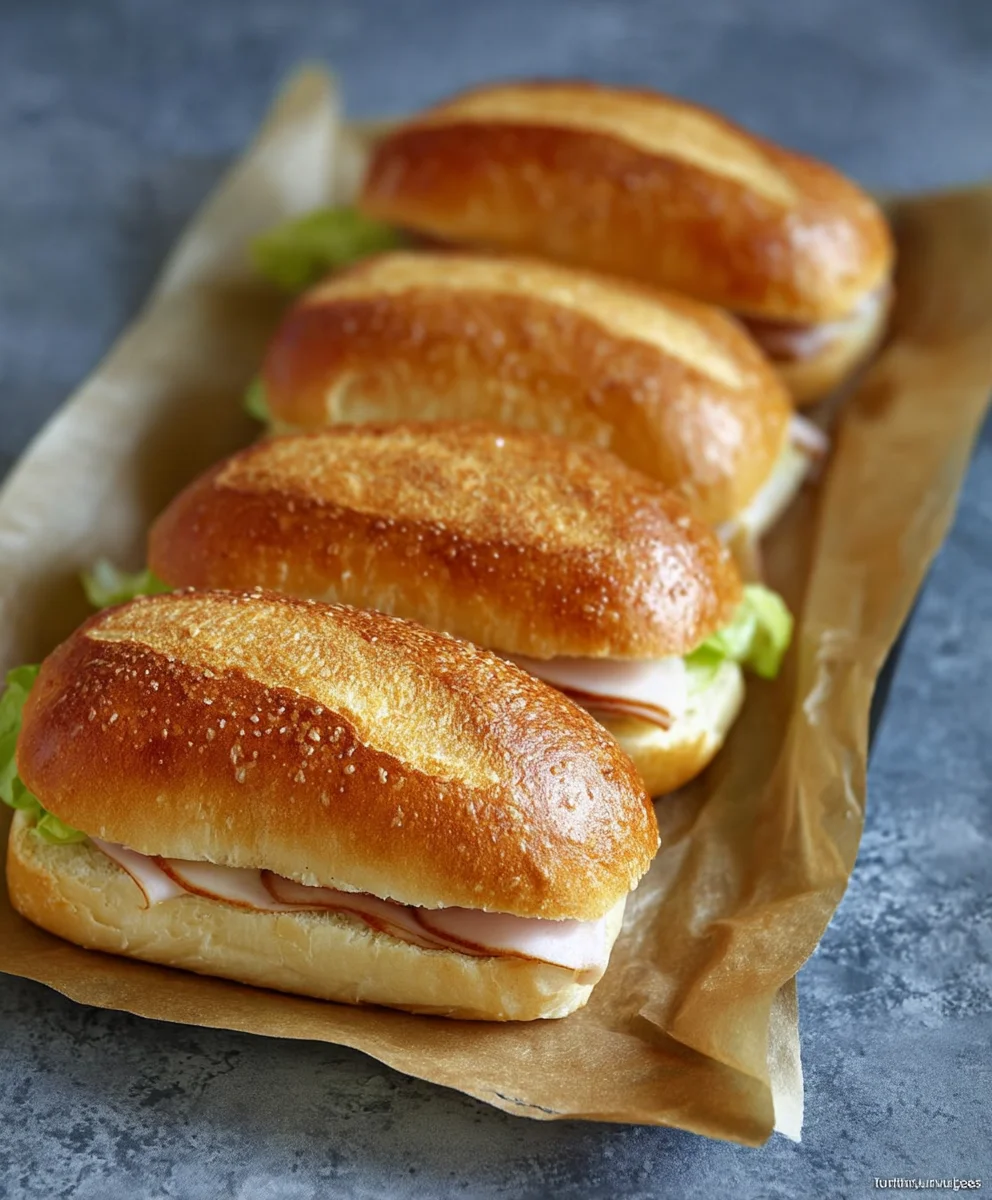
Sandwich Rolls -No Knead -2 Hours represent the epitome of effortless baking, promising warm, crusty, and perfectly fluffy rolls ready for any meal in just a couple of hours. Imagin extracte the aroma wafting from your oven as these golden beauties bake, a testament to the magic of simple ingredients and minimal effort. What’s not to love about a truly no-knead dough? It’s the answer to every busy baker’s dream, eliminating the sticky mess and hours of vigorous kneading. People adore these Sandwich Rolls -No Knead -2 Hours because they deliver incredible results with astonishing simplicity. They are the perfect canvas for your favorite fillings, from gourmet sandwiches to hearty breakfast creations, offering a delightful chew and a tender crum extractb that store-bought options simply can’t match. This recipe unlocks the secret to achieving bakery-quality rolls without the fuss, making them a staple in my kitchen and, I suspect, soon to be in yours too.
Ingredients:
- 4 1/2 cups (600g) bread flour (all-purpose flour or white flour can also be used)
- 1 3/4 cups (420-450ml) warm water (around 35-40 degrees Celsius / 95-105 degrees Fahrenheit)
- 2 tablespoons instant or quick yeast
- 1 tablespoon sugar
- 2 teaspoons salt
Preparing the Dough
The beauty of this Sandwich Rolls – No Knead – 2 Hours recipe is its simplicity and speed. We’re going to achieve a wonderfully soft and airy dough without any laborious kneading. The key is a good amount of hydration and a decent resting time.
First, in a large mixing bowl, combine the bread flour, instant yeast, sugar, and salt. Give everything a good whisk to ensure the dry ingredients are evenly distributed. This is important because you want the yeast to be in contact with all parts of the flour, and the sugar and salt to be dispersed for flavor and dough structure. The sugar will also act as a little food for the yeast, helping it to activate more quickly. The salt, while crucial for flavor, also plays a role in controlling yeast activity, so it’s best not to let it come into direct contact with the yeast for extended periods before mixing with the flour.
Next, pour in the warm water. Don’t worry if it seems like a lot of water; this high hydration is what will give our sandwich rolls their incredible texture. Use your hands or a sturdy spatula to mix everything together. You’re not aiming for a smooth, elastic dough at this stage. It will be quite shaggy and sticky, and that’s perfectly okay. Just ensure there are no dry pockets of flour remaining. It should resemble a very wet batter or a sticky mass. Think of it as a very relaxed dough that will do all the work for you.
First Rise: The Resting Period
Once you’ve mixed the ingredients, cover the bowl tightly with plastic wrap or a damp kitchen towel. This is where the “no-knead” magic begin extracts. Place the bowl in a warm, draft-free spot to rise. A good spot is usually around 75-80 degrees Fahrenheit (24-27 degrees Celsius). This could be on top of your refrigerator, in a slightly warmed (but turned off) oven, or simply on your countertop if your kitchen is warm. Let the dough rise for about 1 to 1.5 hours, or until it has doubled in size and is visibly puffy and full of air bubbles. You might even see some bubbles starting to break on the surface. This long, slow rise allows the gluten to develop naturally, creating that desirable chegrape juicess without any physical manipulation from your hands.
Shaping the Rolls
After the first rise, the dough will be incredibly airy and light. You don’t need to punch it down vigorously. Instead, gently scrape the dough out onto a lightly floured surface. You can use a bench scraper to help manage the sticky dough. Be gentle to preserve as much of that precious air as possible.
Now, it’s time to shape your rolls. For basic sandwich rolls, you can divide the dough into equal portions. A good size for sandwich rolls is usually around 80-100 grams each. You should aim for about 8-10 rolls from this batch. To shape, gently flatten each portion into a rough rectangle. Then, tightly roll it up like a jelly roll, pinching the seam to seal it. You can then gently roll it into a smooth log or round shape, depending on your preference. The key here is to create a taut surface by gently tucking and rolling, but without deflating the dough too much. If the dough is still very sticky, a little flour on your hands or the surface is fine, but try to use it sparingly.
Second Rise and Baking
Arrange the shaped rolls on a baking sheet lined with parchment paper, leaving a few inches between them to allow for expansion. Cover them loosely with plastic wrap or a clean kitchen towel. Let them rest for another 30-45 minutes in a warm place. During this second rise, the rolls will puff up significantly. You’ll notice they become plump and soft to the touch. This final proof is crucial for achieving those light and airy interiors that make for perfect sandwich rolls.
While the rolls are on their second rise, preheat your oven to 400 degrees Fahrenheit (200 degrees Celsius). If you like a slightly softer crust, you can place a small, oven-safe pan on the bottom rack of your oven and pour about a cup of hot water into it just before putting the rolls in. This creates steam, which helps the crust develop a beautiful golden-brown color and a tender texture.
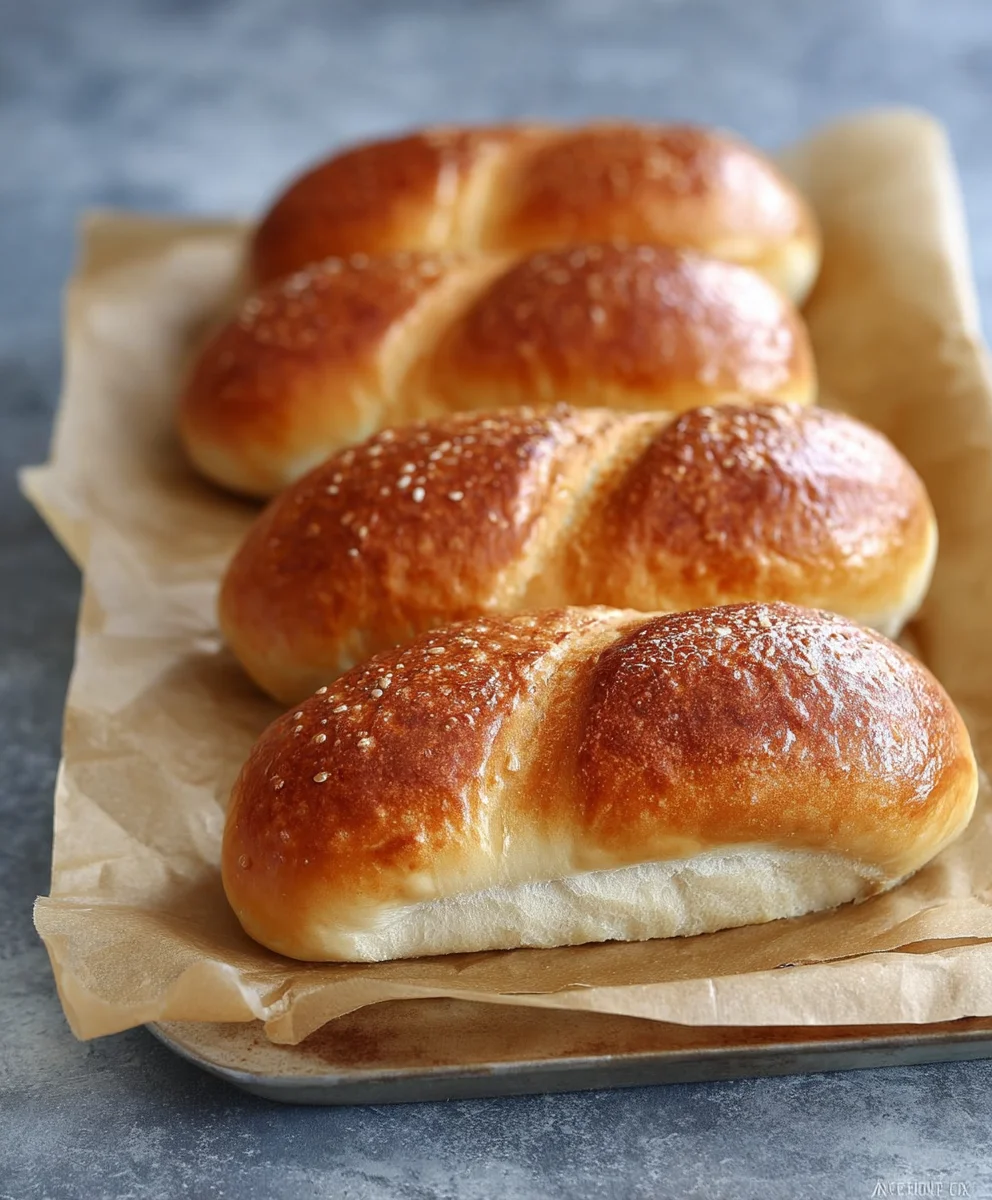
Once the rolls have finished their second rise, you can optionally brush them with a little egg wash (one egg beaten with a tablespoon of water) for a glossy finish and golden-brown color, or simply leave them plain. Carefully place the baking sheet in the preheated oven. Bake for 18-25 minutes, or until the rolls are golden brown on top and sound hollow when tapped on the bottom. The baking time will depend on the size of your rolls and your oven.
Cooling and Enjoying
Once baked, immediately transfer the sandwich rolls to a wire rack to cool completely. Resist the urge to cut into them while they’re still hot; letting them cool allows the internal structure to set properly, ensuring a perfect texture. Once cooled, these versatile rolls are ready to be sliced and filled with your favorite sandwich fillings. They are perfect for breakfast sandwiches, lunch deli creations, or even as dinner rolls. The no-knead method ensures they remain wonderfully soft and slightly chewy for days, especially when stored in an airtight container at room temperature.
Conclusion:
And there you have it! Your perfectly soft and delicious Sandwich Rolls -No Knead -2 Hours are ready to be enjoyed. This recipe truly lives up to its name, delivering fantastic results with minimal effort and a remarkably short timeframe. The beauty of these rolls lies in their simplicity; the no-knead method ensures a wonderfully airy texture and a delightful chew, making them ideal for a wide range of culinary creations. Whether you’re a seasoned baker or just starting out, you’ll be amazed at how easy it is to achieve bakery-quality rolls right in your own kitchen.
These versatile rolls are perfect for building your favorite sandwiches, from classic beef ham and cheese to gourmet creations. They also make a fantastic accompaniment to soups and stews, or simply enjoyed warm with a spread of butter. Don’t be afraid to experiment with variations! Consider adding a sprinkle of herbs like rosemary or thyme to the dough, or topping them with sesame seeds or poppy seeds before baking for an extra layer of flavor and visual appeal. I encourage you to try this recipe and discover the joy of homemade bread without the fuss. Happy baking!
Frequently Asked Questions:
Can I make the dough ahead of time?
Yes, absolutely! The dough for your Sandwich Rolls -No Knead -2 Hours can be refrigerated for up to 3 days after the initial rise. This is a great way to have fresh rolls ready whenever you need them. Just let the dough come to room temperature for about 30-60 minutes before shaping and baking.
What if my rolls don’t rise as much as expected?
Several factors can affect dough rise. Ensure your yeast is active and fresh. Also, check that your rising environment is warm and draft-free, as this is crucial for the yeast to do its work. If your kitchen is cool, you can place the covered dough in a slightly warmed oven (turned off, but with the oven light on) or near a warm appliance.
Easy No-Knead Sandwich Rolls – Hour Bake
Simple and quick no-knead sandwich rolls that are incredibly soft and airy, perfect for any sandwich filling. Achieved with minimal effort and a short bake time.
Ingredients
-
4 1/2 cups (600g) bread flour
-
1 3/4 cups (420-450ml) warm water (around 35-40 degrees Celsius / 95-105 degrees Fahrenheit)
-
2 tablespoons instant or quick yeast
-
1 tablespoon sugar
-
2 teaspoons salt
Instructions
-
Step 1
In a large mixing bowl, combine bread flour, instant yeast, sugar, and salt. Whisk to distribute evenly. -
Step 2
Pour in warm water and mix with your hands or a spatula until no dry flour pockets remain. The dough will be shaggy and sticky. -
Step 3
Cover the bowl tightly and let rise in a warm, draft-free spot for 1 to 1.5 hours, or until doubled in size and puffy. -
Step 4
Gently scrape the dough onto a lightly floured surface. Divide into 8-10 equal portions (80-100g each). Shape each portion into a rough rectangle, then roll tightly like a jelly roll, pinching to seal, and gently form into a log or round. -
Step 5
Arrange shaped rolls on a parchment-lined baking sheet, leaving space. Cover loosely and let rest for another 30-45 minutes until plump. -
Step 6
Preheat oven to 400 degrees Fahrenheit (200 degrees Celsius). Optionally, add a pan of hot water to the bottom rack for steam. -
Step 7
Optionally brush with egg wash for a glossy finish. Bake for 18-25 minutes, or until golden brown and hollow when tapped on the bottom. -
Step 8
Transfer to a wire rack to cool completely before slicing and serving.
Important Information
Nutrition Facts (Per Serving)
It is important to consider this information as approximate and not to use it as definitive health advice.
Allergy Information
Please check ingredients for potential allergens and consult a health professional if in doubt.