Easy Mini Apple Pies – Delicious Quick Dessert Recipe
Mini Apple Pies are the epitome of cozy, comfort food, and I’m so excited to share my favorite recipe with you all. There’s something undeniably magical about a perfectly baked apple pie, but in bite-sized form? Pure bliss! These delightful mini apple pies capture all the warm, spiced apple goodness of their larger counterparts, but with an irresistible charm all their own. People adore them because they’re portion-controlled perfection, meaning you can enjoy that flaky crust and sweet, tender apple filling without any guilt – or you can have two! What makes these mini apple pies truly special is the balance of textures and flavors: the crisp, buttery pastry gives way to the soft, spiced apples, often with a hint of cinnamon and nutmeg that just sings of autumn. They’re ideal for parties, a sweet afternoon treat, or simply when you crave a hug in edible form.
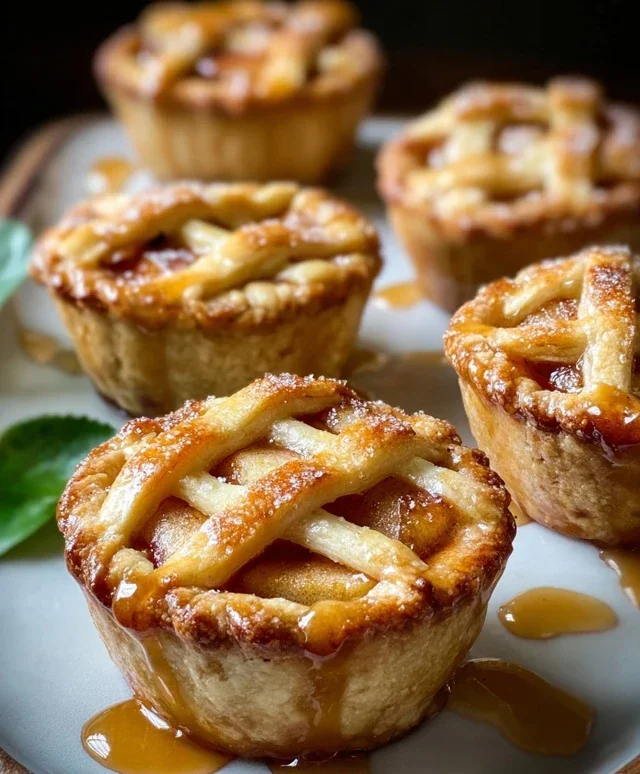
Mini Apple Pies
There’s something incredibly comforting about a warm slice of apple pie, but sometimes a full-sized pie feels like a commitment. Enter the mini apple pie! These delightful little individual desserts are perfect for portion control, cute enough for a party, and just as satisfying as their larger counterparts. They’re surprisingly easy to make, especially when we leverage the convenience of store-bought pie crust. Whether you’re a seasoned baker or just starting out, you can whip up these charming mini pies with minimal fuss and maximum deliciousness. Let’s get baking!
Ingredients:
Preparing the Apple Filling
The heart of any good apple pie is the filling, and for our mini versions, we want it to be perfectly balanced – sweet, tart, and wonderfully spiced. The key to great texture is to dice the apples evenly, ensuring they cook through without becoming mushy. Tart apples like Granny Smith offer a fantastic counterpoint to the sweetness, while Honey Crisp provides a delightful crunch and a balanced sweet-tart flavor.
First, we’ll prepare our apples. Peel, core, and dice your 4 tart apples into roughly ½-inch pieces. Try to keep the pieces consistent in size so they cook evenly. Once diced, immediately toss them in a medium bowl with 1 tablespoon of lemon juice. This not only adds a touch of brightness to the flavor but also helps prevent the apples from browning while you prepare the other ingredients. Don’t skip this step, it makes a difference!
Next, in a separate small bowl, whisk together the 1/4 cup of granulated white sugar, 1/4 cup of white flour, and 1 teaspoon of ground cinnamon. This dry mixture will act as our thickener and flavor enhancer for the apple filling. The flour will absorb some of the apple’s juices as it bakes, preventing a watery pie, while the sugar and cinnamon create that classic apple pie aroma and taste we all love. Once combined, pour this dry mixture over the lemon-juiced apples and toss gently to coat each apple piece. Make sure every apple slice is lightly dusted with the sugar, flour, and cinnamon mixture.
Now for the butter. Cut the 2 tablespoons of salted butter into small pieces and scatter them over the apple mixture. The butter will melt during baking, adding richness and a subtle savory note that complements the sweet and tart apples beautifully. Gently fold the butter pieces into the apple mixture. Don’t worry if they aren’t perfectly distributed; they will melt and distribute themselves during the baking process. Set this delicious apple filling aside while we prepare our pie crusts.
Assembling the Mini Pies
Working with store-bought pie crusts makes this recipe incredibly accessible. For these mini pies, we’ll be using them to create both the bottom and the top of our individual desserts.
Begin extract by unrolling your 2 store-bought pie crusts onto a lightly floured surface. If your crusts are frozen, make sure they have thawed according to package directions. You want them pliable but not sticky. Using a round cookie cutter, a biscuit cutter, or even a small bowl rim, cut out circles from the pie crusts. For the bottom crusts, you’ll want circles that fit the base of your muffin tin cups or tart pans. For the top crusts, you can cut slightly smaller circles, or if you prefer a lattice top, you’ll cut thin strips instead. I find that a 3.5 to 4-inch cutter works well for most standard muffin tins, creating a nice base for the filling. For the tops, a 3-inch cutter or strips will suffice. You’ll likely get 6-8 mini pies from each crust, depending on the size of your cutters, so you’ll have plenty of dough to work with.
Gently press the larger circles of dough into the greased and floured cups of your muffin tin, or into individual tart molds. Ensure the dough comes up the sides of the cups to create a good vessel for the filling. Don’t stretch the dough too much, as this can cause it to shrink during baking. You want a snug fit. If you’re using a muffin tin, make sure the dough lines the entire cup, including the bottom and up the sides.
Now, it’s time to fill them! Spoon the prepared apple filling evenly into each unbaked pie crust. Be generous, but don’t overfill to the point where the apples will spill out during baking. You want a nice dome of filling.
For the tops, you have a few options. You can place a smaller circle of dough over the filling, or you can cut strips of dough and weave them into a lattice top. If you opt for the full circle, be sure to crimp the edges of the top crust to the bottom crust to seal them. If you’re going for a lattice, lay the strips in a criss-cross pattern over the apples and press the ends onto the edge of the bottom crust. This adds a lovely rustic touch and allows steam to escape. If you have any leftover dough, you can cut out decorative shapes like leaves or small apples to place on top for an extra bit of flair.
The Finishing Touches and Baking
Before they hit the oven, a couple of simple steps will elevate these mini pies from good to absolutely stunning.
In a small bowl, whisk together 1 large egg and 1 tablespoon of water. This is your egg wash. Using a pastry brush, lightly brush the tops of each mini pie with this egg wash. This will give the crust a beautiful golden-brown sheen as it bakes and help the topping sugar adhere.
Next, sprinkle the tops of the pies evenly with 1 tablespoon of turbinado sugar or granulated white sugar. The turbinado sugar, with its larger crystals, provides a delightful crunch and a lovely caramelization. If you don’t have turbinado sugar, regular granulated sugar will work just fine, offering a slightly sweeter, crisper topping. This is your final touch of sparkle and crunch!
Baking the Mini Pies
Preheat your oven to 400°F (200°C). Place your prepared muffin tin or tart pans onto a baking sheet. This is a crucial step; it catches any potential drips and makes it easier to transfer the whole tin into and out of the oven.
Bake for 20-25 minutes, or until the crust is golden brown and the apple filling is bubbling. Keep an eye on them, as mini pies can bake more quickly than larger ones. If you notice the edges of the crust browning too quickly, you can loosely tent the pies with aluminum foil.
Once baked, carefully remove the baking sheet from the oven. Let the mini apple pies cool in the muffin tin or tart pans for at least 10-15 minutes before attempting to remove them. This allows the filling to set slightly, preventing them from falling apart. After the initial cooling, carefully remove the mini pies from the tin. You might need to run a thin knife around the edges to loosen them. Let them cool completely on a wire rack.
Serve them warm or at room temperature. They are absolutely divine with a scoop of vanilla ice cream or a dollop of whipped cream. Enjoy your homemade mini apple pies!
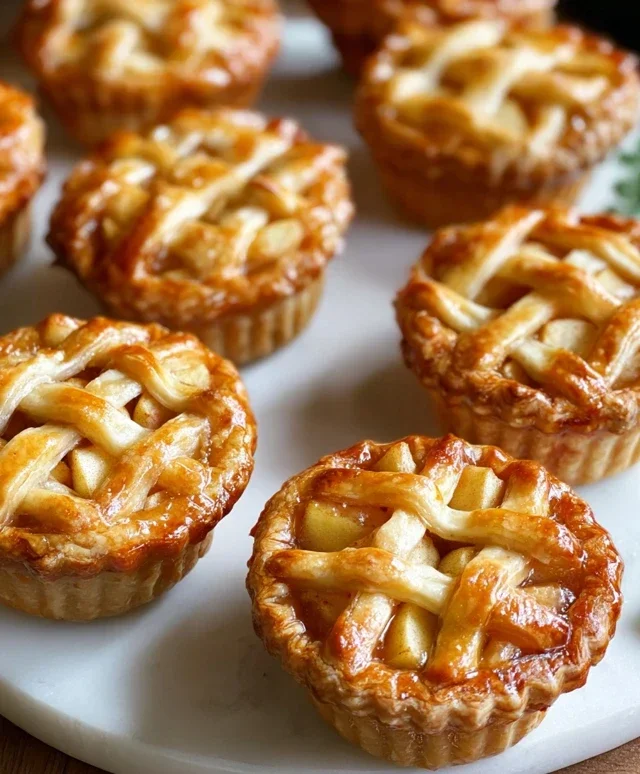
Conclusion:
There you have it – a straightforward guide to creating delightful mini apple pies that are sure to impress! These individual desserts are perfect for so many occasions, from potlucks and parties to simply treating yourself to something special. The beauty of this recipe lies in its simplicity and the comforting, classic flavor of warm apples encased in flaky pastry. They’re incredibly versatile, allowing for a wonderful range of personal touches and creative twists.
When it comes to serving, I love to enjoy these warm, perhaps with a dollop of vanilla ice cream or a drizzle of caramel sauce for an extra layer of indulgence. They also make a fantastic breakfast treat if you omit the extra spices and focus on the pure apple goodness. Don’t be afraid to experiment with different apple varieties – Honeycrisp or Gala offer a lovely balance of sweetness and tartness, while Granny Smith provides a more pronounced tang. You could also add a pinch of nutmeg or cardamom to the filling for a different spice profile, or even swirl in some softened cream cheese for a richer texture. I truly encourage you to give these mini apple pies a try; they’re a small effort for a huge reward, bringin extractg joy with every bite!
Frequently Asked Questions:
Can I make the pie crust ahead of time?
Absolutely! You can prepare the pie dough up to 2 days in advance and store it, tightly wrapped in plastic wrap, in the refrigerator. You can also freeze the dough for up to 3 months. Just be sure to let it thaw in the refrigerator overnight before you plan to use it.
What other fruits can I use in these mini pies?
While apple is the star, these mini pies are fantastic with other fruits too! Pears, berries (like blueberries or raspberries), peaches, or even a mix of fruits would be delicious. You might need to adjust the sugar and spices slightly depending on the sweetness and tartness of your chosen fruit.
How should I store leftover mini apple pies?
Leftover mini apple pies can be stored in an airtight container at room temperature for up to 2 days, or in the refrigerator for up to 4 days. For the best texture, I recommend gently reheating them in a toaster oven or oven for a few minutes before serving.
Mini Apple Pies
Individual-sized apple pies with a flaky crust and sweet cinnamon apple filling.
Ingredients
-
4 tart apples like Granny Smith or Honey Crisp, peeled, cored, and diced
-
1 tablespoon lemon juice
-
1/4 cup granulated white sugar
-
1/4 cup white flour
-
1 teaspoon ground cinnamon
-
2 tablespoons salted butter, cut into small pieces
-
2 store-bought or homemade pie crusts
-
1 large egg, beaten
-
1 tablespoon water
-
1 tablespoon turbinado sugar or granulated white sugar
Instructions
-
Step 1
Preheat oven to 375°F (190°C). Lightly grease a muffin tin or place individual tart pans on a baking sheet. -
Step 2
In a medium bowl, combine the diced apples and lemon juice. In a small bowl, whisk together the granulated sugar, flour, and cinnamon. -
Step 3
Add the sugar mixture to the apples and toss to coat. Stir in the pieces of butter until evenly distributed. -
Step 4
Cut out circles from the pie crusts to fit your muffin tin or tart pans. Press the crusts into the prepared pans. -
Step 5
Divide the apple filling evenly among the pie crusts. You can create top crusts with remaining dough if desired, or leave them open-faced. -
Step 6
In a small bowl, whisk together the beaten egg and water. Brush the egg wash over the edges of the crusts (and any top crusts). Sprinkle with turbinado sugar. -
Step 7
Bake for 20-25 minutes, or until the crust is golden brown and the filling is bubbly. -
Step 8
Let the mini pies cool in the pan for a few minutes before transferring them to a wire rack to cool completely.
Important Information
Nutrition Facts (Per Serving)
It is important to consider this information as approximate and not to use it as definitive health advice.
Allergy Information
Please check ingredients for potential allergens and consult a health professional if in doubt.