Chocolate Dipped Fruit Cones-Sweet Treat Recipe
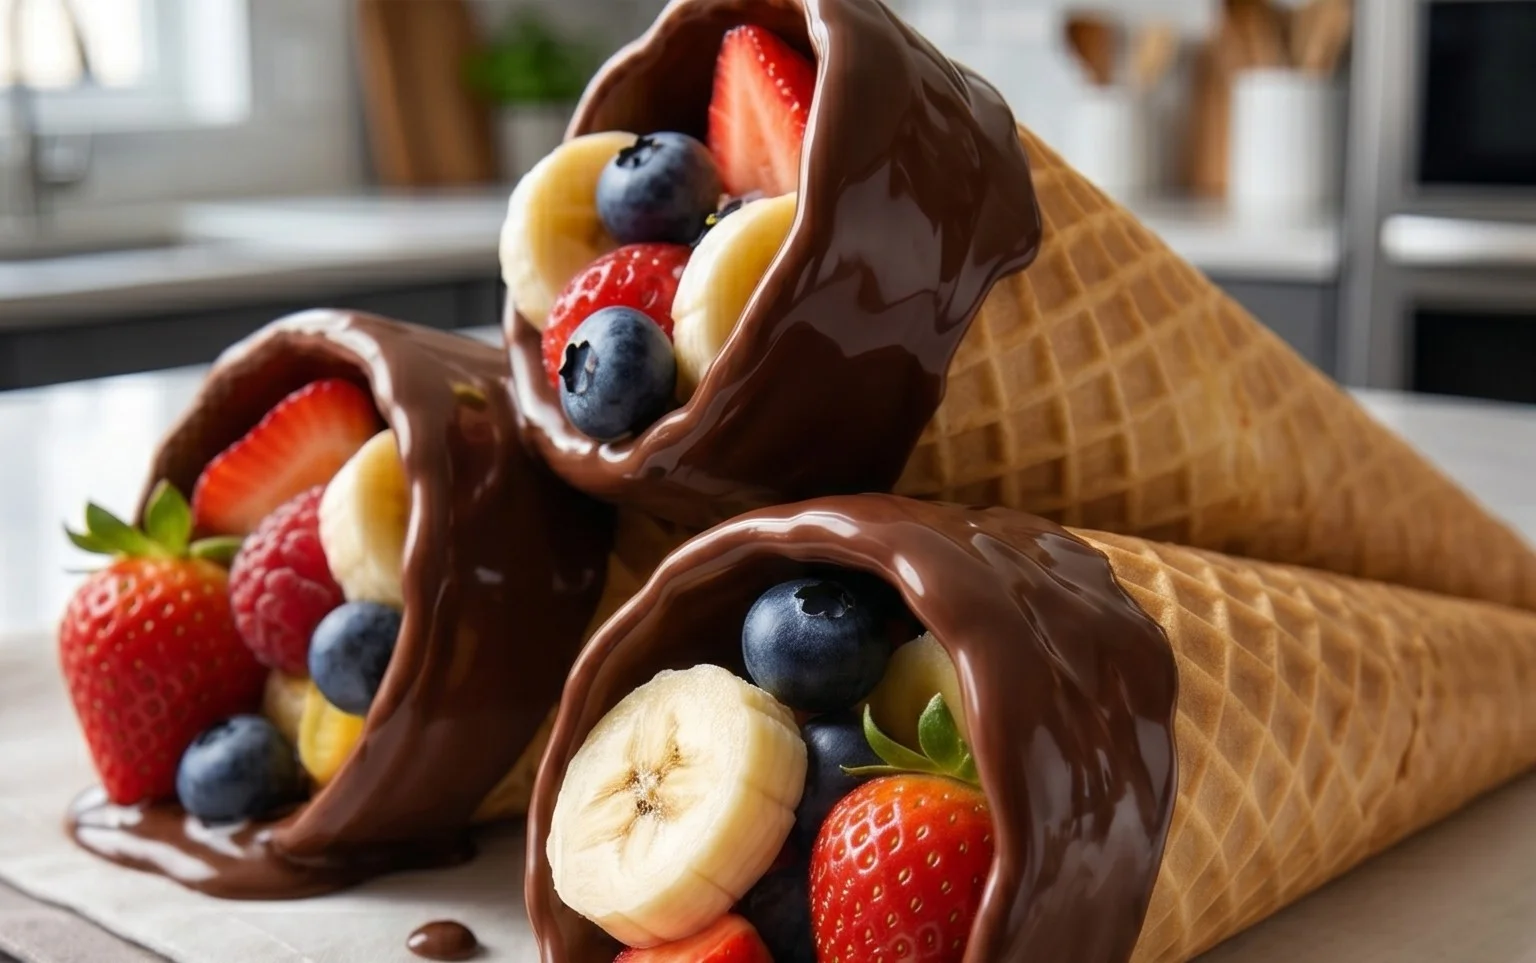
Chocolate Dipped Fruit Filled Cones are the ultimate treat that perfectly balances crisp, sweet perfection with vibrant, bursting fruit flavors. Imagin extracte the satisfying crunch of a perfectly baked waffle cone giving way to a luscious, creamy filling, all enrobed in a decadent shell of rich chocolate. It’s no wonder these delightful delights are a crowd-pleaser, bringin extractg smiles to faces of all ages. We love them because they’re incredibly versatile – you can customize the fruit and filling to suit any mood or occasion, making each bite a unique adventure. What truly makes our Chocolate Dipped Fruit Filled Cones special is the symphony of textures and tastes: the coolness of the fruit, the smoothness of the filling, and the satisfying snap of the chocolate. Get ready to create your own little masterpieces that are as beautiful as they are delicious!
Chocolate Dipped Fruit Filled Cones
Get ready for a delightful treat that’s as beautiful as it is delicious! These Chocolate Dipped Fruit Filled Cones are the perfect blend of creamy, fruity, and decadent. They’re surprisingly easy to make and are sure to impress at any gathering or simply as a special indulgence for yourself. Imagin extracte a crisp, airy cone, generously filled with luscious cream and sweet, vibrant fruit, all enrobed in a rich, glossy chocolate shell. It’s a symphony of textures and flavors that will have you reaching for another one before you’ve even finished your first. We’re going to walk through each step together, ensuring perfect results every time.
Ingredients:
Getting Started: Preparing Our Delicious Filling
First, let’s get our creamy filling ready. This is the heart of our cone, so we want it to be smooth, sweet, and utterly irresistible. In a medium bowl, combine the softened cream cheese. Make sure your cream cheese is at room temperature; this is crucial for achieving a smooth, lump-free texture. If it’s too cold, it will be difficult to mix and you might end up with a lumpy filling.
Next, we’ll add the powdered sugar. Sift it in to prevent any clumps from forming. Using a hand mixer or a sturdy whisk, beat the cream cheese and powdered sugar together until they are well combined and fluffy. Don’t rush this step; you want to incorporate plenty of air to make the filling light and airy.
Now, let’s introduce the vanilla extract for that classic sweet aroma and flavor. Add it to the cream cheese mixture and mix again until fully incorporated.
In a separate small bowl, whip the heavy cream until stiff peaks form. This means when you lift the whisk, the cream will stand up in pointy peaks. This is a delicate process, so be careful not to over-whip, or you’ll end up with butter! Gently fold the whipped cream into the cream cheese mixture. The goal here is to lighten the cream cheese filling and give it a wonderfully airy texture. Fold gently to avoid deflating the whipped cream.
Assembling the Cones
Now for the fun part: assembling our cones! Take your waffle cones and carefully spoon or pipe the cream cheese filling into each one. Fill them generously, but leave a little space at the top, about half an inch. This will give us room to arrange our beautiful fresh berries.
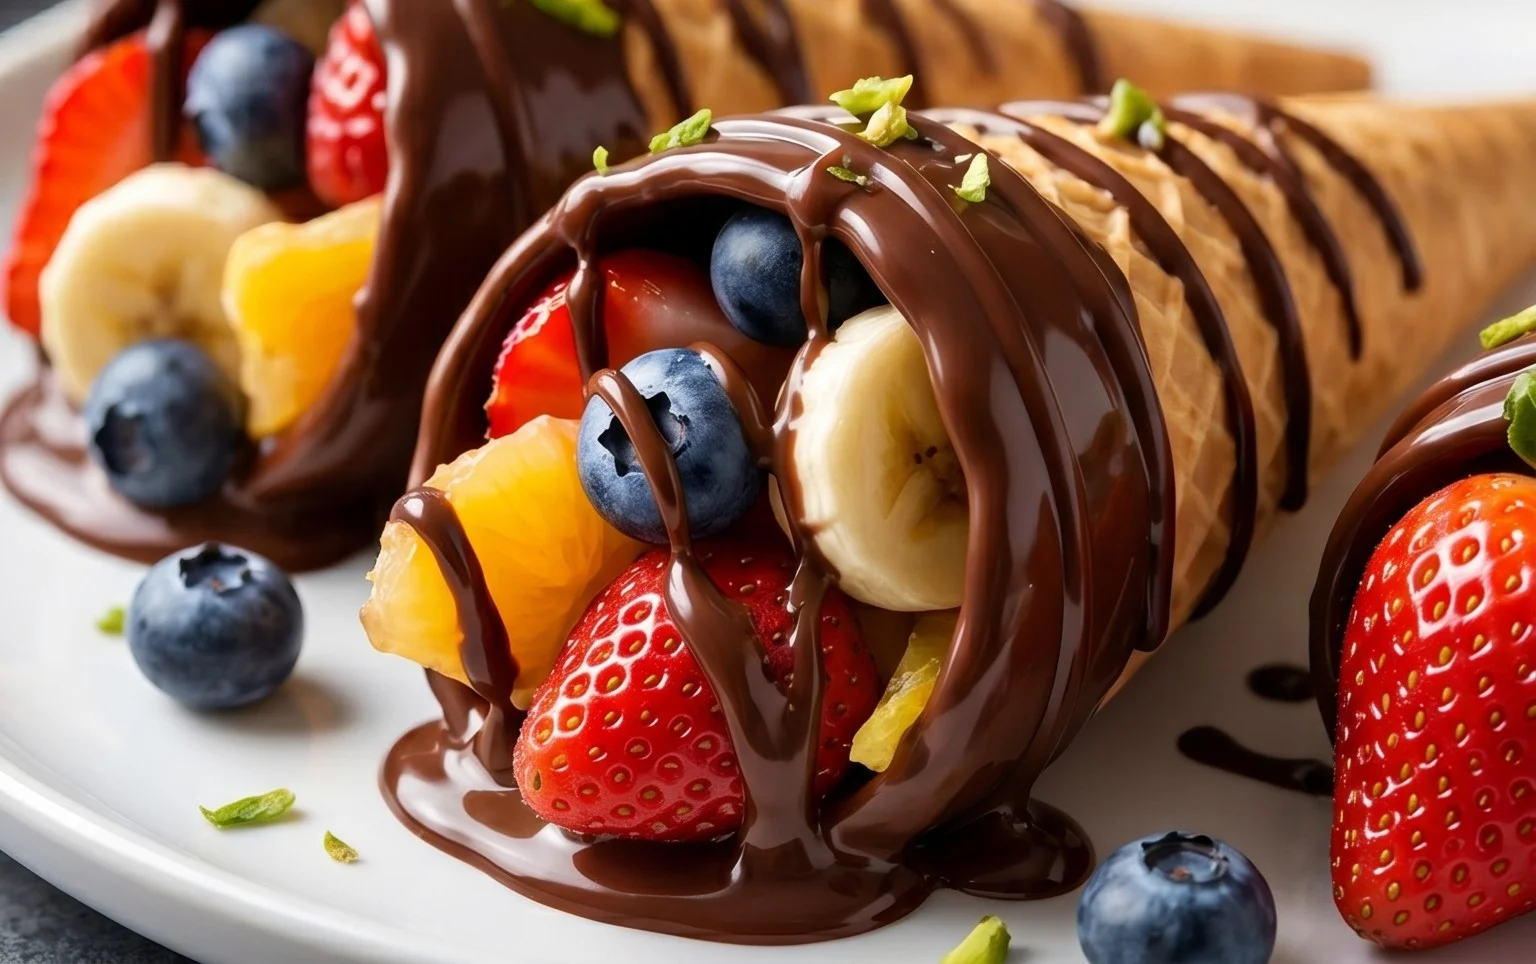
Arrange your mixed berries artfully on top of the cream cheese filling. I like to use a colorful combination to make them visually appealing. Gently press them down so they are nestled into the cream. The contrast of the bright berries against the white cream is absolutely stunning.
Once your cones are filled and topped with fruit, place them in the freezer for at least 30 minutes. This is a vital step. Freezing the cones helps to set the filling and fruit, making them firm enough to withstand the chocolate dipping without becoming messy. If you skip this step, the warm chocolate could melt the filling and cause it to ooze out, which isn’t ideal.
The Chocolatey Finnon-alcoholic ale: Dipping Perfection
While our cones are chilling, let’s prepare the chocolate coating. In a microwave-safe bowl, combine the semi-sweet chocolate chips and the coconut oil (if using). The coconut oil helps to create a thinner, glossier chocolate coating that sets beautifully and is less prone to cracking.
Microwave the chocolate chips in 30-second intervals, stirring well after each interval, until the chocolate is completely melted and smooth. Be patient here. Overheating chocolate can cause it to seize up and become unusable. Stirring thoroughly after each short burst of microwave time is key to even melting.
Once the chocolate is smooth and glossy, carefully remove the cones from the freezer. Hold a cone by the very tip or the edge of the cone. Using a spoon, drizzle or pour the melted chocolate over the filled portion of the cone, allowing it to drip down the sides. You want to create a beautiful chocolate shell that encases the filling and fruit. You can dip the entire top portion of the cone into the chocolate for a more substantial coating, or simply drizzle it artfully.
Place the chocolate-dipped cones on a baking sheet lined with parchment paper. The parchment paper will prevent them from sticking. If you want a thicker chocolate coating, you can do a second dip once the first layer has started to set slightly.
Allow the chocolate to set completely at room temperature or place them back in the refrigerator for about 10-15 minutes to speed up the process. Once the chocolate is firm to the touch, your delicious Chocolate Dipped Fruit Filled Cones are ready to be enjoyed! These are best served soon after they are made to ensure the cone remains crisp and the filling is at its freshest. Enjoy every delightful bite!
Conclusion:
And there you have it – your guide to creating these absolutely delightful Chocolate Dipped Fruit Filled Cones! I truly believe this recipe is a winner because it strikes the perfect balance between being impressively elegant and surprisingly easy to make. The crisp, sweet cone, the luscious fruit filling, and the rich chocolate coating come together in a symphony of textures and flavors that will have everyone asking for seconds. They are fantastic for parties, a special treat for family, or even just a little indulgence for yourself.
For serving, I love to present them on a decorative platter, perhaps with a dusting of powdered sugar or a few extra chocolate shavings. They’re wonderful on their own, but can also be paired with a scoop of vanilla ice cream for an extra decadent dessert. Don’t be afraid to get creative with the fruit fillings! Try seasonal berries, sliced peaches, or even a swirl of lemon curd. The possibilities are endless.
I wholeheartedly encourage you to give these Chocolate Dipped Fruit Filled Cones a try. They are a joy to make and even more of a joy to eat. Let your inner chocolatier shine and enjoy the delicious results!
Frequently Asked Questions:
Can I make these cones ahead of time?
Yes, you absolutely can! Once the chocolate has fully set, you can store the cones in an airtight container in the refrigerator for up to 2 days. Be sure they are completely cooled and the chocolate is firm before covering them to prevent condensation.
What kind of chocolate works best for dipping?
I recommend using good quality melting chocolate or chocolate chips specifically designed for melting and coating. They will give you the smoothest finish and the best snap. You can use milk, dark, or white chocolate, depending on your preference!
My chocolate isn’t coating smoothly. What am I doing wrong?
A common issue is the chocolate being too thick or too thin. If it’s too thick, try adding a tiny bit of neutral oil (like canola or vegetable oil) or shortening, about a teaspoon at a time, and stir until smooth. If it’s too thin, you might need to let it cool slightly, or use a chocolate with a higher cocoa butter content.
Chocolate Dipped Fruit Filled Cones
Sweet ice cream cones dipped in chocolate and filled with fresh fruit for a delightful treat.
Ingredients
-
1 cup chocolate chips
-
2 tablespoons vegetable shortening
-
1 pint vanilla ice cream
-
1 cup mixed fresh berries (strawberries, blueberries, raspberries)
-
1/2 cup chopped fresh pineapple
-
4 sugar cones
Instructions
-
Step 1
Line a baking sheet with parchment paper. -
Step 2
In a microwave-safe bowl, combine chocolate chips and vegetable shortening. Microwave in 30-second intervals, stirring in between, until smooth and melted. -
Step 3
Spoon a small amount of melted chocolate into the bottom of each sugar cone and swirl to coat. -
Step 4
Dip the top rim of each cone into the remaining melted chocolate, letting excess drip off. -
Step 5
Place the dipped cones upright on the prepared baking sheet. -
Step 6
Fill each cone with a scoop of vanilla ice cream. -
Step 7
Top the ice cream with mixed fresh berries and chopped fresh pineapple. -
Step 8
Place the filled cones in the freezer for at least 30 minutes, or until the chocolate is set and the ice cream is firm.
Important Information
Nutrition Facts (Per Serving)
It is important to consider this information as approximate and not to use it as definitive health advice.
Allergy Information
Please check ingredients for potential allergens and consult a health professional if in doubt.