Easy Chocolate Swiss Roll Recipe-Quick Delicious Treat
Easy Chocolate Swiss Roll recipes are a dream come true for anyone who loves the classic elegance of a beautifully rolled cake but shies away from complicated baking. There’s something undeniably magical about a Swiss roll, isn’t there? That delicate sponge, swirled with luscious cream and then the rich, inviting embrace of chocolate – it’s a dessert that whispers of celebration and comfort all at once. What makes this particular Easy Chocolate Swiss Roll so special? It’s the promise of pure indulgence without the intimidating techniques often associated with this showstopper. We’re talking about achieving that perfect, crack-free roll and that decadent chocolate finish with surprising ease, making it a perfect weekend treat or an impressive dessert to share with loved ones. Get ready to impress yourself and everyone around you!
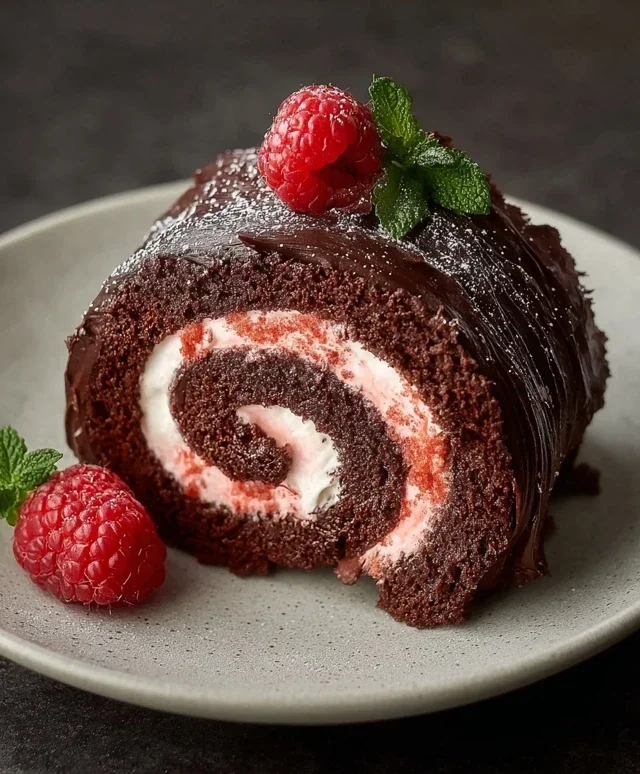
Easy Chocolate Swiss Roll
Welcome to a delightful baking adventure that will bring a smile to your face and a delicious treat to your table! Today, we’re making an incredibly easy Chocolate Swiss Roll. This recipe is perfect for begin extractners and seasoned bakers alike, offering a wonderfully moist chocolate sponge and a rich, creamy filling, all without any dairy or eggs. The beauty of a Swiss roll lies in its simplicity and elegance; it looks impressive but is surprisingly straightforward to prepare. We’ll be using some fantastic pantry staples and a clever ingredient swap for that signature lightness. Get ready to impress yourself and your loved ones with this decadent yet accessible dessert.
Ingredients:
Creating the Chocolate Sponge
This is where the magic begin extracts. The base of our Swiss roll is a light and airy chocolate sponge. We’re using a combination of oat flour and cassava flour for a lovely texture that’s both tender and sturdy enough to roll. The cocoa powder provides that deep chocolatey flavor we all crave.
1. Preheat and Prepare: First things first, preheat your oven to 175°C (350°F). Line a 25cm x 38cm (10 inch x 15 inch) baking pan with parchment paper, ensuring it goes up the sides. This will make removing the sponge so much easier. Now, take a clean kitchen towel and spread it out flat on your counter. Dust this towel generously with the 2 tbsp of cocoa powder. This is our secret weapon for preventing the sponge from sticking when we roll it up. Set this aside.
2. Dry Ingredients: In a medium bowl, whisk together the oat flour, cassava flour, 30g of cocoa powder, arrowroot starch, baking powder, and baking soda. Whisking thoroughly ensures that all the leavening agents and flours are evenly distributed, which is crucial for a consistent rise.
3. Wet Ingredients and Aquafaba Magic: In a separate large bowl, begin extract by beating the aquafaba. Aquafaba, the liquid from a can of chickpeas, is an amazing egg substitute. Beat it with an electric mixer on high speed until stiff peaks form. This might take a few minutes, so be patient! Gradually add 100g of the granulated sugar, about a tablespoon at a time, while continuing to beat. Keep beating until the sugar is fully incorporated and the mixture is glossy and firm. In another bowl, whisk together the unsweetened applesauce and unsweetened dairy-free yogurt. Add this mixture, along with the remaining 100g of granulated sugar, to the aquafaba mixture. Gently fold these together until just combined. Be careful not to overmix at this stage.
4. Combining and Baking: Now, gently fold the dry ingredients into the wet ingredients in two or three additions. Be careful not to overmix; you want to preserve as much air as possible for a light sponge. Once just combined, pour the batter evenly into your prepared baking pan. Gently spread it with a spatula to ensure an even layer. Bake for 12-15 minutes, or until a toothpick inserted into the center comes out clean. The sponge should spring back slightly when gently touched.
5. The Crucial Roll: This is perhaps the most critical step for success. As soon as the cake comes out of the oven, immediately invert it onto your prepared cocoa-dusted kitchen towel. Carefully peel off the parchment paper. While the cake is still warm, gently roll it up, starting from one of the shorter ends, using the towel to help you. Let it cool completely in this rolled shape on a wire rack. This allows the sponge to set into a shape that’s easier to fill and re-roll later. Don’t skip this cooling step, it’s essential for preventing cracks!
Whipping Up the Luscious Filling
While our sponge is cooling, we can prepare the rich and creamy filling. This vegan butter cream is surprisingly simple and utterly delicious.
1. Cream the Butter: In a large bowl, cream the room-temperature vegan butter with your electric mixer until it’s light and fluffy. This should take about 3-5 minutes.
2. Add Sweetness and Flavor: Gradually add the pulsed freeze-dried strawberries, which have been processed into a fine flour. This adds a beautiful strawberry flavor and a lovely pink hue to the frosting. Continue to mix until well combined.
3. Achieve Perfect Consistency: If the frosting seems too stiff, you can add a tablespoon of your dairy-free milk at a time until you reach your desired spreadable consistency. However, for a Swiss roll, a slightly firmer frosting is often preferred as it helps hold the roll together.
Assembling Your Masterpiece
Once the sponge is completely cool, it’s time to bring it all together!
1. Unrolling and Filling: Carefully unroll the cooled chocolate sponge. You’ll see it’s now pliable and ready to be filled. Spread an even layer of the strawberry vegan butter cream over the entire surface of the sponge, leaving a small border (about 1 cm or 1/2 inch) on one of the longer edges. This border will help prevent the filling from squeezing out when you re-roll.
2. The Final Roll: Starting from the opposite long edge (the one without the border), carefully and snugly re-roll the sponge. Use the kitchen towel that’s still attached to help guide and tighten the roll. Work slowly and gently to avoid cracking. Once rolled, wrap the entire Swiss roll tightly in the kitchen towel and place it seam-side down on a serving plate or board.
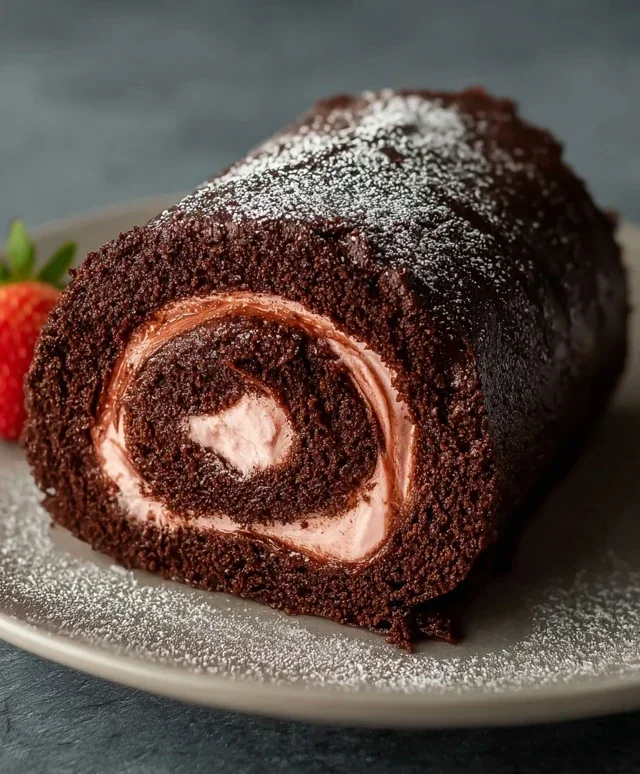
3. Chill and Garnish: For best results, refrigerate your Swiss roll for at least 30 minutes to allow the filling to firm up and the roll to set. This makes slicing much cleaner. Before serving, you can dust the top with a little extra cocoa powder or some of the pulsed freeze-dried strawberries for an extra pop of color and flavor. Garnish with fresh sliced strawberries. Slice and enjoy this delightful, easy Chocolate Swiss Roll!
Conclusion:
And there you have it! This easy chocolate Swiss roll recipe truly delivers on its promise of deliciousness without the fuss. It’s a fantastic way to impress your friends and family, or simply treat yourself to something decadent, even if you’re a begin extractner baker. The light, airy sponge, rolled with a rich, creamy chocolate filling, creates a delightful contrast in texture and flavour that’s simply irresistible. The beauty of this recipe lies in its simplicity and adaptability, making it a go-to for any occasion.
For serving, a dusting of powdered sugar is classic, but don’t hesitate to add a dollop of whipped cream or a few fresh berries to elevate it further. Get creative with your filling too! Think about adding a hint of coffee extract to the chocolate ganache, or perhaps swirling in some caramel. You could even experiment with different extracts like peppermint or orange for a festive twist. I truly encourage you to give this easy chocolate Swiss roll a try. It’s more rewarding than you might imagin extracte!
Frequently Asked Questions:
Q: My Swiss roll cracked when I rolled it. What went wrong?
Don’t worry, a little cracking is often part of the process, especially for your first few attempts! To minimize it, ensure your sponge is baked just enough – not overbaked, as that makes it brittle. Rolling it while it’s still warm, but not hot, with the help of parchment paper or a clean kitchen towel is key. Applying the filling evenly and not overfilling can also help.
Q: Can I make this ahead of time?
Absolutely! You can bake the sponge cake up to a day in advance and store it, wrapped tightly, at room temperature. Prepare the filling and keep it refrigerated. Then, simply assemble the roll when you’re ready to serve or a few hours before. This makes it a perfect dessert for entertaining!
Easy Chocolate Swiss Roll
A simple and delicious vegan chocolate swiss roll, perfect for a treat.
Ingredients
-
135 g oat flour
-
30 g cassava flour
-
30 g cocoa powder
-
1 tbsp arrowroot starch
-
1 1/2 tsp baking powder
-
1/2 tsp baking soda
-
122 mL aquafaba, room temperature
-
100 g organic granulated sugar or coconut sugar, room temperature
-
100 g unsweetened applesauce, room temperature
-
60 g unsweetened dairy free yogurt, room temperature
-
2 tbsp cocoa powder for dusting the dish towel
-
1 cup sliced strawberries, for garnish
-
226 g vegan butter, room temperature
-
70 g freeze dried strawberries, pulsed into a flour
-
Coconut fat from 1 can full-fat coconut cream.
Instructions
-
Step 1
Preheat oven to 350°F (175°C). Line a 10×15 inch baking pan with parchment paper and lightly grease. Dust a clean kitchen towel with 2 tbsp cocoa powder. -
Step 2
In a large bowl, whisk together oat flour, cassava flour, 30g cocoa powder, arrowroot starch, baking powder, and baking soda. -
Step 3
In a separate bowl, whisk aquafaba until foamy. Gradually add half of the sugar (100g) and continue whisking until stiff peaks form. -
Step 4
Gently fold the dry ingredients into the aquafaba mixture in three additions, alternating with the applesauce and yogurt. Be careful not to overmix. -
Step 5
Pour batter into the prepared baking pan and spread evenly. Bake for 12-15 minutes, or until a toothpick inserted into the center comes out clean. -
Step 6
Immediately invert the cake onto the prepared towel. Carefully peel off the parchment paper. Let the cake cool completely on the towel. -
Step 7
While the cake cools, prepare the filling. Beat room temperature vegan butter and the remaining sugar (100g) until light and fluffy. Add the coconut fat and pulsed freeze-dried strawberries. Beat until well combined. -
Step 8
Spread the filling evenly over the cooled cake, leaving a small border. Starting from one of the longer sides, tightly roll up the cake with the towel. Slice and garnish with fresh strawberries.
Important Information
Nutrition Facts (Per Serving)
It is important to consider this information as approximate and not to use it as definitive health advice.
Allergy Information
Please check ingredients for potential allergens and consult a health professional if in doubt.