Cherry Brownie Ice Cream Sandwiches-Easy Treat
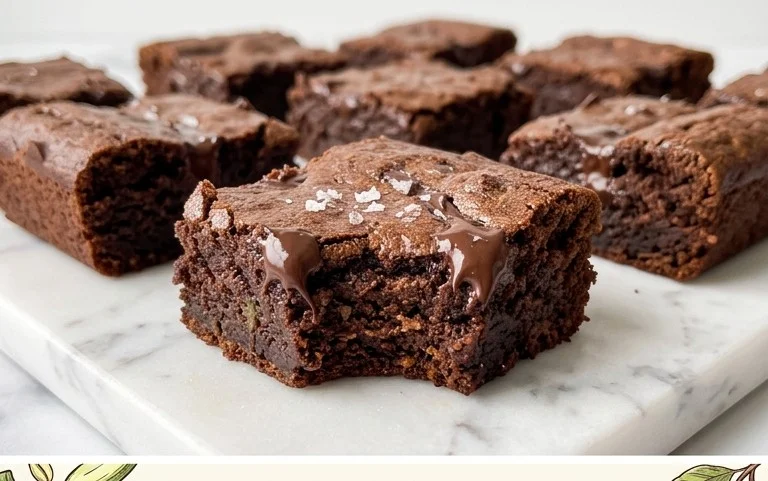
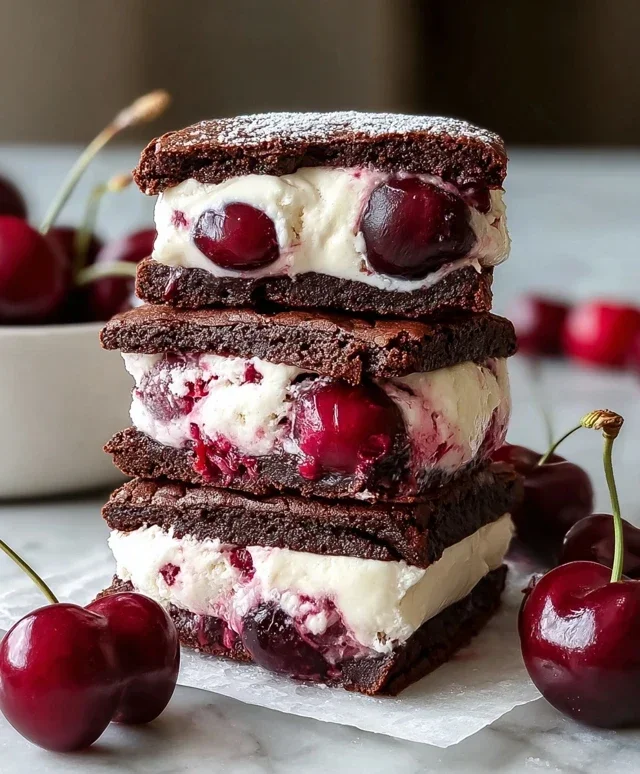
Cherry Brownie Ice Cream Sandwiches are a dreamy indulgence, a perfect marriage of rich, fudgy chocolate and bright, tart cherries, all nestled between two soft, chewy brownie cookies. If you’re anything like me, the thought of combining these incredible flavors is pure bliss. These aren’t just any ice cream sandwiches; they’re an elevated experience. The deep, intense chocolate flavor of the brownies provides a sophisticated base, while the bursts of cherry cut through the richness, creating a delightful balance that’s simply irresistible. What truly makes our Cherry Brownie Ice Cream Sandwiches special is the homemade touch. You control the quality of ingredients, ensuring every bite is packed with authentic flavor. Imagin extracte biting into that cool, creamy ice cream, surrounded by warm, gooey brownie goodness and punctuated by sweet, juicy cherries. It’s a symphony of textures and tastes that will transport you straight to dessert heaven.
Why You’ll Love These Cherry Brownie Ice Cream Sandwiches
A Perfect Blend of Flavors and Textures
Cherry Brownie Ice Cream Sandwiches
Get ready to elevate your dessert game with these incredible Cherry Brownie Ice Cream Sandwiches! Imagin extracte the rich, fudgy decadence of a homemade brownie paired with the creamy sweetness of vanilla ice cream, all elevated by the bright, slightly tart burst of cherries. It’s a flavor combination that’s simply irresistible, perfect for a summer treat, a special occasion, or just because you deserve something amazing. These sandwiches are surprisingly simple to make, and the results are truly spectacular. We’ll be making our own brownies from scratch, infusing them with that classic chocolatey goodness, and then transforming them into the ultimate ice cream sandwich experience.
Ingredients:
Instructions:
Making the Brownie Bases
1. Preheat and Prepare: Start by preheating your oven to 350°F (175°C). Line a baking sheet with parchment paper, leaving some overhang on the sides. This will make it super easy to lift out the brownies once they’re baked. Lightly grease the parchment paper as well, just to be extra sure nothing sticks. We’re aiming for thin, crisp brownie edges for our sandwich bases, so a regular-sized baking sheet will work perfectly for this.
2. Cream the Sugars and Butter: In a medium bowl, cream together the softened unsalted butter, granulated sugar, and brown sugar. I like to use a hand mixer for this step, but a sturdy whisk and some elbow grease will do just fine. You want to beat them until the mixture is light and fluffy, with a pnon-alcoholic ale yellow color. This process incorporates air, which contributes to the brownie’s texture.
3. Incorporate Wet Ingredients: Beat in the two large eggs, one at a time, making sure each egg is fully incorporated before adding the next. Then, stir in the vanilla extract. The mixture might look a little separated or curdled at this stage, but don’t worry, that’s completely normal.
4. Add Dry Ingredients: In a separate, smaller bowl, whisk together the cocoa powder, all-purpose flour, and salt. Gradually add these dry ingredients to the wet ingredients, mixing until just combined. Be careful not to overmix the batter. Overmixing can develop the gluten in the flour too much, resulting in tougher brownies, and we want these to be delightfully chewy. The batter will be thick and fudgy.
5. Bake the Brownies: Spread the brownie batter evenly onto the prepared baking sheet. Aim for a thin, uniform layer – about ¼ to ½ inch thick. This is crucial for creating brownie bases that are easy to handle and have the right brownie-to-ice cream ratio. Bake for 15-20 minutes, or until a toothpick inserted into the center comes out with moist crum extractbs attached, but not wet batter. Keep a close eye on them, as they can go from perfectly baked to overcooked very quickly due to their thinness. Once baked, let them cool completely on the baking sheet. This is a critical step; trying to handle warm brownies will lead to a crum extractbly mess.
Assembling the Sandwiches
6. Prepare the Ice Cream and Cherries: While the brownies are cooling, take your vanilla ice cream out of the freezer and let it soften for about 10-15 minutes. You want it to be pliable enough to scoop and spread easily, but not so soft that it’s liquid. In a small bowl, gently fold the chopped cherries into the slightly softened ice cream. You can use fresh or frozen cherries; if using frozen, make sure they’re not clumpy and have had any excess moisture patted off.
7. Cut and Assemble: Once the brownies are completely cool, carefully lift them out of the baking sheet using the parchment paper overhang. Place them on a clean cutting board. Using a sharp knife or a cookie cutter (about 3-4 inches in diameter works well), cut out your brownie bases. You’ll need an even number of bases, as each sandwich uses two. Spread a generous scoop of the cherry-infused vanilla ice cream onto one brownie base. Then, top with another brownie base, gently pressing down to create your sandwich. Repeat with the remaining brownie bases and ice cream.
8. Chill and Drizzle: Place the assembled ice cream sandwiches on a parchment-lined baking sheet and return them to the freezer for at least 1-2 hours, or until the ice cream is firm. This chilling step is essential for the sandwiches to hold their shape. Once firm, melt the chocolate chips. You can do this in the microwave in 30-second intervals, stirring in between, or use a double boiler. Drizzle the melted chocolate over the tops of the ice cream sandwiches for an extra touch of decadence.
9. Serve and Enjoy: Let the drizzled chocolate set in the freezer for another 15-30 minutes. Once everything is firm and the chocolate drizzle is hardened, your Cherry Brownie Ice Cream Sandwiches are ready to be devoured! These are best enjoyed immediately after their final chill, but they can be stored in an airtight container in the freezer for a few weeks. Simply take them out a few minutes before you plan to eat them to allow them to soften slightly for the perfect bite. Enjoy this delightful treat that’s a step above any store-bought ice cream sandwich!
Conclusion:
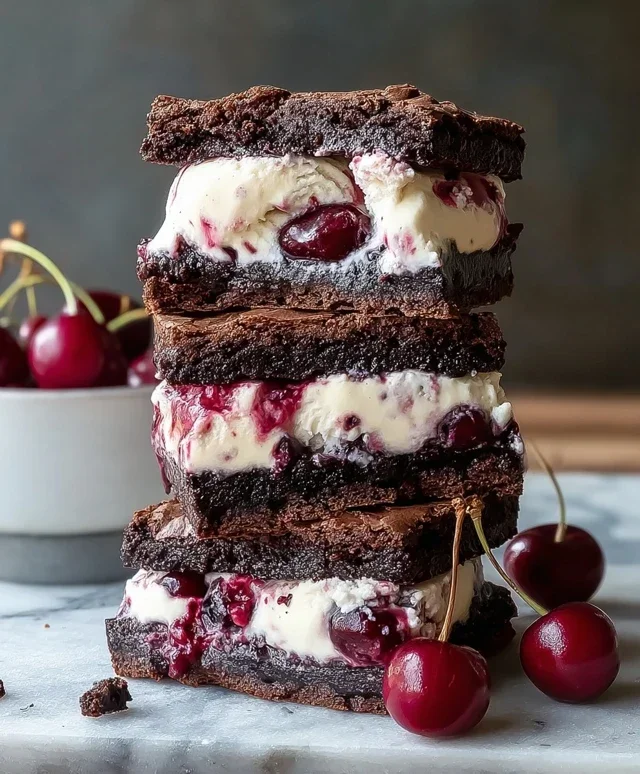
I hope you’re as excited as I am about these Cherry Brownie Ice Cream Sandwiches! This recipe is truly a showstopper because it perfectly marries the rich, fudgy goodness of homemade brownies with the cool, creamy delight of your favorite ice cream, all elevated by the bright, sweet burst of cherries. It’s a surprisingly simple yet incredibly satisfying dessert that guarantees smiles all around. Imagin extracte biting into that decadent brownie, the slight chegrape juicess giving way to smooth, cold ice cream, with little pockets of cherry flavor adding a refreshing twist. They’re perfect for summer gatherings, a special treat after dinner, or even just because you deserve something delicious!
For serving, these are best enjoyed immediately after assembly, but you can prep the brownies and freeze the ice cream scoops ahead of time to make sandwich assembly a breeze. You can even roll the edges in chopped nuts, mini chocolate chips, or sprinkles for an extra flourish. If cherries aren’t your favorite, don’t hesitate to swap them out for raspberries, strawberries, or even a swirl of hot fudge for a different flavor profile. The possibilities are endless! I truly encourage you to give this Cherry Brownie Ice Cream Sandwich recipe a try. It’s a fantastic way to impress your friends and family, or simply treat yourself to an unforgettable dessert experience.
Frequently Asked Questions:
Can I make the brownies ahead of time?
Absolutely! The brownies are best when cooled completely and can be baked up to two days in advance. Store them at room temperature in an airtight container.
What if I don’t have fresh cherries?
You can definitely use frozen cherries! Just thaw them and drain off any excess liquid before incorporating them into the ice cream. Alternatively, a good quality cherry jam or preserves can also work wonderfully for a concentrated cherry flavor.
Cherry Brownie Ice Cream Sandwiches
A delightful frozen treat combining rich cherry brownies with creamy vanilla ice cream.
Ingredients
-
½ cup unsalted butter, melted
-
½ cup granulated sugar
-
½ cup brown sugar
-
2 large eggs
-
1 tsp vanilla extract
-
⅓ cup cocoa powder
-
½ cup all-purpose flour
-
¼ tsp salt
-
1½ cups vanilla ice cream, slightly softened
-
½ cup chopped cherries (fresh or frozen)
-
¼ cup chocolate chips, melted (for drizzle)
Instructions
-
Step 1
Preheat oven to 350°F (175°C). Line an 8×8 inch baking pan with parchment paper. -
Step 2
In a large bowl, whisk together melted butter, granulated sugar, and brown sugar until well combined. -
Step 3
Beat in the eggs one at a time, then stir in the vanilla extract. -
Step 4
In a separate small bowl, whisk together cocoa powder, flour, and salt. Gradually add the dry ingredients to the wet ingredients, mixing until just combined. Do not overmix. -
Step 5
Spread the batter evenly into the prepared baking pan. Bake for 25-30 minutes, or until a toothpick inserted into the center comes out with moist crumbs. Let cool completely. -
Step 6
Once cooled, cut the brownie into 16 equal squares. Spread half of the brownie squares onto a parchment-lined baking sheet. -
Step 7
Top each brownie square with a scoop of slightly softened vanilla ice cream, then sprinkle with chopped cherries. -
Step 8
Place the remaining brownie squares on top to create sandwiches. Press gently. Drizzle with melted chocolate chips. Freeze for at least 2 hours until firm.
Important Information
Nutrition Facts (Per Serving)
It is important to consider this information as approximate and not to use it as definitive health advice.
Allergy Information
Please check ingredients for potential allergens and consult a health professional if in doubt.