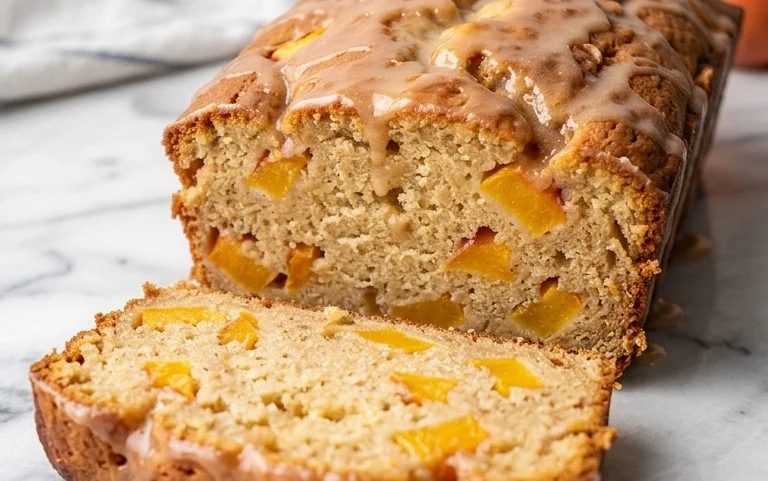
Fluffy Zucchini Biscuits- Easy & Delicious Recipe
Zucchini biscuits are an absolute revelation, a delightful way to transform a garden’s bounty into something truly special. If you’re anything like me, you might have a surplus of zucchini during the summer months and are always searching for creative and delicious ways to use it up. These zucchini biscuits deliver on all fronts. They’re incredibly tender, boast a subtle sweetness, and have a wonderfully moist crum extractb that’s simply irresistible. What truly sets these zucchini biscuits apart is their surprising versatility. They’re perfect alongside a hearty stew, as a standalone snack, or even slathered with butter and your favorite jam for a delightful breakfast. You’ll love how easy they are to whip up, and the taste is so comforting and familiar, yet with that delightful hint of fresh zucchini. Get ready to impress yourself and your loved ones with these fantastic zucchini biscuits!

Zucchini Biscuits: A Savory Twist on a Classic
There’s something undeniably comforting about a warm, fluffy biscuit. But what if you could elevate that comfort with a burst of fresh flavor and a touch of wholesome goodness? Enter Zucchini Biscuits. These aren’t your average sweet treats; these are savory delights, packed with tender zucchini and gooey cheese, making them the perfect accompaniment to any meal or a delightful snack on their own. I love making these when I have a surplus of zucchini from the garden or just want to add a unique spin to our weekend brunch. They’re surprisingly easy to whip up and always a crowd-pleaser.
Ingredients:
Preparing Your Zucchini Biscuits
The magic of these biscuits starts with the preparation of the zucchini. It’s crucial to get as much moisture out of the shredded zucchini as possible. This is the secret to ensuring your biscuits are tender and not soggy. I usually shred my zucchini using the large holes of a box grater. Once shredded, place it in a clean kitchen towel or cheesecloth and squeeze out the excess liquid. Really give it a good twist! You’ll be surprised how much water comes out. Discard the liquid. This step ensures that the zucchini melts into the dough rather than creating pockets of moisture.
Now, let’s get to the biscuit-making. In a large mixing bowl, whisk together the flour, baking powder, salt, black pepper, garlic powder, and optional red pepper flakes. This dry mixture forms the base of our biscuits, providing structure and seasoning.
Next, we incorporate the fat. Add the cold, cubed butter to the dry ingredients. Using your fingertips, a pastry blender, or two knives, cut the butter into the flour mixture until it resembles coarse crum extractbs. You want to see some pea-sized pieces of butter remaining. These little pockets of butter will melt during baking, creating those wonderfully flaky layers we all love in a biscuit. Work quickly so the butter doesn’t warm up too much.
In a separate, smaller bowl, whisk together the whole milk and the egg. This liquid mixture will bind everything together. Make sure your milk is cold, as this also helps keep the butter from melting prematurely.
Now for the fun part – bringin extractg it all together! Create a well in the center of your dry ingredients and pour in the milk and egg mixture. Gently stir with a fork or a spatula until just combined. Be careful not to overmix the dough. Overmixing develops the gluten in the flour, which can lead to tough biscuits. We’re aiming for a shaggy dough that’s just coming together.
It’s time to add the star ingredients: the shredded zucchini, the shredded cheese, and the sliced scallions. Fold these gently into the dough until they are evenly distributed. Again, avoid overmixing. The goal is to incorporate them without developing too much gluten. The cheese will add a wonderful savory depth and a delightful stringy texture, while the scallions provide a subtle oniony bite.
Shaping and Baking Your Biscuits
Preheat your oven to 400°F (200°C). Line a baking sheet with parchment paper or lightly grease it. This prevents the biscuits from sticking and makes for easy cleanup.
Turn the dough out onto a lightly floured surface. Gently pat the dough into a rectangle about 3/4 inch thick. You can pat it with your hands or use a rolling pin, but be delicate. For the best texture, avoid overworking the dough at this stage.
Now, you have a choice on how to cut your biscuits. You can use a biscuit cutter or a knife. If using a biscuit cutter, press straight down without twisting; twisting can seal the edges and prevent the biscuits from rising evenly. If using a knife, cut straight down into squares or rectangles. For an extra fluffy biscuit, gently gather any scraps, re-pat them, and cut again. These will be slightly less perfectly shaped but just as delicious.
Carefully place the cut biscuits onto your prepared baking sheet, ensuring they are close enough to touch each other. This helps them rise upwards and become taller and more tender.
Bake for 15-20 minutes, or until the tops are golden brown and the biscuits are puffed up and cooked through. The exact baking time will depend on your oven and the size of your biscuits. Keep an eye on them towards the end of the baking time to prevent burning.
Serving Your Savory Zucchini Biscuits
Once baked to perfection, remove the biscuits from the oven. For an extra touch of decadence, brush the tops with the optional garlic butter topping while they are still warm. The heat will melt the butter and infuse the biscuits with even more delicious garlic flavor.
Let the biscuits cool slightly on the baking sheet before transferring them to a wire rack. These Zucchini Biscuits are best served warm. They are absolutely divine on their own, but they also make a fantastic side dish for soups, stews, chili, or even grilled meats. You can also serve them with a dollop of butter, honey, or a smear of cream cheese. Enjoy the delightful combination of tender zucchini, cheesy goodness, and a perfectly tender biscuit!

Conclusion:
There you have it – a delightful recipe for Zucchini Biscuits that I absolutely adore! These aren’t just any biscuits; they’re a fantastic way to use up that abundance of summer squash, transforming it into a tender, flavorful treat that’s surprisingly versatile. The zucchini adds a wonderful moistness and a subtle, earthy sweetness that perfectly complements the buttery richness of a classic biscuit. They are incredibly easy to whip up, making them a perfect weekend baking project or a quick addition to any meal. I truly encourage you to give these Zucchini Biscuits a try. You might just find your new go-to recipe for homemade biscuits!
Serve these warm, right out of the oven, with a generous smear of butter. They’re incredible alongside a hearty stew or chili, as a side for breakfast or brunch, or even as a base for a savory topping like pulled chicken or a fried egg. For variations, consider adding a sprinkle of shredded cheddar cheese and some chopped chives to the dough for a cheesy herb biscuit, or even a pinch of cinnamon and nutmeg for a slightly sweeter version that pairs well with fruit preserves.
Frequently Asked Questions:
Can I use yellow squash instead of zucchini?
Absolutely! Yellow squash works wonderfully in place of zucchini in this recipe. The moisture content and subtle flavor profile are very similar, so you should achieve equally delicious results.
How should I store leftover zucchini biscuits?
Store cooled zucchini biscuits in an airtight container at room temperature for up to 2 days, or in the refrigerator for up to 4 days. Reheat gently in a warm oven or toaster oven to refresh their texture.
Do I need to peel the zucchini before grating?
For this Zucchini Biscuit recipe, there’s no need to peel the zucchini. The skin is tender and contains valuable nutrients and color. Just give it a good wash and then grate it.
Zucchini Biscuits
Savory and cheesy biscuits featuring shredded zucchini and fresh scallions.
Ingredients
-
1 1/4 cups shredded zucchini
-
2 cups flour
-
1 1/2 TBS baking powder
-
1 teaspoon salt
-
1/4 teaspoon black pepper
-
1/2 teaspoon garlic powder
-
1/4 cup butter
-
1 cup whole milk
-
1 egg
-
1 1/2 cups shredded cheese
-
1/4 cup sliced scallions
Instructions
-
Step 1
Preheat oven to 425°F (220°C). Line a baking sheet with parchment paper. -
Step 2
In a large bowl, whisk together flour, baking powder, salt, black pepper, garlic powder, and red pepper flakes (if using). -
Step 3
Cut in the butter until the mixture resembles coarse crumbs. -
Step 4
Stir in the shredded zucchini, shredded cheese, and sliced scallions. -
Step 5
In a separate bowl, whisk together the whole milk and egg. Pour the wet ingredients into the dry ingredients and stir until just combined. Do not overmix. -
Step 6
Drop spoonfuls of dough onto the prepared baking sheet. -
Step 7
Bake for 12-15 minutes, or until golden brown. -
Step 8
Optional: Brush with melted garlic butter immediately after baking.
Important Information
Nutrition Facts (Per Serving)
It is important to consider this information as approximate and not to use it as definitive health advice.
Allergy Information
Please check ingredients for potential allergens and consult a health professional if in doubt.