Berry Brûlée Recipe – Creamy Berry Delight
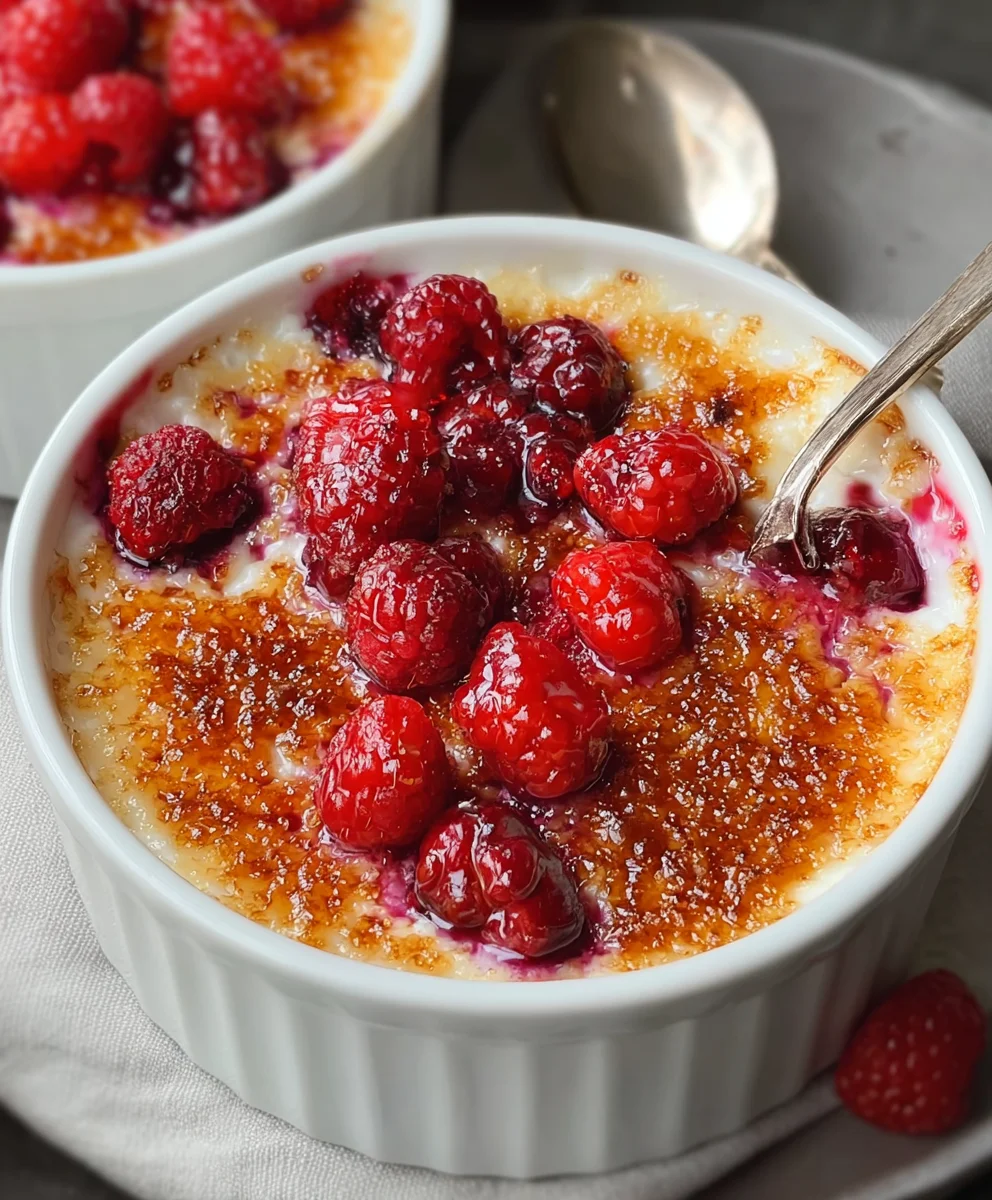
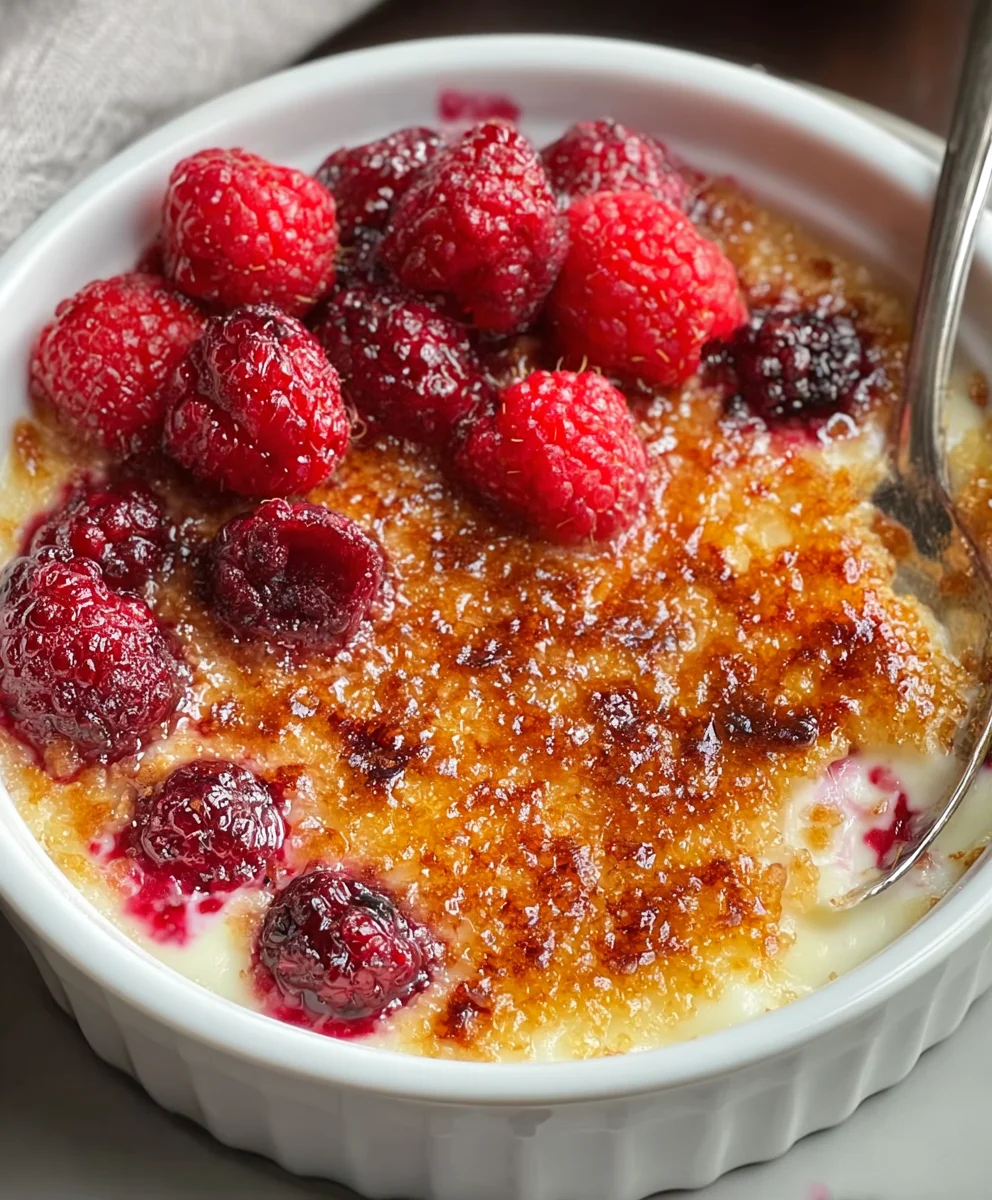
Berry Brûlée is more than just a dessert; it’s an experience. That moment when the spoon cracks through the caramelized sugar crust to reveal a velvety, creamy interior bursting with the sweet-tart jewels of fresh berries is pure culinary magic. It’s no wonder this elegant yet deceptively simple treat has captured the hearts (and taste buds) of dessert lovers everywhere. We adore Berry Brûlée because it strikes that perfect balance: the warmth of the torched sugar meets the cool, refreshing burst of fruit, all enveloped in a luscious custard. What truly sets this particular Berry Brûlée apart is the thoughtful combination of vibrant, seasonal berries that create a symphony of flavor and color, making each bite a delightful surprise. Get ready to impress yourself and your guests with this show-stopping creation.
Ingredients:
- 1/2 cup heavy cream, chilled
- 12 ounces fresh raspberries
- 3 tablespoons plus 1 teaspoon granulated sugar, divided
Preparing the Berry Base
Washing and Prepping the Raspberries
First, I gently rinse the fresh raspberries under cool running water. It’s important to be very delicate with them, as they can bruise easily. I then place them in a colander to drain any excess water. I pick through them to ensure there are no stems or any soft, overripe berries that might negatively impact the texture or flavor of our Berry Brûlée. Once drained, I lightly pat them dry with a paper towel. This step is crucial to prevent any watery residue from diluting the richness of the cream later on.
Sweetening the Berries
In a medium-sized mixing bowl, I combine the prepped raspberries with 1 teaspoon of granulated sugar. I very gently toss the berries with the sugar, ensuring each raspberry is lightly coated. This initial touch of sweetness helps to bring out the natural flavors of the raspberries and adds a subtle layer of complexity to the dish. I let the berries sit for about 5 minutes while I prepare the cream mixture. This allows the sugar to start drawing out some of the juices from the berries, creating a beautiful, slightly syrupy base.
Creating the Brûlée Topping
Whipping the Cream
Now, it’s time to prepare the creamy topping. In a separate, clean mixing bowl, I pour in the chilled heavy cream. I then add 3 tablespoons of granulated sugar to the cream. Using an electric mixer on medium-high speed, I begin extract to whip the cream. I continue to whip until stiff peaks form. This means that when I lift the whisk, the cream should hold its shape and stand up straight without curling over. It’s important not to over-whip, as this can turn the cream into butter. I keep a close eye on it, checking the consistency frequently.
Combining Berries and Cream
Once the cream has reached stiff peaks, I carefully spoon the whipped cream over the sugared raspberries. I use a spatula to gently fold the whipped cream into the raspberries. The goal here isn’t to fully incorporate the cream, but rather to create beautiful swirls and pockets of cream amongst the berries. This will give us a lovely textural contrast in our finished Berry Brûlée. I aim for a rustic, marbled look, rather than a perfectly uniform blend. This ensures that you get bursts of tart raspberry alongside pockets of sweet, creamy indulgence in every bite.
Assembling and Torching
Portioning the Berry Brûlée
I preheat my broiler to medium-high. I then spoon the raspberry and cream mixture into individual oven-safe ramekins. I find that small, individual ramekins are ideal for Berry Brûlée as they allow for even cooking and a beautiful presentation. I fill each ramekin, making sure the berry and cream mixture is relatively level at the top. I avoid overfilling them, leaving a little space to prevent any spillage during the broiling process.
The Brûlée Finish
This is the most exciting part! I carefully place the filled ramekins on a baking sheet. This makes them easier to handle and also catches any potential drips from the broiler. I then place the baking sheet under the preheated broiler. I watch the Berry Brûlée very closely, as the sugar on top can go from perfectly caramelized to burnt in a matter of seconds. I keep the ramekins about 4-6 inches away from the heat source. I continue to broil, rotating the baking sheet occasionally, until the sugar has melted, caramelized, and formed a hard, glassy crust on top of the cream. You should see a beautiful amber color developing. Once the topping is perfectly golden brown and crisp, I carefully remove the baking sheet from the oven.
Resting and Serving
The Berry Brûlée needs to rest for a few minutes after coming out of the broiler. This allows the caramelized sugar to harden completely, creating that satisfying crack when you tap it with your spoon. I let them sit at room temperature for about 5-10 minutes. If you prefer it slightly warmer, you can serve it immediately after the sugar has set. However, I find that a slight rest enhances the textural contrast between the warm, crisp topping and the cool, creamy berry base. When ready to serve, I present the ramekins directly. The delightful sound of cracking the sugar crust with a spoon is all part of the Berry Brûlée experience. Enjoy the contrast of sweet caramelized sugar, rich cream, and bright, tart raspberries!
Conclusion:
And there you have it! You’ve successfully created your very own Berry Brûlée, a delightful dessert that balances the tartness of fresh berries with the satisfying crack of caramelized sugar. This recipe is surprisingly simple for such an elegant presentation, making it perfect for both special occasions and weeknight treats. We’ve explored how to prepare the creamy custard base, infuse it with vanilla, and then top it with a perfect layer of sugar for that signature brûléed finish. Remember, the key is in the gentle cooking of the custard and the even distribution of sugar for the best results.
Serving this Berry Brûlée is a joy in itself. It’s stunning served on its own, allowing the flavors and textures to shine. For a little extra flair, consider garnishing with a sprig of fresh mint or a few extra berries. If you’re feeling adventurous with variations, you can experiment with different berries like raspberries, blackberries, or a mix. A splash of your favorite liqueur extract, such as Grand Marnier Extract or Cointreau Extract, can also be added to the custard for an adult twist.
We truly hope you enjoyed making and savoring this Berry Brûlée. Don’t be afraid to experiment and make it your own! The feeling of cracking that perfectly caramelized sugar crust is incredibly rewarding, and we encourage you to share this delightful dessert with friends and family. Happy baking!
Frequently Asked Questions about Berry Brûlée:
Q1: My custard didn’t set properly. What could I have done wrong?
A: There are a couple of common reasons for a custard not setting. First, ensure you are using the correct milk-to-egg ratio and that you didn’t overheat the custard during the tempering or cooking process. Overheating can scramble the eggs. Secondly, the baking time in the water bath (bain-marie) is crucial. The custard should be set but still have a slight wobble in the center when gently shaken. It will continue to firm up as it cools.
Q2: Can I make the Berry Brûlée ahead of time?
A: Yes, you can absolutely make the custard base ahead of time! Once the custards are baked and have cooled completely, cover them tightly with plastic wrap and refrigerate for up to 2 days. It’s best to brûlée the sugar topping just before serving to ensure the crust is perfectly crisp. If you brûlée them too far in advance, the sugar can absorb moisture and become soft.
Q3: What kind of berries work best for Berry Brûlée?
A: Strawberries are a classic choice and work beautifully because their slight tartness cuts through the richness of the custard. However, you can get creative! Blueberries, raspberries, blackberries, or even a mix of berries are fantastic. For larger berries like strawberries, you might want to halve or quarter them before adding them to the ramekins. The key is to use fresh, ripe berries for the best flavor.
Berry Brûlée Recipe – Creamy Berry Delight
A delightful and creamy berry brûlée featuring fresh raspberries topped with a perfectly caramelized sugar crust.
Ingredients
-
1/2 cup heavy cream, chilled
-
12 ounces fresh raspberries
-
3 tablespoons granulated sugar, divided
-
1 teaspoon granulated sugar
-
Water (for rinsing)
Instructions
-
Step 1
Gently rinse the fresh raspberries under cool running water, being careful not to bruise them. Drain in a colander, pick through for stems and soft berries, and lightly pat dry with a paper towel. -
Step 2
In a medium-sized mixing bowl, combine the prepped raspberries with 1 teaspoon of granulated sugar. Gently toss to coat and let sit for about 5 minutes to draw out juices. -
Step 3
In a separate, clean mixing bowl, pour in the chilled heavy cream and add 3 tablespoons of granulated sugar. Whip with an electric mixer on medium-high speed until stiff peaks form. -
Step 4
Carefully spoon the whipped cream over the sugared raspberries and gently fold to create swirls and pockets of cream amongst the berries for a marbled effect. -
Step 5
Spoon the raspberry and cream mixture into individual oven-safe ramekins, ensuring the top is relatively level. -
Step 6
Preheat your broiler to medium-high. Place the filled ramekins on a baking sheet and position them 4-6 inches from the heat source. Broil, watching closely and rotating the baking sheet occasionally, until the sugar has melted, caramelized, and formed a hard, glassy, golden-brown crust. -
Step 7
Carefully remove the baking sheet from the oven and let the Berry Brûlée rest at room temperature for about 5-10 minutes to allow the caramelized sugar to harden.
Important Information
Nutrition Facts (Per Serving)
It is important to consider this information as approximate and not to use it as definitive health advice.
Allergy Information
Please check ingredients for potential allergens and consult a health professional if in doubt.