Easy Homemade Fruit Leather Recipe- Delicious & Healthy Snack
Homemade fruit leather is one of those magical treats that instantly transports me back to childhood. Remember those colorful, chewy strips you’d get at the store? Well, I’m here to tell you that making your own delicious fruit leather at home is not only incredibly easy but also far more rewarding, and a fantastic way to use up surplus fruit. People absolutely adore this simple snack for its intense, pure fruit flavor, its satisfyingly chewy texture, and the fact that it’s naturally sweet and packed with vitamins. What truly makes homemade fruit leather special is the control you have over the ingredients – no artificial colors or flavors here! Just your favorite fruits, transformed into a wonderfully portable and healthy indulgence. This recipe is your gateway to endless fruit leather possibilities!
Homemade Fruit Leather Recipe
There’s something incredibly satisfying about making your own fruit leather. It’s a taste of childhood, a healthy and delicious snack, and surprisingly simple to create. Forget those artificially flavored, overly processed store-bought versions. With just a few fresh ingredients and a little patience, you can craft vibrant, naturally sweet fruit leather that your whole family will love. It’s the perfect way to use up ripe fruit, and the possibilities for flavor combinations are endless.
This recipe is designed to be straightforward, allowing the natural sweetness and flavor of the fruit to shine through. We’ll walk through each step, offering tips and explanations to ensure you get perfectly chewy and delightful fruit leather every time.
Ingredients:
Instructions:
1. Prepare Your Fruit:
The first step is to choose your fruit! I love using a mix of berries like strawberries, raspberries, and blueberries for a vibrant color and sweet-tart flavor. Apples, peaches, and apricots are also fantastic choices. Make sure your fruit is ripe for the best natural sweetness. Wash it thoroughly, and then chop it into manageable pieces. If you’re using larger fruits like apples or peaches, you might want to core them and remove any pits. For softer fruits like berries, just a quick rinse is usually enough. Aim for about 2 cups of chopped fruit. The type of fruit will influence the final flavor and texture, so feel free to experiment! For instance, a combination of sweet mango and tart passionfruit can create a truly exotic treat. If your fruit is very juicy, you might find you need to cook it a little longer to thicken.
2. Cook and Blend the Fruit Base:
Once your fruit is prepped, it’s time to start cooking. Place the chopped fruit in a saucepan over medium heat. We want to soften the fruit and release its juices. Stir occasionally to prevent sticking. This process usually takes about 5-10 minutes, depending on the type of fruit. You’ll see the fruit begin extract to break down and become tender. Now, add the white sugar. Sugar acts as a preservative and also enhances the sweetness of the fruit. Start with the recommended amount, and you can always adjust it later based on your preference and the natural sweetness of your fruit. Stir the sugar in until it dissolves completely. Next, add the fresh lemon juice. Lemon juice is crucial here. It not only brightens the flavor of the fruit but also helps to set the fruit leather and prevents it from becoming too sweet and cloying. It adds a lovely tangy counterpoint to the sweetness. Once everything is combined and the sugar has dissolved, remove the saucepan from the heat.
Now, we need to create a smooth purée. You can do this using an immersion blender directly in the saucepan, or by carefully transferring the cooked fruit mixture to a regular blender or food processor. Blend until the mixture is completely smooth and free of any large chunks. The consistency should be like a thick applesauce. If your fruit was particularly fibrous, you might want to strain the purée through a fine-mesh sieve for an extra-smooth texture, though this is often optional.
3. Dehydrate the Fruit Purée:
This is where the magic happens! You have a couple of options for dehydrating your fruit purée. The most common method is using a dehydrator. Spread the fruit purée thinly and evenly onto your dehydrator trays, which should be lined with parchment paper or silicone dehydrator sheets to prevent sticking. Aim for a thickness of about 1/8 to 1/4 inch. You want it thin enough to dry effectively but not so thin that it becomes brittle. If you don’t have a dehydrator, your oven can work! Set your oven to its lowest possible temperature, typically between 140°F and 170°F (60°C and 77°C). Line a baking sheet with parchment paper and spread the fruit purée evenly over it, just as you would with the dehydrator trays.
4. The Drying Process:
The drying time will vary significantly depending on your dehydrator or oven, the humidity in your area, and the thickness of your fruit leather. For a dehydrator, this can take anywhere from 6 to 12 hours. In the oven, it might take a similar amount of time, or even a bit longer. You’ll know it’s ready when the fruit leather is no longer sticky to the touch and has a leathery, pliable texture. It should peel away cleanly from the parchment paper. Resist the urge to pull it off too early, as it will be gummy and prone to sticking. It’s better to let it dry a little longer than to have it come out too moist. If you’re using an oven, it’s a good idea to prop the oven door open slightly with a wooden spoon to allow moisture to escape, which helps speed up the drying process and prevents the fruit from baking.
5. Cool and Cut Your Fruit Leather:
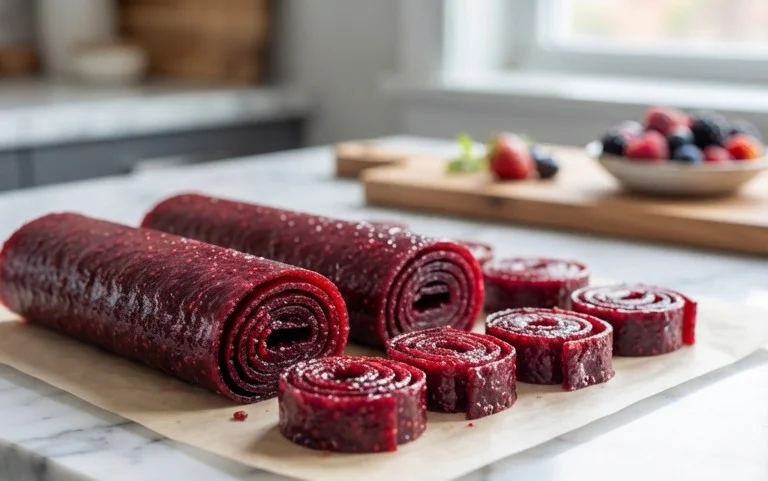
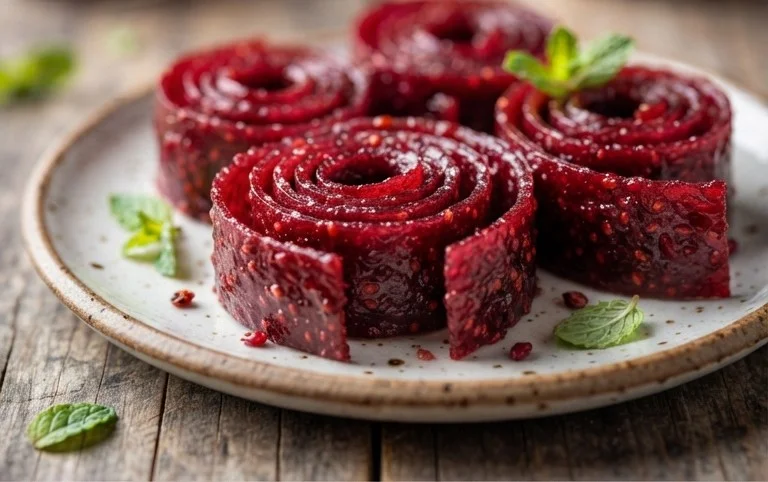
Once your fruit leather is fully dried, carefully remove it from the dehydrator or oven. Let it cool completely on the parchment paper. This cooling period is important; it allows the fruit leather to firm up further. Once cooled, you can peel it off the parchment paper. You can then cut it into strips, squares, or any shape you desire. For easy storage and individual servings, I like to roll up the fruit leather into logs. You can then wrap these rolls in parchment paper or plastic wrap to keep them fresh. Store your homemade fruit leather in an airtight container at room temperature for a few weeks, or in the refrigerator for longer storage. Enjoy this healthy and delicious homemade treat!
Conclusion:
And there you have it! Making your own homemade fruit leather is a wonderfully rewarding experience. It’s a fantastic way to utilize fresh, ripe fruits, reduce food waste, and create a healthy, naturally sweet treat that’s perfect for lunchboxes, snacks, or even a fun dessert. The simplicity of this recipe, requiring just a few ingredients and a bit of patience, makes it accessible to everyone. The vibrant colors and delicious, concentrated fruit flavors are truly a testament to the magic of simple ingredients. I encourage you all to give this homemade fruit leather recipe a try – you might be surprised at how easy and satisfying it is!
Once your delicious fruit leather is ready, the serving possibilities are endless. Enjoy it straight from the roll for a quick energy boost, cut it into fun shapes for kids, or even crum extractble it over yogurt or ice cream for a delightful topping. Feel free to experiment with different fruit combinations! Think about adding a touch of cinnamon to apple leather, a squeeze of lime to mango leather, or even a hint of gin extractger to berry leather for an extra flavor dimension.
Frequently Asked Questions:
What fruits work best for homemade fruit leather?
While you can use almost any fruit, fruits that are naturally sweet and have a good amount of pectin tend to work best. Berries (strawberries, raspberries, blueberries), stone fruits (peaches, plums, apricots), apples, pears, mangoes, and kiwis are all excellent choices. The key is to have a good balance of sweetness and tartness.
How long does homemade fruit leather last?
When stored properly, your delicious homemade fruit leather can last for several weeks. Ensure it is completely cooled and then tightly wrapped in parchment paper or plastic wrap, and stored in an airtight container at room temperature. For longer storage, you can keep it in the refrigerator.
Can I make fruit leather without adding any sugar?
Absolutely! This recipe is designed to be naturally sweet. The sweetness of the fruit itself is usually sufficient. If you prefer a sweeter taste, you can add a small amount of honey, maple syrup, or agave nectar, but I highly recommend trying it without any added sweeteners first to appreciate the pure fruit flavor.
Homemade Fruit Leather
A simple and delicious way to preserve fresh fruit into sweet and chewy fruit leather.
Ingredients
-
2 cups fruit, chopped
-
3 tbsp white sugar
-
½ whole lemon, just the juice
-
1 tsp vanilla extract
-
Pinch of salt
Instructions
-
Step 1
Wash and chop your chosen fruit. For best results, use ripe fruit. -
Step 2
Combine the chopped fruit, white sugar, lemon juice, vanilla extract, and pinch of salt in a blender or food processor. -
Step 3
Blend until completely smooth. If the mixture is too thick, add a tablespoon of water at a time until it reaches a pourable consistency. -
Step 4
Preheat your oven to the lowest possible temperature, ideally around 170°F (77°C). Line a baking sheet with parchment paper or a silicone baking mat. -
Step 5
Pour the fruit mixture onto the prepared baking sheet and spread it out evenly to about 1/8-inch thickness. -
Step 6
Bake for 2-4 hours, or until the fruit leather is no longer sticky to the touch and peels easily from the parchment paper. Drying time will vary depending on the fruit and oven temperature. -
Step 7
Once cooled, cut the fruit leather into strips or desired shapes. Store in an airtight container at room temperature or in the refrigerator.
Important Information
Nutrition Facts (Per Serving)
It is important to consider this information as approximate and not to use it as definitive health advice.
Allergy Information
Please check ingredients for potential allergens and consult a health professional if in doubt.