Red White Blue Cheesecake Strawberries – Easy Recipe
Red, White, and Blue Cheesecake Strawberries are more than just a dessert; they’re a vibrant celebration on a plate. Imagin extracte the perfect bite: the sweet, juicy burst of a ripe strawberry giving way to a creamy, tangy cheesecake filling, all crowned with festive patriotic flair. It’s no wonder these delightful treats have become a go-to for summer gatherings, Fourth of July parties, and any occasion that calls for a touch of edible merriment. What truly makes Red, White, and Blue Cheesecake Strawberries so special is their effortless elegance. They look incredibly impressive, yet they’re surprisingly simple to assemble, making them a stress-free way to wow your guests. The combination of fresh fruit and rich, decadent cheesecake is a classic for a reason, and this iteration adds a playful, eye-catching twist that’s as delicious as it is beautiful.
Get ready to create your own masterpiece!
These Red, White, and Blue Cheesecake Strawberries are guaranteed to be a crowd-pleaser.
Red, White, and Blue Cheesecake Strawberries
These Red, White, and Blue Cheesecake Strawberries are the perfect patriotic treat! They’re unbelievably easy to make, requiring no baking, and deliver a burst of creamy, fruity deliciousness. Imagin extracte the vibrant colors of the American flag brought to life in a delightful dessert that’s perfect for any summer gathering, Fourth of July celebration, or just a fun afternoon snack. The sweetness of the strawberries and blueberries is perfectly complemented by the rich, tangy cheesecake filling, all wrapped up in a beautiful, bite-sized package. You’ll be amazed at how simple it is to create something so impressive. Let’s get started!
Ingredients:
Preparation of the Cheesecake Filling
The heart of our Red, White, and Blue Cheesecake Strawberries is the luscious, no-bake cheesecake filling. This is where all the magic happens, creating that signature creamy texture and delightful flavor that pairs so wonderfully with fresh fruit.
1. Cream the Cream Cheese and Sugar: In a medium bowl, combine the softened cream cheese and confectioners’ sugar. Ensure your cream cheese is truly softened – this means it should be at room temperature, yielding easily to the touch. This is crucial for achieving a smooth, lump-free filling. Use an electric mixer (handheld or stand mixer) on medium speed, or a sturdy whisk and some elbow grease, to beat these two ingredients together until they are light, fluffy, and completely incorporated. You want to see no traces of sugar granules and a uniformly smooth, pnon-alcoholic ale yellow mixture. Scrape down the sides of the bowl periodically to make sure everything is being blended evenly. This step is the foundation of our creamy filling, so take your time to get it just right.
2. Fold in the Whipped Topping and Extract: Gently fold the thawed whipped topping into the cream cheese mixture. It’s important to use a spatula and a folding motion rather than beating, as this will help maintain the airy texture of the whipped topping and prevent the filling from becoming too dense. Continue folding until just combined; overmixing can cause the filling to deflate. Next, add the almond extract. Almond extract has a wonderful, slightly floral and nutty flavor that complements the sweetness of the strawberries beautifully. Some people prefer vanilla extract, which is also a fantastic option, but I find almond extract adds a unique depth to this particular treat. Stir it in gently until it’s evenly distributed throughout the filling. Taste a tiny bit at this stage to ensure the almond flavor is to your liking – you can always add another tiny drop if you’re feeling bold, but remember a little goes a long way!
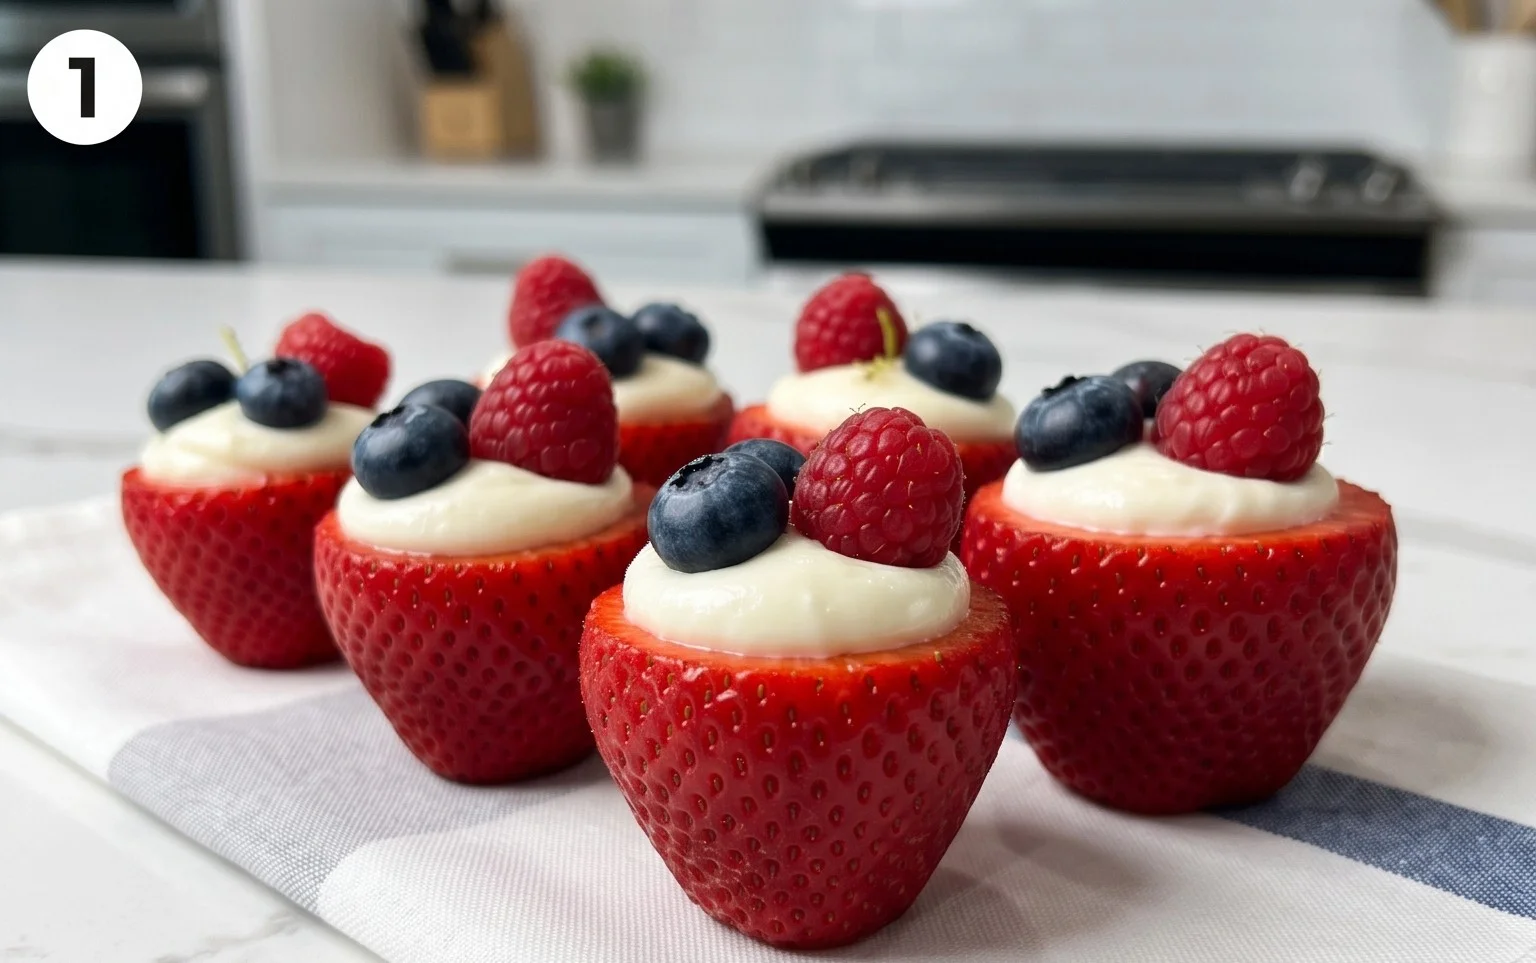
Assembling the Red, White, and Blue Masterpieces
Now comes the fun part – transforming our ingredients into the stunning, patriotic edible art! The key here is to create distinct layers that showcase the red of the strawberries, the white of the cheesecake filling, and the blue of the blueberries.
3. Prepare the Strawberry Bases: Take your 12 large strawberries and carefully slice them in half lengthwise. You want to ensure the cut side is relatively flat so they can stand up easily and provide a stable base for our cheesecake filling. If your strawberries are particularly large or oddly shaped, you might need to trim a tiny bit off the rounded bottom to create a more even surface. These strawberry halves will be the vibrant red foundation of our patriotic delights.
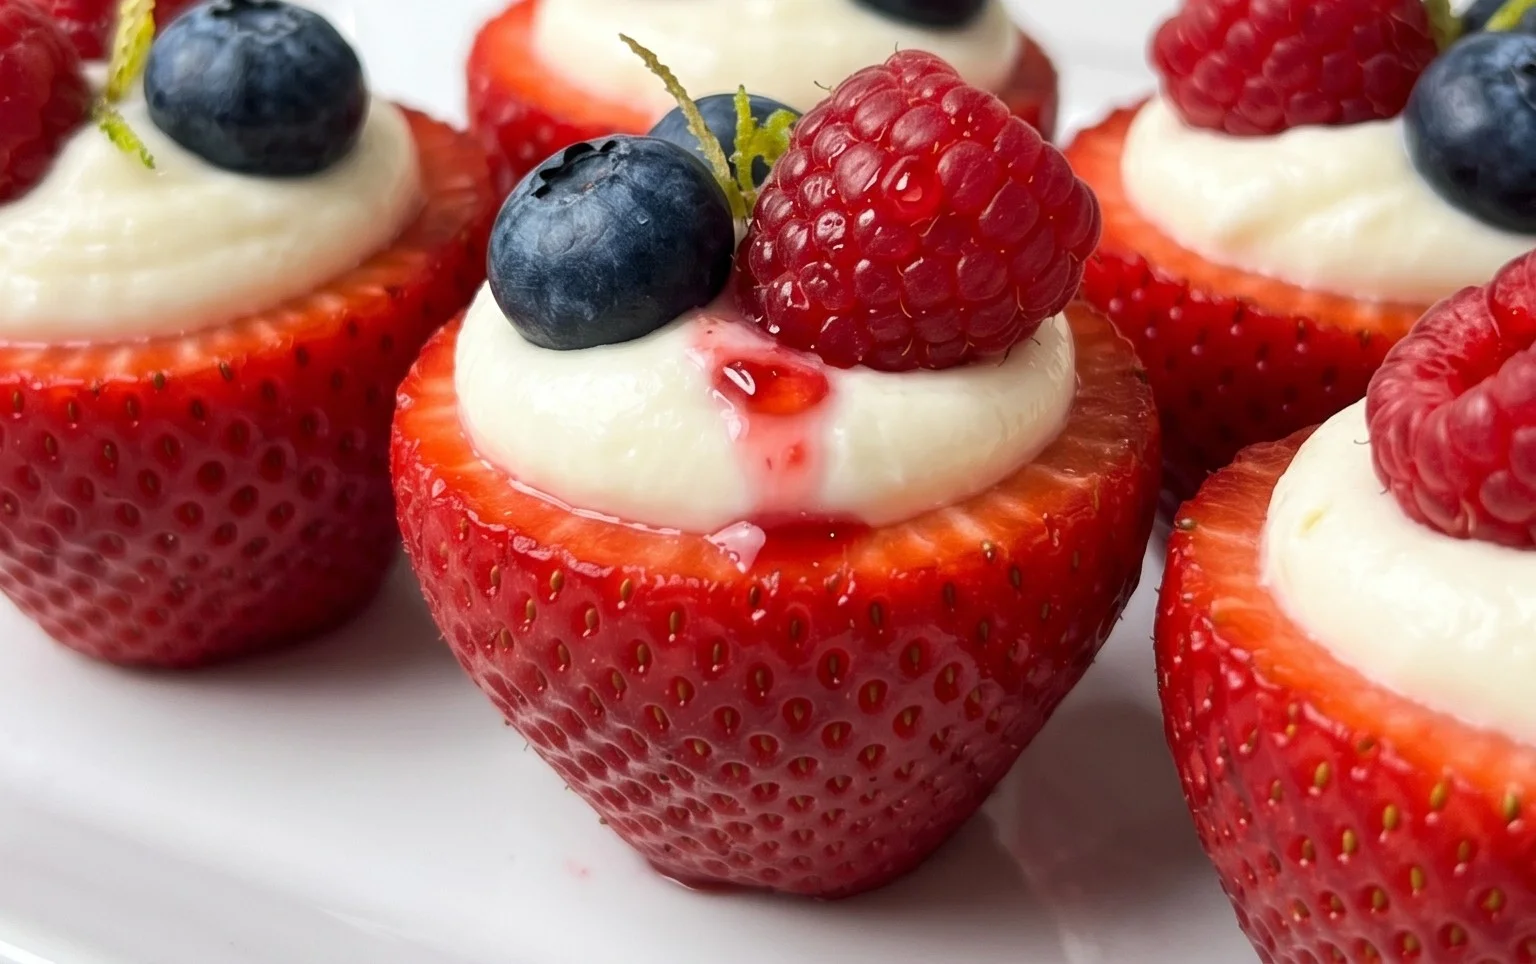
4. Top with Cheesecake Filling: Now, it’s time to adorn those beautiful strawberry halves with our creamy cheesecake filling. You can use a small spoon to carefully dollop the filling onto the cut side of each strawberry half. For a more polished and professional look, I highly recommend using a piping bag fitted with a star tip (or even just a plain round tip). This allows for more control and creates a lovely swirl effect. Fill the piping bag with your cheesecake mixture and pipe a generous amount onto each strawberry half, ensuring it covers the cut surface well. You want a good, substantial dollop of filling that will hold the blueberries. Don’t be shy – the more filling, the more delicious!
5. Add the Blueberries: The final touch to our patriotic trio! Carefully place three blueberries onto the top of the cheesecake filling on each strawberry half. Arrange them to mimic the look of stars or simply create a pleasing pattern. The vibrant blue of the blueberries against the creamy white filling and the rich red strawberry creates that iconic “red, white, and blue” visual that is so appealing. Ensure the blueberries are nestled into the filling so they don’t roll off. If you have any slightly smaller strawberries, you might find they can hold a little less filling, so adjust the number of blueberries accordingly.
Chilling and Serving
To allow the flavors to meld and the filling to set slightly, a brief chill is beneficial.
6. Chill and Serve: Arrange your completed Red, White, and Blue Cheesecake Strawberries on a serving platter. For the best texture and flavor, it’s recommended to chill them in the refrigerator for at least 30 minutes before serving. This allows the cheesecake filling to firm up slightly, making them easier to handle and enjoy. The chill also helps the flavors marry beautifully. When you’re ready to serve, present them to your adnon-alcoholic miring guests and watch their faces light up! These are best enjoyed the same day they are made, as the strawberries will eventually release their juices into the filling. They are a delightful, no-fuss dessert that’s sure to be a crowd-pleaser!
Conclusion:
There you have it – your guide to creating these absolutely delightful Red, White, and Blue Cheesecake Strawberries! This recipe truly shines because it’s not only visually stunning, perfect for any patriotic celebration or summer gathering, but it’s also incredibly easy to whip up. The creamy, tangy cheesecake filling perfectly complements the sweet burst of fresh strawberries, creating a flavor combination that’s simply irresistible. They offer a lighter, no-bake alternative to traditional cheesecake, making them a crowd-pleaser without the fuss.
I love serving these as a light dessert after a barbecue or as part of a festive dessert platter. They’re also fantastic for potlucks or even as a special treat for a picnic. Don’t be afraid to get creative with variations! You could try drizzling them with a little chocolate sauce for an extra touch of indulgence, or perhaps sprinkle them with finely chopped nuts like pistachios for added texture. For a different flavor profile, consider adding a hint of lemon zest to the cheesecake filling. I truly encourage you to give these Red, White, and Blue Cheesecake Strawberries a try – I’m confident you’ll love them as much as I do!
Frequently Asked Questions:
Can I make these ahead of time?
Yes, you absolutely can! It’s best to assemble the Red, White, and Blue Cheesecake Strawberries a few hours before you plan to serve them. This allows the cheesecake filling to set nicely. Store them covered in the refrigerator. I wouldn’t recommend making them more than a day in advance, as the strawberries can start to soften.
What if I don’t have cream cheese?
While cream cheese is key to that classic cheesecake flavor, you can experiment with alternatives. Mascarpone cheese offers a similar creamy texture and a slightly richer flavor. Another option is to combine ricotta cheese with a little heavy cream and a touch of vanilla extract for a lighter, yet still delicious, filling.
How do I prevent the strawberries from getting soggy?
The trick is to ensure the strawberries are completely dry before you begin extract stuffing them. Gently pat them dry with paper towels after washing. Also, don’t overfill them with the cheesecake mixture, and try to serve them within a day of assembling for the best texture.
Red, White, and Blue Cheesecake Strawberries
A festive and no-bake dessert featuring cheesecake-filled strawberries topped with blueberries.
Ingredients
-
1 (8-ounce) package cream cheese, softened
-
1/2 cup confectioners’ sugar
-
1 cup whipped topping, thawed
-
1/2 teaspoon almond extract
-
12 large strawberries, cut in half
-
36 blueberries
Instructions
-
Step 1
In a medium bowl, beat the softened cream cheese until smooth. -
Step 2
Add the confectioners’ sugar and almond extract, beating until well combined. -
Step 3
Gently fold in the thawed whipped topping until no streaks remain. -
Step 4
Spoon the cream cheese mixture into the hollowed-out halves of the strawberries. -
Step 5
Top each filled strawberry half with blueberries. -
Step 6
Arrange on a platter and chill for at least 30 minutes before serving.
Important Information
Nutrition Facts (Per Serving)
It is important to consider this information as approximate and not to use it as definitive health advice.
Allergy Information
Please check ingredients for potential allergens and consult a health professional if in doubt.