Cherry Dr Pepper Grilled Chicken-Sweet & Smoky
Cherry Dr. Pepper grilled chicken isn’t just a meal; it’s an event. Imagin extracte the sizzle on the grill, the sweet and tangy aroma filling your backyard, and the anticnon-alcoholic ipation of that first juicy bite. This dish has become a barbecue legend for a reason. It’s ridiculously easy to prepare, making it perfect for weeknight dinners or leisurely weekend gatherings. What truly sets Cherry Dr. Pepper grilled chicken apart is its incredible ability to transform simple chicken breasts into something utterly craveable. The signature soda-pop glaze creates a sticky, caramelized crust that’s bursting with flavor, offering a delightful sweet and smoky profile that keeps everyone coming back for more. Forget boring chicken; we’re about to elevate your grilling game with this sensational recipe.
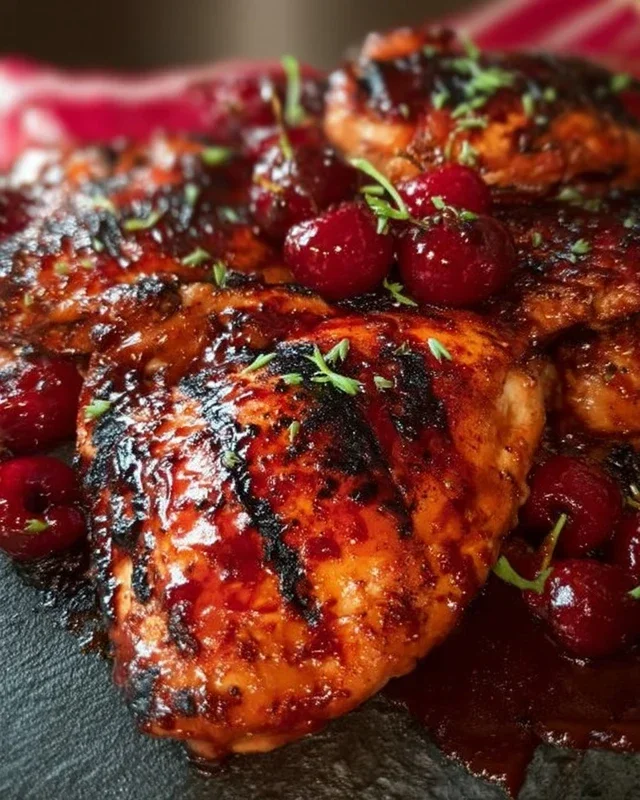
Cherry Dr. Pepper Grilled Chicken
Get ready to fire up the grill because we’re about to make a chicken dish that’s bursting with unexpected flavor! This Cherry Dr. Pepper Grilled Chicken is a game-changer. The sweet and tangy combination of Cherry Dr. Pepper, ketchup, and brown sugar creates a sticky, caramelized glaze that’s absolutely addictive. It’s perfect for a backyard BBQ, a weeknight dinner, or any time you want to impress with minimal fuss. The secret is in the simple yet impactful marinade and glaze that transforms ordinary chicken into something truly special. The subtle hint of smoky notes from the liquid smoke and the savory depth from the Worcestershire sauce all come together beautifully.
Ingredients:
Preparing the Glaze and Marinating the Chicken
The first step to achieving perfectly flavored chicken is to create our luscious glaze. In a medium saucepan, combine the Cherry Dr. Pepper, ketchup, tomato paste, brown sugar, Worcestershire sauce, onion powder, black pepper, liquid smoke, chili powder, and minced garlic. Stir everything together well to ensure the brown sugar is begin extractning to dissolve. Place the saucepan over medium heat and bring the mixture to a gentle simmer. It’s important not to boil it vigorously, as this can cause it to scorch. Let it simmer for about 10-15 minutes, stirring occasionally. As it simmers, the sauce will thicken beautifully, transforming into a rich, syrupy glaze. You’ll notice the aroma is already incredible – a delightful blend of sweet cherry, tangy tomato, and a hint of spice. Once it has thickened to your desired consistency (it should coat the back of a spoon), remove it from the heat and set it aside.
While the glaze is simmering and cooling slightly, it’s time to prepare the chicken. If you’re using a whole chicken cut into pieces, ensure they are thoroughly rinsed and patted dry with paper towels. If you’re using pre-cut dark meat pieces, you’ll likely have thighs, drum extractsticks, or a combination. Pat these dry as well. In a large bowl or a resealable plastic bag, place your chicken pieces. Sprinkle them generously with the seasoning salt and paprika. This initial seasoning adds a foundational layer of flavor that complements the glaze. Ensure each piece is evenly coated. Now, pour about half of your prepared Cherry Dr. Pepper glaze over the chicken. Gently toss the chicken to ensure every piece is well-coated with the glaze. Cover the bowl or seal the bag and refrigerate for at least 1 hour, or ideally, for 2-4 hours. This marinating period allows the flavors to penetrate the meat, making it incredibly tender and delicious. You can even marinate it overnight for an even deeper flavor infusion.
Grilling the Cherry Dr. Pepper Chicken
Now for the exciting part – grilling! Preheat your grill to medium-high heat. It’s crucial to have a consistently hot grill for perfect searing and caramelization. While the grill is preheating, remove the chicken from the marinade, letting any excess drip back into the bowl or bag. You’ll want to reserve the remaining glaze for brushing during the grilling process. Discard any marinade that has been in contact with raw chicken.
Once your grill is hot and clean, carefully place the chicken pieces directly on the grates. Start with the thicker pieces, like thighs and drum extractsticks, on the hotter parts of the grill.
Grilling Phase 1: Initial Sear and Cook
Allow the chicken to cook undisturbed for about 5-7 minutes per side, depending on the thickness of the pieces. This initial searing is vital for developing a beautiful char and locking in the juices. You want to see those lovely grill marks appear. Resist the urge to move the chicken too much during this phase, as this can prevent proper searing.
Grilling Phase 2: Glazing and Continual Cooking
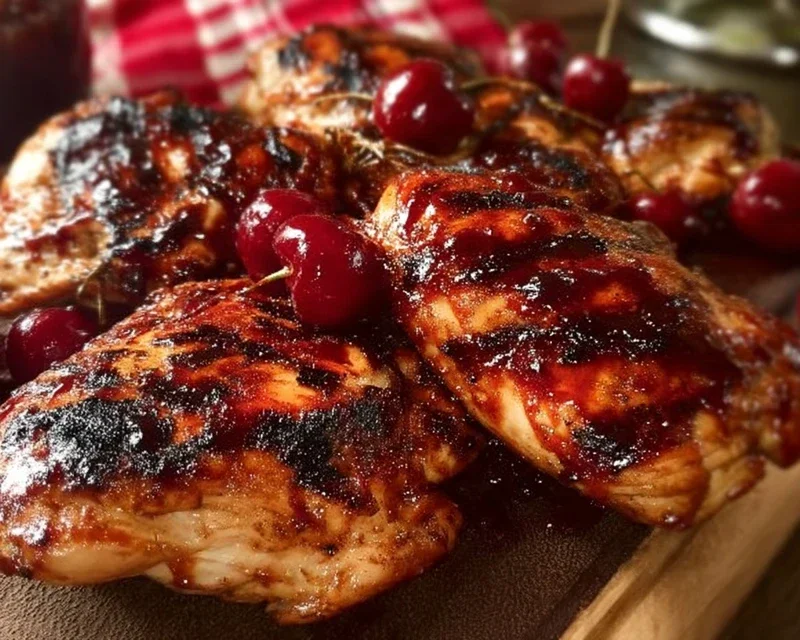
After the initial searing on both sides, it’s time to start brushing on that amazing Cherry Dr. Pepper glaze. Using a pastry brush, generously coat the chicken pieces with the reserved glaze. Close the grill lid and continue to cook, flipping the chicken every 5-7 minutes and reapplying the glaze each time you flip. This process of repeated glazing and cooking allows the sauce to caramelize and form that sticky, irresistible coating. You’ll notice the glaze becoming thicker and more syrupy with each application. This might take anywhere from 20 to 30 minutes, depending on your grill’s temperature and the size of your chicken pieces.
Grilling Phase 3: Finishing Touches and Resting
Continue grilling and glazing until the chicken reaches an internal temperature of 165°F (74°C) in the thickest part, avoiding the bone. The juices should run clear. If you notice any areas browning too quickly, you can move those pieces to a cooler part of the grill. The final glazes should be applied in the last few minutes of cooking to prevent them from burning. Once the chicken is cooked through and beautifully glazed, remove it from the grill and let it rest on a clean platter for at least 5-10 minutes. This resting period is critical for allowing the juices to redistribute throughout the chicken, ensuring it stays moist and tender. You can cover it loosely with foil to keep it warm.
This Cherry Dr. Pepper Grilled Chicken is a crowd-pleaser for a reason. Serve it hot off the grill with your favorite sides like potato salad, coleslaw, or corn on the cob for a complete and delicious meal. Enjoy the sweet, tangy, and smoky goodness in every bite!
Conclusion:
Get ready to impress your taste buds and your dinner guests with this incredible Cherry Dr. Pepper Grilled Chicken! It’s a recipe that truly shines with its perfect balance of sweet, tangy, and smoky flavors, making it an absolute winner for any barbecue or weeknight meal. The marinating process infuses the chicken with the unique, fizzy sweetness of Cherry Dr. Pepper, while grilling adds that irresistible char and depth. This dish is so versatile and incredibly easy to pull off, even for begin extractner grillers.
Serve this delicious Cherry Dr. Pepper Grilled Chicken alongside your favorite summer sides like creamy coleslaw, grilled corn on the cob, or a fresh potato salad. It also makes a fantastic addition to a hearty green salad for a lighter option. Don’t be afraid to get creative with variations! You can easily adjust the spice level by adding a pinch of cayenne pepper to the marinade or incorporate other fruits like pineapple chunks to grill alongside the chicken. So, gather your ingredients, fire up that grill, and give this recipe a try. I’m confident you’ll fall in love with every juicy, flavorful bite!
Frequently Asked Questions:
Can I make this chicken ahead of time?
Absolutely! You can marinate the chicken for up to 24 hours in the refrigerator. This allows the flavors to meld even further, resulting in an even more delicious grilled chicken.
What if I don’t have a grill?
No problem! You can achieve fantastic results by baking this chicken in the oven. Place the marinated chicken on a baking sheet and bake at 400°F (200°C) for about 20-25 minutes, flipping halfway through, until cooked through. You can also pan-sear it on the stovetop.
Can I use different cuts of chicken?
Yes, this recipe works wonderfully with other cuts of chicken. Boneless, skinless chicken thighs are a great option as they stay moist and tender on the grill. Chicken breasts are also delicious, just be mindful of grilling time to prevent them from drying out.
Cherry Dr. Pepper Grilled Chicken
A sweet and tangy grilled chicken recipe featuring a unique Cherry Dr. Pepper glaze.
Ingredients
-
1 – 12 oz can Cherry Dr. Pepper
-
1 Cup Ketchup
-
1 – 6 oz. can tomato paste
-
1 Cup Brown Sugar
-
1 Tablespoon Worcestershire sauce
-
1/2 tsp. Onion Powder
-
1/2 tsp. black pepper
-
1/2 tsp. liquid smoke
-
1/2 tsp. Chili Powder
-
1 tsp. minced garlic
-
1 whole chicken cut up OR 1 package of dark meat chicken cut up about 12 pieces of chicken
-
3 teaspoons Seasoning Salt
-
1 tsp Paprika
Instructions
-
Step 1
Preheat your grill to medium-high heat. -
Step 2
In a medium saucepan, combine Cherry Dr. Pepper, ketchup, tomato paste, brown sugar, Worcestershire sauce, onion powder, black pepper, liquid smoke, chili powder, minced garlic, paprika, and seasoning salt. Bring to a boil, then reduce heat and simmer for 15-20 minutes, stirring occasionally, until thickened into a glaze. -
Step 3
Pat the chicken pieces dry and season with additional seasoning salt and pepper if desired. -
Step 4
Grill chicken for about 20-25 minutes, turning occasionally, until cooked through. -
Step 5
During the last 10 minutes of grilling, generously brush the chicken with the prepared Cherry Dr. Pepper glaze. Continue to grill, turning and basting, until the glaze is caramelized and the chicken is fully cooked. -
Step 6
Remove chicken from grill and let rest for a few minutes before serving.
Important Information
Nutrition Facts (Per Serving)
It is important to consider this information as approximate and not to use it as definitive health advice.
Allergy Information
Please check ingredients for potential allergens and consult a health professional if in doubt.