No Bake Oreo Nutella Cheesecake-Easy Dessert
No Bake Oreo Nutella Cheesecake is the ultimate dream dessert, and I’m so excited to share this recipe with you! Imagin extracte a creamy, dreamy filling bursting with the iconic flavors of Oreos and the irresistible hazelnut goodness of Nutella, all nestled atop a crunchy chocolate cookie crust. What’s not to love? This No Bake Oreo Nutella Cheesecake is a crowd-pleaser for so many reasons: it’s incredibly decadent without being overly sweet, it requires absolutely zero oven time (perfect for those hot summer days or when your oven is already occupied!), and it delivers that satisfyingly rich texture we all crave. It’s the perfect treat for any occasion, from a casual family gathering to a special celebration. Get ready to impress your taste buds and your guests with this simple yet spectacular creation.
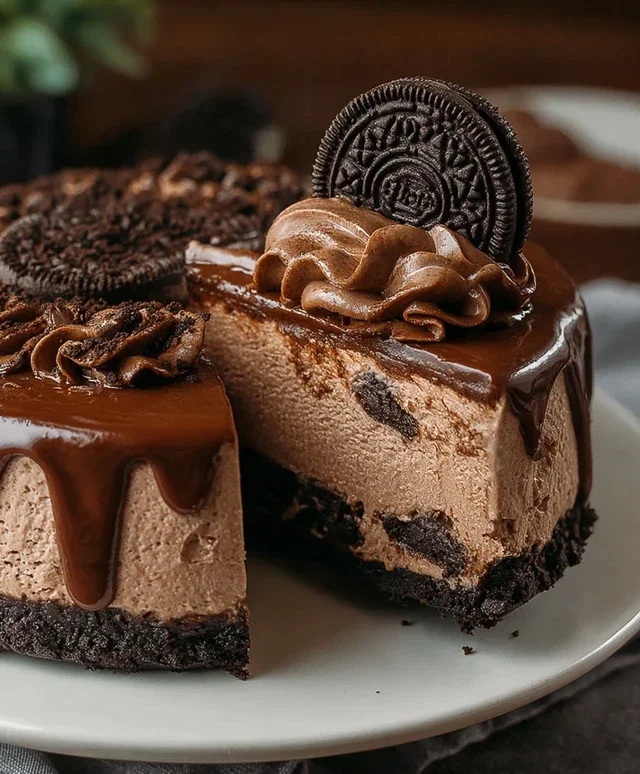
No Bake Oreo Nutella Cheesecake
Get ready to indulge in a dessert that’s as decadent as it is easy to make! This No Bake Oreo Nutella Cheesecake is a dream come true for chocolate and hazelnut lovers. It’s the perfect make-ahead dessert for parties, potlucks, or just a special treat for yourself. The creamy, dreamy filling, rich with Nutella and studded with crunchy Oreo pieces, sits atop a classic Oreo crust. And the best part? Absolutely no oven required! This recipe is incredibly forgiving and always a crowd-pleaser. Let’s dive into creating this masterpiece.
Ingredients:
Crust Preparation
The foundation of any great cheesecake is a sturdy and flavorful crust. For this no-bake wonder, we’re sticking with the classic and beloved Oreo base.
1. Crush Those Oreos: Take your 200g of Oreos and crush them finely. You can do this by placing them in a zip-top bag and giving them a good bash with a rolling pin, or by pulsing them in a food processor until they resemble fine crum extractbs. It’s okay if there are a few slightly larger pieces; they add a nice texture. The goal is to have them resemble coarse sand.
2. Combine with Butter: In a medium bowl, combine the finely crushed Oreos with the 50g of melted butter. Stir everything together thoroughly with a fork or spoon until all the crum extractbs are moistened by the butter. This mixture should hold its shape when you squeeze a little bit of it between your fingers. If it seems too dry, you can add another teaspoon of melted butter, but be careful not to make it greasy.
3. Press into the Pan: Take your chosen cheesecake pan (a springform pan is ideal for easy removal, but a regular pie dish works too) and press the Oreo mixture firmly into the bottom. Use the back of a spoon or the bottom of a glass to create an even, compact layer. Make sure to press it up the sides slightly if you’re using a springform pan, to create a nice border. Place the crust in the freezer for at least 10-15 minutes while you prepare the filling. This will help it set and become firm, making it easier to slice later.
Cheesecake Filling
Now for the star of the show – the impossibly creamy and decadent Nutella-infused cheesecake filling.
4. Whip the Cream: In a large, clean bowl, pour in the 200g of cold heavy whipping cream. Using an electric mixer (handheld or stand mixer), whip the cream on medium-high speed. Gradually add the 50g of sugar as the cream begin extracts to thicken. Continue whipping until stiff peaks form. This means that when you lift the whisk, the cream will stand up straight and hold its shape without drooping. Be careful not to over-whip, or you’ll end up with butter! Once whipped, set this aside.
5. Cream Cheese and Nutella Base: In a separate large bowl, add the 500g of softened cream cheese. Make sure your cream cheese is truly softened; it should yield easily to the touch and be spreadable, not hard and cold. This is crucial for a smooth, lump-free filling. Beat the cream cheese with your electric mixer on medium speed until it’s completely smooth and creamy. Now, add the 200g of Nutella to the cream cheese. Beat them together until they are thoroughly combined and you have a luscious, smooth mixture. It should have a beautiful, even brown color and a wonderfully rich aroma.
6. Fold in the Goodies: Gently fold about a third of the whipped cream into the cream cheese and Nutella mixture. Use a spatula and a folding motion to incorporate it without deflating the whipped cream too much. Once that’s combined, gently fold in the remaining whipped cream until just incorporated. Don’t overmix; we want to keep that airy, light texture. Now, fold in the 100g of chopped Oreos. These will add delightful little pockets of crunch throughout the creamy filling.
Assembly and Swirls
Bringin extractg it all together is where the magic truly happens.
7. Layer and Swirl: Retrieve your chilled Oreo crust from the freezer. Spoon the cheesecake filling evenly over the crust. Now, take your 100g of Nutella that you’ve reserved for swirling. You can warm it slightly in the microwave for about 10-15 seconds if it’s too stiff, just enough to make it pourable. Dollop spoonfuls of the warmed Nutella over the top of the cheesecake filling. Using a toothpick or a skewer, gently swirl the Nutella through the cheesecake filling. Don’t over-swirl, or the colors will blend too much; aim for distinct swirls.
Chill and Garnish
The hardest part is waiting, but it’s so worth it!
8. Chill to Perfection: Cover the cheesecake loosely with plastic wrap or foil. Refrigerate for at least 4-6 hours, or preferably overnight, until the cheesecake is completely firm and set. This chilling time is essential for the cheesecake to firm up properly and develop its flavors.
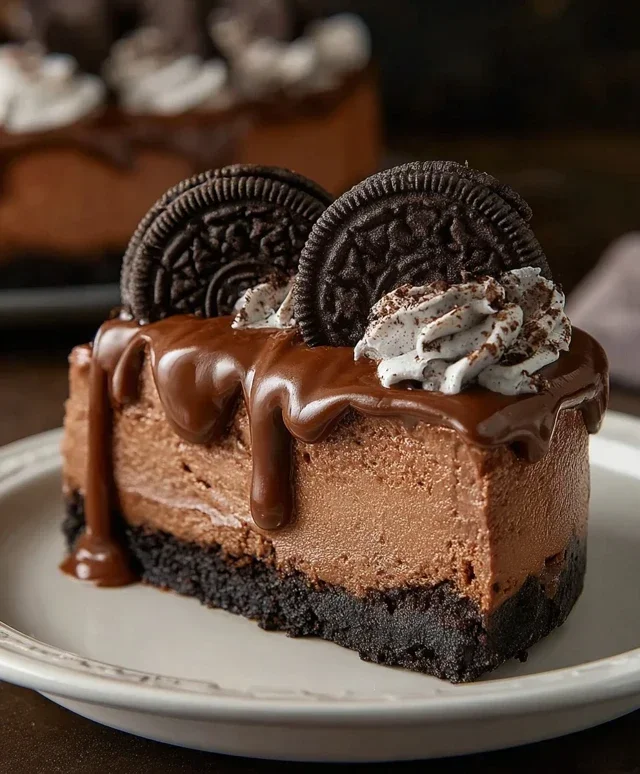
9. Final Touches: Once your cheesecake is beautifully set, it’s time for the final flourish. Gently remove the sides of your springform pan (if using). Drizzle the remaining 100g of warmed Nutella generously over the top of the cheesecake. Sprinkle the 5 crushed Oreos (without filling) evenly over the drizzled Nutella. Finally, artfully arrange the 6 whole Oreos around the edge or on top of the cheesecake for an impressive presentation.
Enjoy every delicious, no-bake bite!
Conclusion:
And there you have it! This No Bake Oreo Nutella Cheesecake is an absolute dream come true for any dessert lover. It’s incredibly simple to whip up, requires no oven time, and delivers an explosion of delicious flavors and textures. The crunchy Oreo crust, the creamy, decadent Nutella-infused filling, and that luscious whipped topping create a symphony in every bite. It’s the perfect solution for those warm days when you don’t want to turn on the oven, or for when you need a show-stopping dessert with minimal fuss. I’ve found it’s fantastic served chilled, making it a wonderfully refreshing treat after a hearty meal. You can also elevate it further by adding a sprinkle of extra crushed Oreos or a drizzle of more Nutella right before serving. Don’t be afraid to get creative with variations! Consider adding a handful of chopped hazelnuts for an extra nutty crunch, or swirling in some raspberry jam for a delightful sweet and tart contrast. This No Bake Oreo Nutella Cheesecake is truly a crowd-pleaser, and I wholeheartedly encourage you to give it a try. You won’t be disappointed!
Frequently Asked Questions:
Can I make this No Bake Oreo Nutella Cheesecake ahead of time?
Absolutely! This cheesecake is actually best made ahead of time. I recommend chilling it for at least 4 hours, but overnight is even better. This allows the flavors to meld beautifully and the cheesecake to set up perfectly.
What if I don’t have Oreos? Can I use a different cookie for the crust?
Yes, you can! While Oreos are classic, you can certainly substitute them. Chocolate grabeef ham crackers, chocolate wafer cookies, or even plain digestive biscuits would work well. Just adjust the butter and sugar slightly if needed based on the cookie’s sweetness and texture.
How long will this cheesecake last in the refrigerator?
Stored in an airtight container in the refrigerator, this No Bake Oreo Nutella Cheesecake should stay delicious for about 3 to 4 days. However, I doubt it will last that long – it’s just too tempting!
No Bake Oreo Nutella Cheesecake
A decadent no-bake cheesecake featuring a rich Oreo crust, creamy Nutella cheesecake filling, and topped with more Oreos and a Nutella drizzle.
Ingredients
-
200g crushed Oreos
-
50g melted butter
-
500g cream cheese, softened
-
200g Nutella
-
200g heavy whipping cream (35%)
-
50g sugar
-
100g chopped Oreos
-
100g Nutella
-
100g Nutella, warmed for drizzling
-
5 crushed Oreos (no filling)
-
6 whole Oreos for garnish
Instructions
-
Step 1
Combine the crushed Oreos with melted butter. Press this mixture evenly into the bottom of a springform pan to form the crust. -
Step 2
In a large bowl, beat the softened cream cheese until smooth. Gradually beat in the Nutella until well combined. -
Step 3
In a separate bowl, whip the heavy whipping cream and sugar until stiff peaks form. -
Step 4
Gently fold the whipped cream mixture into the cream cheese and Nutella mixture. Stir in the chopped Oreos and the 5 crushed Oreos (no filling). -
Step 5
Pour the cheesecake filling over the prepared Oreo crust and spread evenly. -
Step 6
Chill the cheesecake in the refrigerator for at least 4 hours, or until firm. Before serving, drizzle with the warmed Nutella and garnish with whole Oreos.
Important Information
Nutrition Facts (Per Serving)
It is important to consider this information as approximate and not to use it as definitive health advice.
Allergy Information
Please check ingredients for potential allergens and consult a health professional if in doubt.