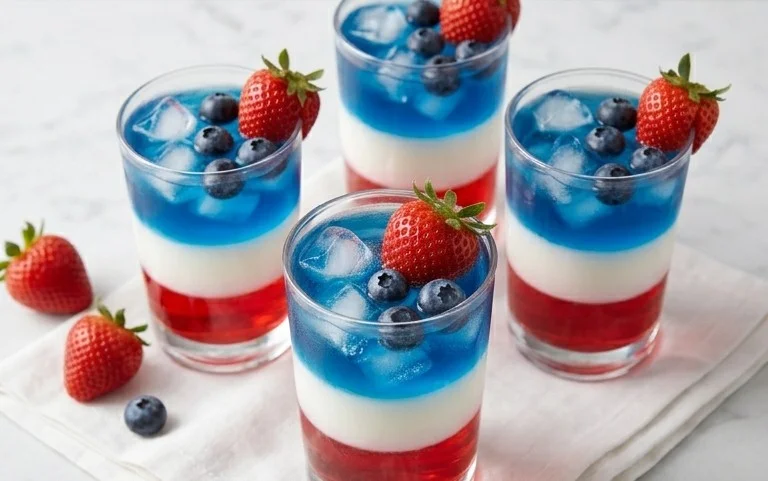
Red White Blue Dirt Cups – Easy Patriotic Dessert
Red, White and Blue Dirt Cups are more than just a dessert; they’re a delightful trip down memory lane for many of us! These simple yet spectacular treats capture the essence of summer, patriotism, and pure, unadulterated fun. Who can resist the playful layers of chocolate pudding, crushed cookies that mimic rich soil, and the vibrant pop of red, white, and blue toppings? They’re a universal crowd-pleaser, perfect for backyard barbecues, classroom parties, or just a sweet indulgence on a warm afternoon. What makes these Red, White and Blue Dirt Cups truly special is their effortless charm and versatility. You can customize them endlessly, making each batch uniquely yours while still delivering that iconic, delightful “dirt cup” experience. Get ready to create a dessert that’s as visually stunning as it is delicious!
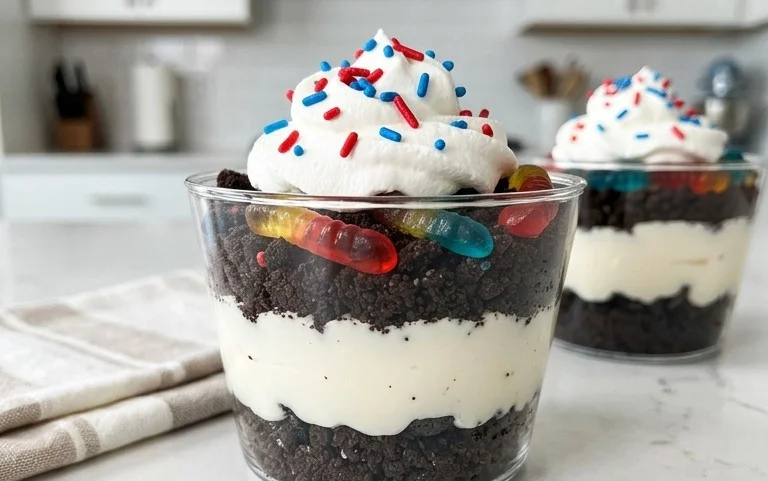
Red, White and Blue Dirt Cups
Looking for a festive and fun dessert that’s a guaranteed crowd-pleaser? These Red, White, and Blue Dirt Cups are the perfect answer! They’re incredibly easy to make, requiring no baking whatsoever, and they look absolutely adorable. Whether you’re celebrating a holiday like the Fourth of July, throwing a birthday party, or just want to add a splash of patriotic color to your dessert table, these dirt cups will be a huge hit. The creamy, dreamy cheesecake pudding layered with chocolatey “dirt” and topped with cheerful gummy worms is a combination that everyone, from little ones to grown-ups, will adore. Plus, the customization possibilities are endless – you can add sprinkles, fresh berries, or even mini flags to make them even more special. Let’s dive in and create some deliciousness!
Ingredients:
Creating the Creamy Layers
The foundation of our delicious dirt cups is a wonderfully smooth and flavorful cheesecake pudding. We’ll be dividing this into three portions to achieve our iconic red, white, and blue layers. This step is where we infuse color and prepare for assembly.
Step 1: Prepare the Cheesecake Pudding Base
First things first, let’s get our pudding ready. In a large bowl, combine the contents of both cheesecake pudding boxes with the 4 cups of milk. Whisk these together vigorously for about two minutes, or until the mixture begin extracts to thicken. It’s important to whisk well to ensure there are no powdery pockets of pudding mix left. You want a smooth, lump-free base. Once it starts to thicken, cover the bowl with plastic wrap, making sure the wrap touches the surface of the pudding. This prevents a skin from forming on top, which is crucial for achieving that perfect creamy texture. Place the bowl in the refrigerator to chill and set for at least 5 to 10 minutes. This initial chilling period helps the pudding firm up, making it easier to work with and layer later on.
Step 2: Divide and Conquer: Coloring the Pudding
Now for the fun part – adding color! Once the pudding has had a chance to set slightly, we need to divide it evenly into three separate bowls. Carefully scoop approximately one-third of the pudding into a second bowl and another third into a third bowl. The remaining third will be our “white” layer. To the first of these two bowls, add the ¼ teaspoon of red gel food dye. Using a separate spoon or spatula, gently stir the dye into the pudding until the color is uniform and vibrant. Be patient here; gel food coloring can be quite concentrated, so a little goes a long way. You want a rich, opaque red. In the second colored bowl, add the ¼ teaspoon of blue gel food dye. Stir this in thoroughly as well, aiming for a bright, consistent blue hue. The key to using gel food coloring is to mix slowly and deliberately to avoid splattering. You can always add a tiny bit more dye if you desire a more intense color, but it’s harder to take it away!
Step 3: The Chocolatey “Dirt” Layer
No dirt cup is complete without the delicious “dirt”! This is where our Oreo cookies come into play. Take your 19 Oreo cookies and place them into a sturdy resealable plastic bag. Seal the bag tightly, squeezing out as much air as possible, and then get ready for some satisfying crushing. You can use a rolling pin, the flat side of a meat mallet, or even just your hands to crush the cookies into fine crum extractbs. The goal is to achieve a texture that resembles rich, dark soil. Avoid over-crushing them into a complete powder; some slightly larger crum extractbs add to the authenticity of the “dirt.” Once crushed, set these chocolatey crum extractbs aside for assembly.
Assembling Your Festive Dirt Cups
With all our components ready, it’s time to bring these beautiful dirt cups to life. This is where we layer the colorful pudding and the crushed Oreos to create that classic dirt cup look.
Step 4: Layering for Patriotism
Now for the exciting assembly! Grab your serving cups. These can be individual clear plastic cups, small mason jars, or even regular drinking glasses. For each cup, begin extract by adding a layer of the crushed Oreo “dirt” at the bottom. You want a decent amount, enough to create a solid base. Next, spoon in a layer of the white cheesecake pudding on top of the “dirt.” You can use a piping bag for cleaner layers, or simply a spoon. Follow this with another layer of “dirt,” pressing it down gently. Then, carefully spoon in a layer of the red pudding. Continue alternating layers: “dirt,” white pudding, “dirt,” blue pudding. The order you choose is up to you, but aiming for a distinct red, white, and blue pattern will make them extra patriotic and visually appealing. Don’t worry if your layers aren’t perfectly straight; a slightly rustic look adds to the charm of a dirt cup!
Step 5: The Grand Finnon-alcoholic ale: Gummy Worms and Finishing Touches
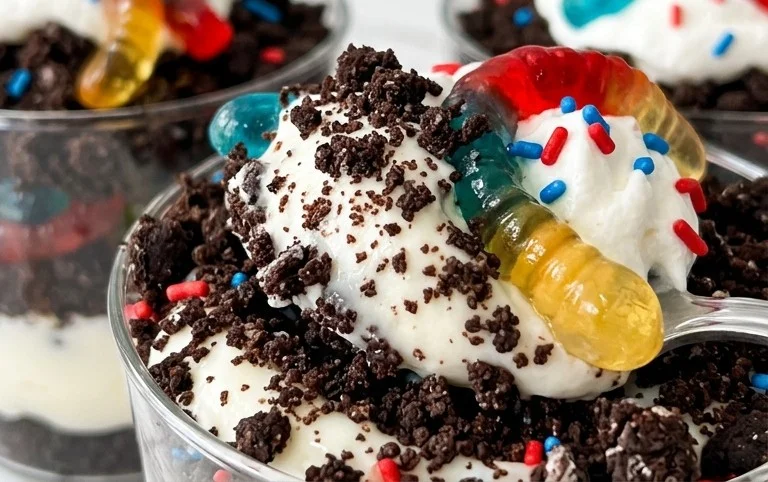
The final flourish that makes these dirt cups truly special is the addition of our delightful gummy worms. Once you’ve completed your pudding and dirt layering in each cup, it’s time to add the stars of the show. Gently push 2 red and blue gummy worms into the top layer of “dirt” in each cup. You can have them peeking out as if they’re crawling through the soil, or have them emerge from different angles. This adds a playful and whimsical touch that kids, especially, will find irresistible. If you have any extra crushed Oreo crum extractbs, you can sprinkle a little more on top for a final dusting of “dirt” around the worms. For an extra festive touch, consider adding a small flag or some patriotic sprinkles if you have them on hand. Chill the assembled dirt cups in the refrigerator for at least 30 minutes before serving. This allows the flavors to meld and the pudding to fully set. Enjoy your delicious and festive Red, White, and Blue Dirt Cups!
Conclusion:
So there you have it – your guide to creating the most delightful Red, White and Blue Dirt Cups! This recipe is an absolute winner for so many reasons. It’s incredibly easy to make, requires no baking whatsoever, and the visual appeal is simply undeniable, making it a perfect treat for patriotic holidays, summer picnics, or any occasion that calls for a touch of fun. The combination of creamy pudding, crunchy cookie crum extractbs, and sweet gummy worms is a crowd-pleaser for all ages. I encourage you to give this simple yet spectacular recipe a try – I promise you won’t be disappointed!
For serving, these Red, White and Blue Dirt Cups are fantastic on their own, but you can elevate them further. Consider adding a dollop of whipped cream on top for an extra decadent touch, or even a few fresh berries like strawberries or blueberries to enhance the patriotic theme and add a burst of freshness. If you’re feeling adventurous with variations, don’t hesitate to experiment! You could swap the chocolate pudding for vanilla or cheesecake pudding, use different types of crushed cookies like Oreos (for extra “dirt”!) or grabeef ham crackers, or even get creative with the gummy worm colors.
Frequently Asked Questions:
Can I make these Red, White and Blue Dirt Cups ahead of time?
Absolutely! These are perfect for making a day in advance. In fact, allowing them to chill for a few hours helps the flavors meld together beautifully and ensures the pudding is nicely set. Just be sure to store them covered in the refrigerator to keep them fresh.
What if I can’t find gummy worms?
No problem at all! While gummy worms are a classic element, you can easily substitute them with other candies. Chocolate candies like M&M’s or Reese’s Pieces work wonderfully for adding a pop of color and crunch. You could also use chocolate frosting piped on top to resemble worms, or even small pretzel sticks for a different texture.
Are there any nut-free options for this recipe?
Yes, indeed! The standard recipe is generally nut-free, provided your chocolate pudding mix and cookies do not contain any nuts. Always double-check the packagin extractg of your ingredients to be absolutely sure, especially if you are preparing these for someone with nut allergies. Many brands offer nut-free versions of these common dessert components.
Red, White and Blue Dirt Cups
A festive and easy-to-make dessert featuring layers of creamy cheesecake pudding, crushed Oreos, and colorful gummy worms, perfect for patriotic celebrations.
Ingredients
-
2 boxes cheesecake pudding (3.4 ounces each)
-
4 cups milk
-
19 Oreo cookies (crushed)
-
¼ teaspoon red gel food dye
-
¼ teaspoon blue gel food dye
-
8 red and blue gummy worms
Instructions
-
Step 1
In a large bowl, whisk together the cheesecake pudding mix and milk until well combined and thickened. Let stand for 5 minutes. -
Step 2
Divide the pudding mixture into three equal portions in separate bowls. -
Step 3
Stir red gel food dye into one portion of pudding until evenly colored. Stir blue gel food dye into another portion of pudding until evenly colored. The third portion will remain white. -
Step 4
Spoon a layer of crushed Oreo cookies into the bottom of 8 clear cups or glasses. -
Step 5
Add a layer of white pudding over the crushed cookies. -
Step 6
Add a layer of red pudding over the white pudding. -
Step 7
Add a layer of blue pudding over the red pudding. -
Step 8
Top each cup with a few more crushed Oreo cookies to resemble dirt. Garnish with red and blue gummy worms.
Important Information
Nutrition Facts (Per Serving)
It is important to consider this information as approximate and not to use it as definitive health advice.
Allergy Information
Please check ingredients for potential allergens and consult a health professional if in doubt.